Deploy an AI model on Amazon SageMaker and make Data Driven Predictions using IAM Role Authentication and Beam.
Introduction
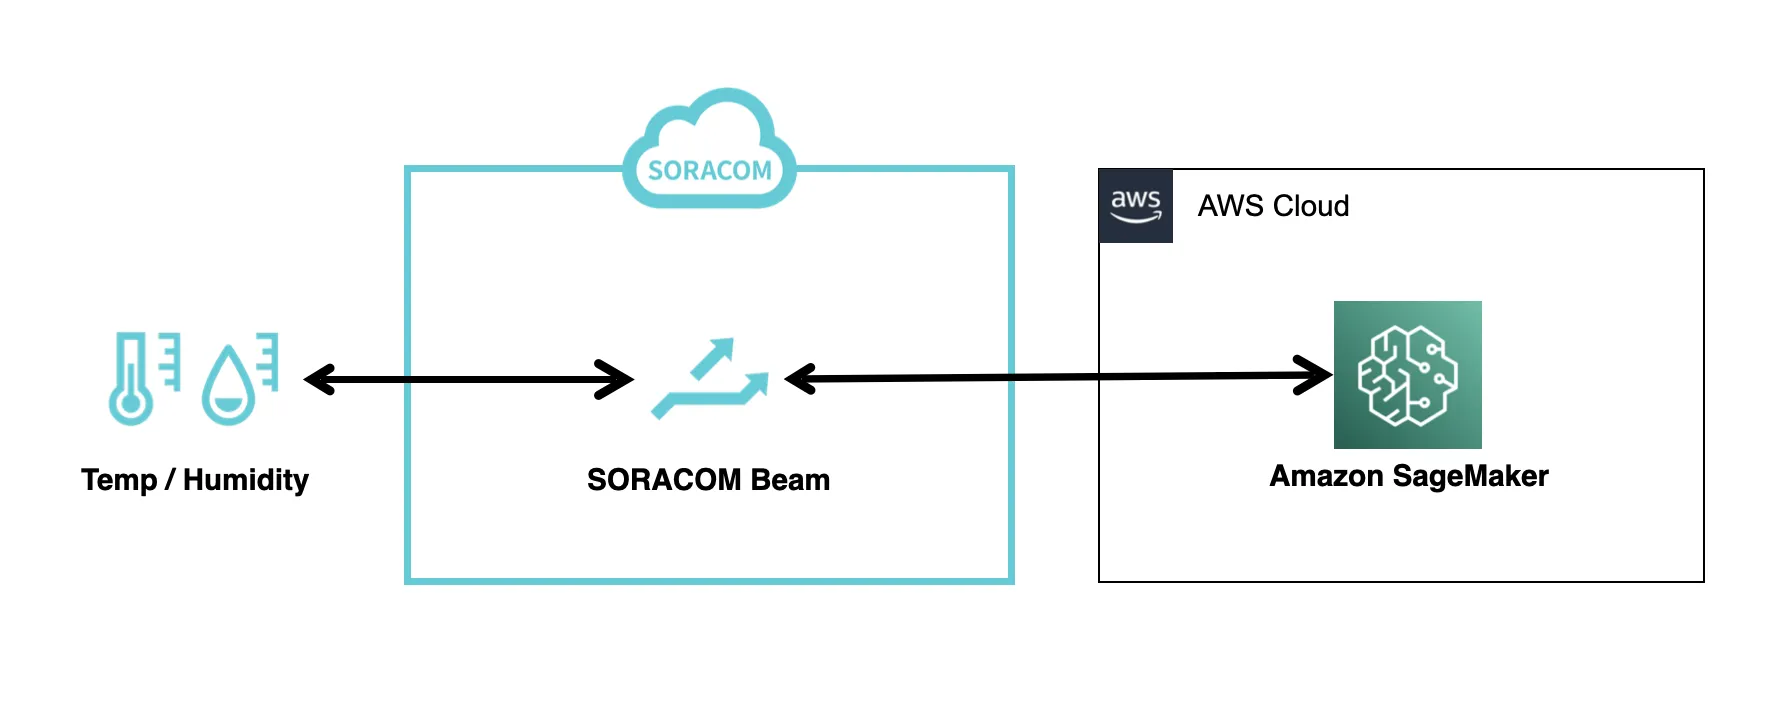
In this guide, you will feed December 2022 electricity demand data in Tokyo (Tokyo Electric Power Grid Data) into XGBoost, creating a model that can predict the electricity demand from the area’s temperature and humidity. This model, which will be deployed on SageMaker, can receive data from IoT devices with Soracom Beam enabled, and make timely predictions powered by AI.
More generally, any predictive model deployed on your AWS account’s SageMaker can be configured for use by Soracom’s AWS account through Soracom Beam. The authentication required to access the models on SageMaker can be offloaded away from your devices, since Beam will take care of the authentication and the devices only need Beam’s entry point.
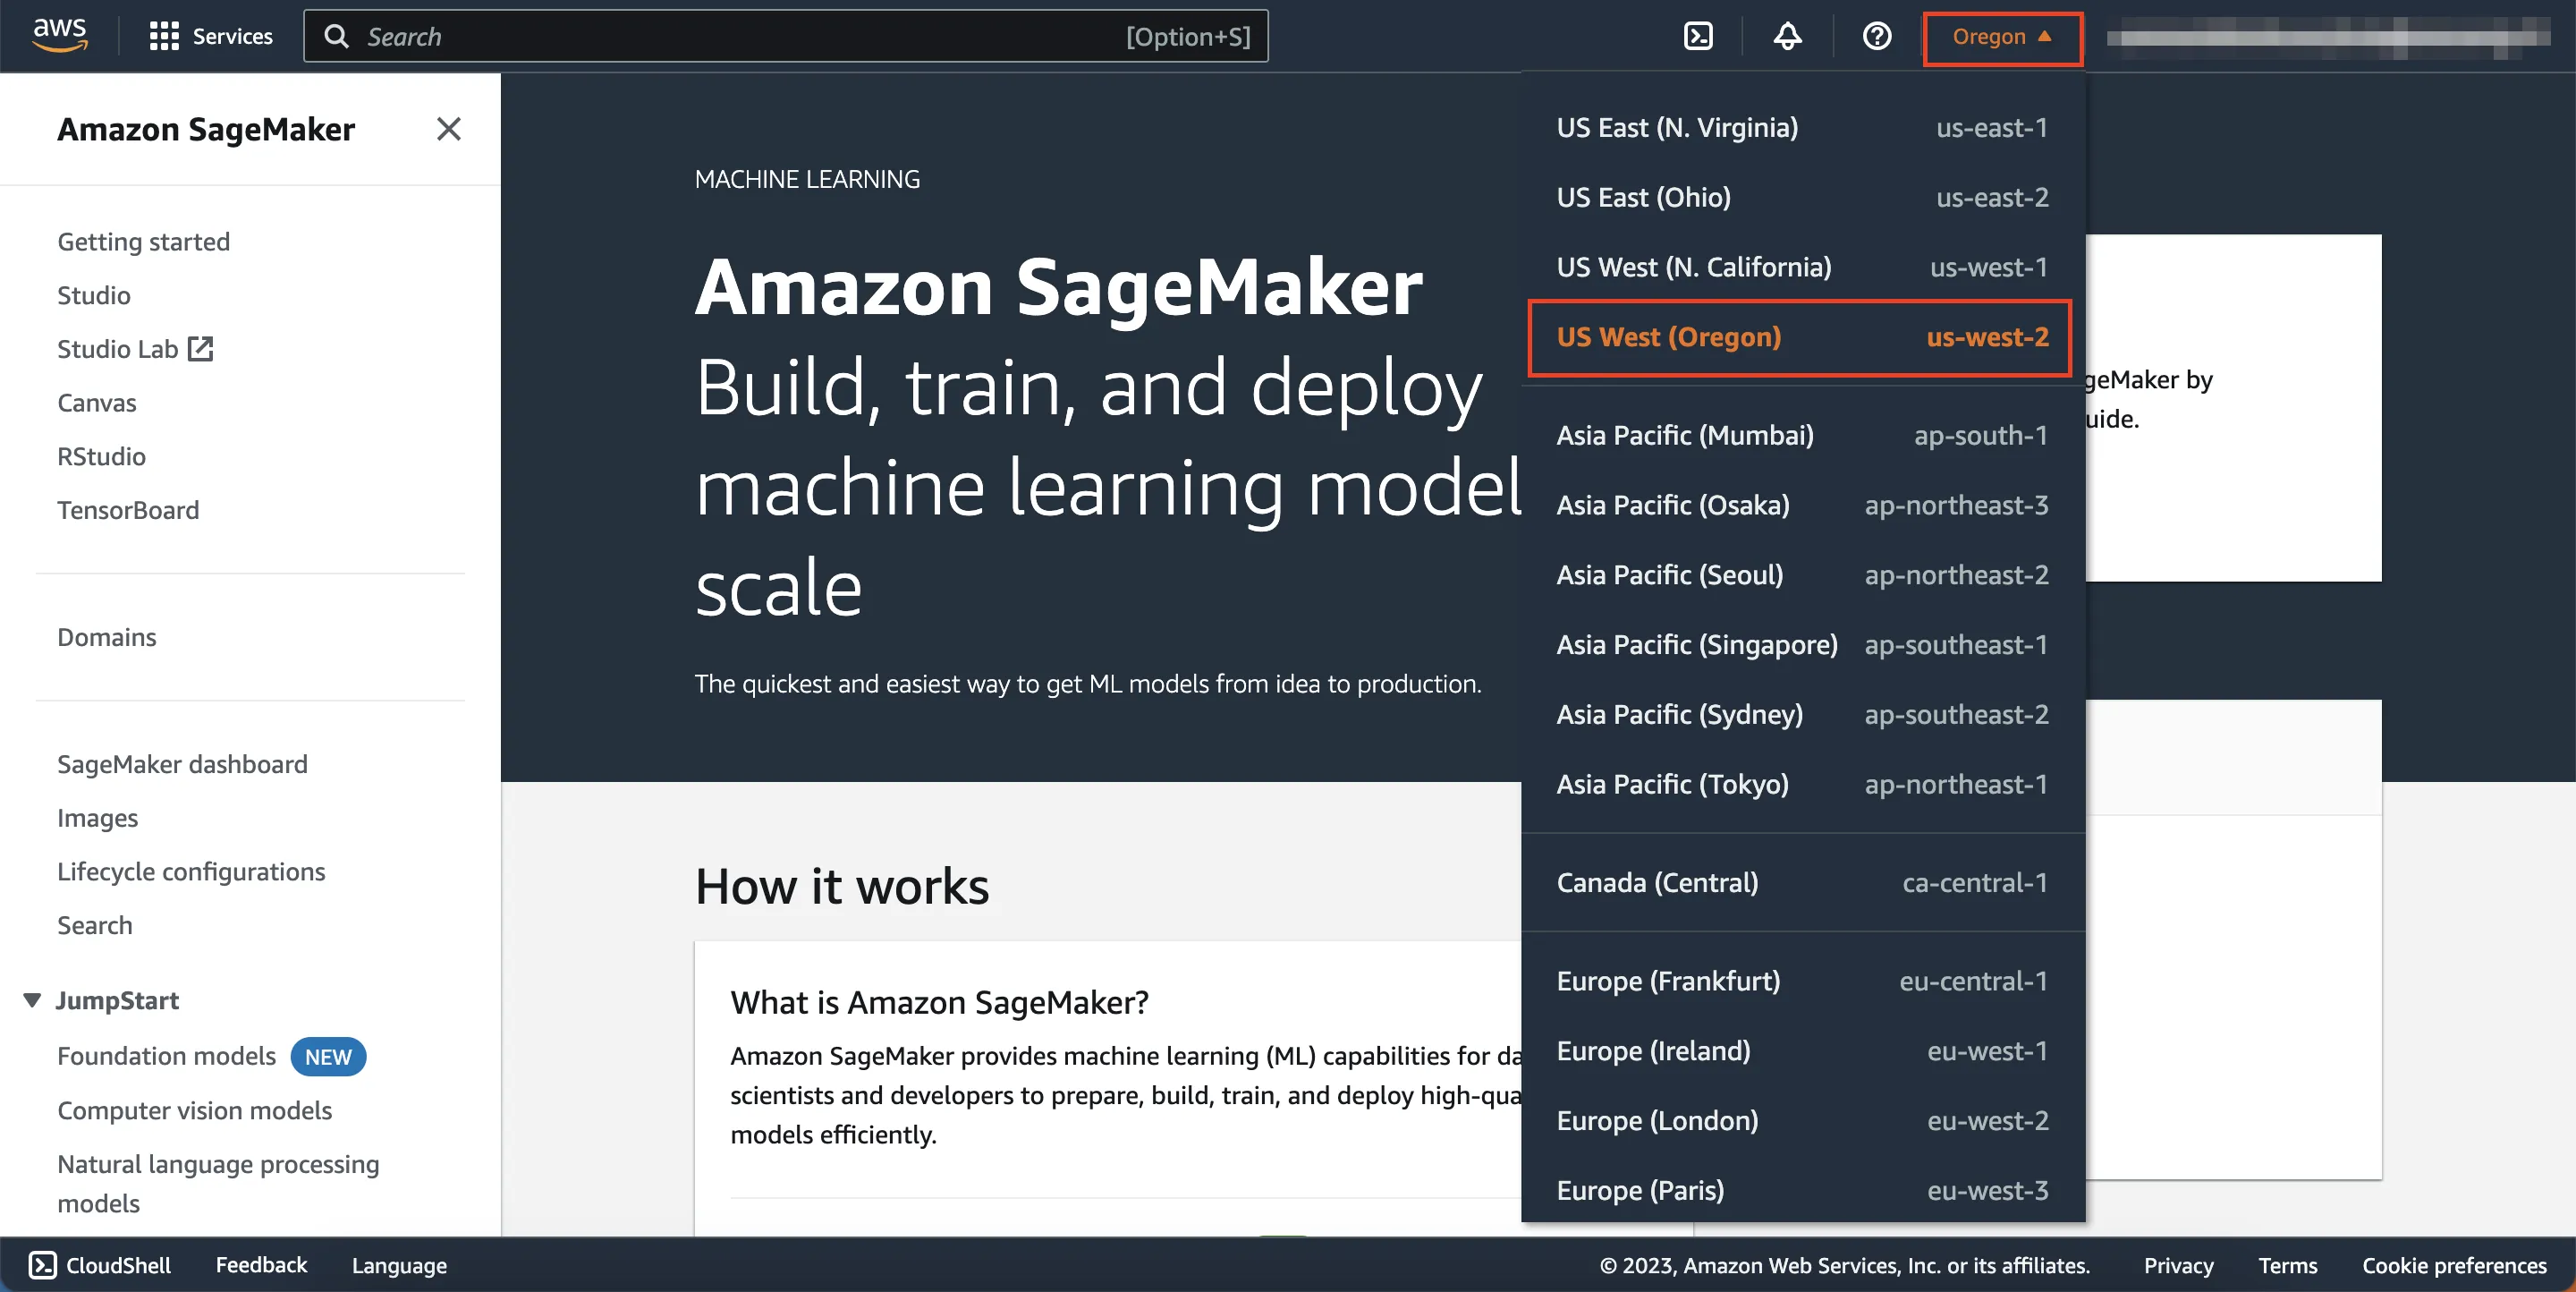
Use the Oregon (us-west-2) AWS region for this service. Amazon SageMaker has only confirmed SageMaker's stable operation in the Oregon (us-west-2) region. We found that some of the code on this page do not work as intended in other regions such as Tokyo (ap-northeast-1).
Step 1: Prepare the Data
You must first create an Amazon SageMaker notebook instance to prep the data accordingly.
Sign in to your AWS account and open Amazon SageMaker.
Change your region to Oregon (us-west-2).
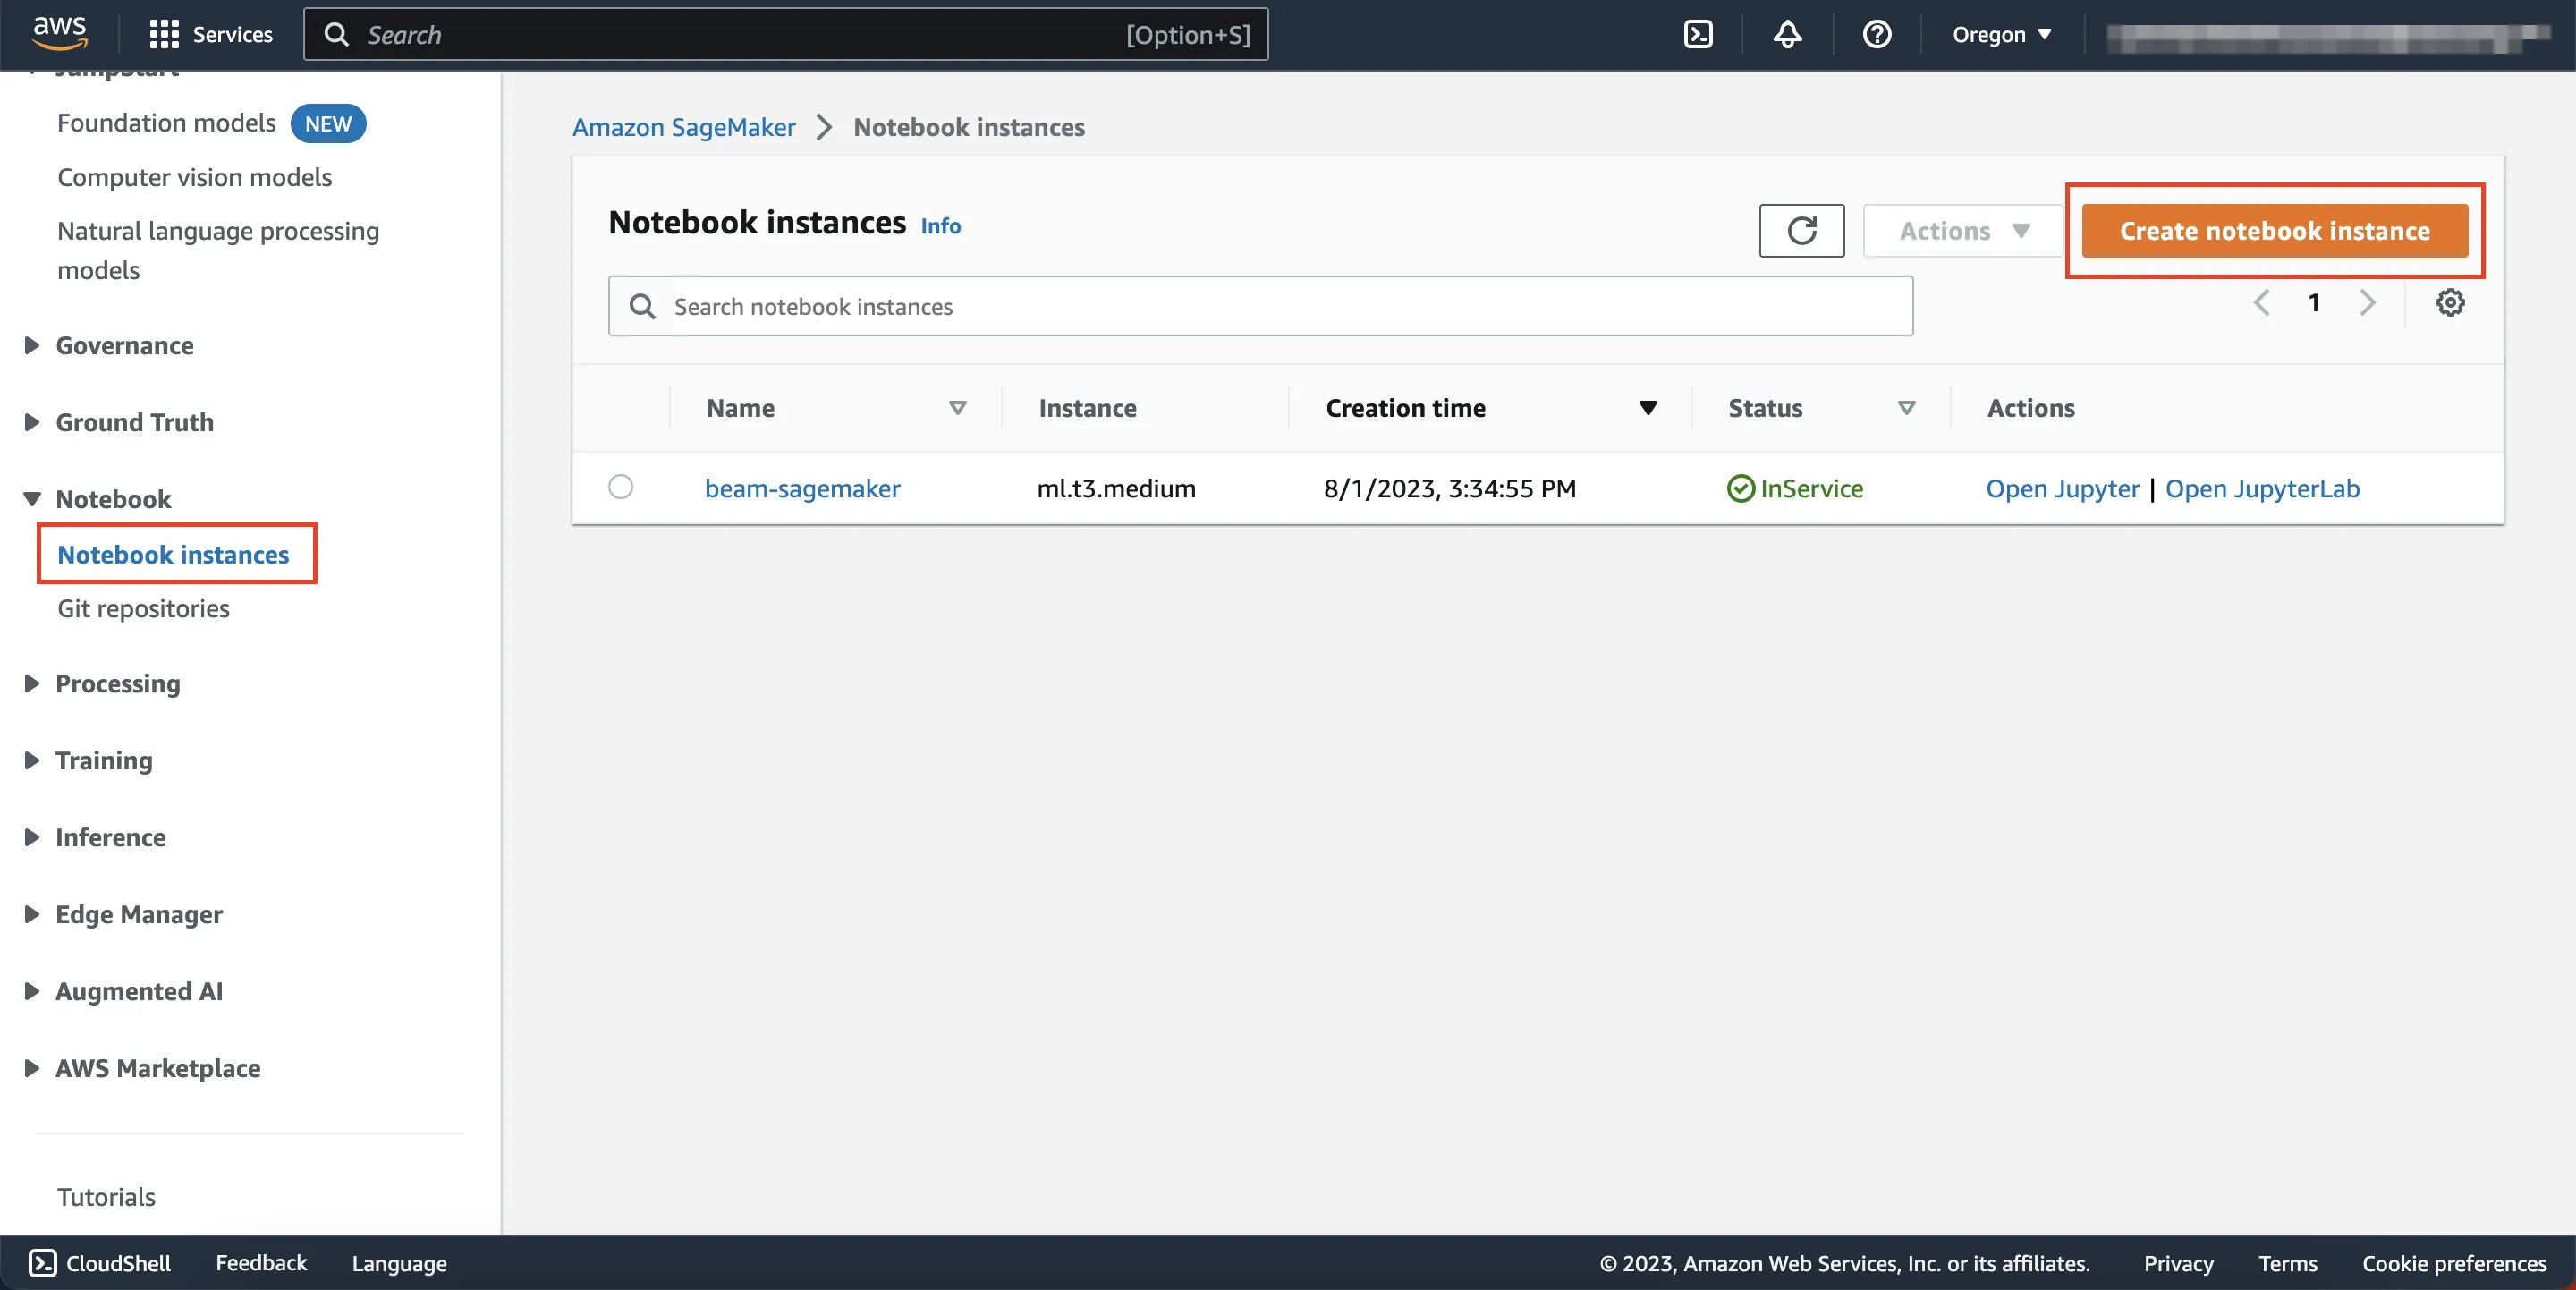
Scroll down on the left nav bar and click Notebook instances, then click Create notebook instance on the top right.
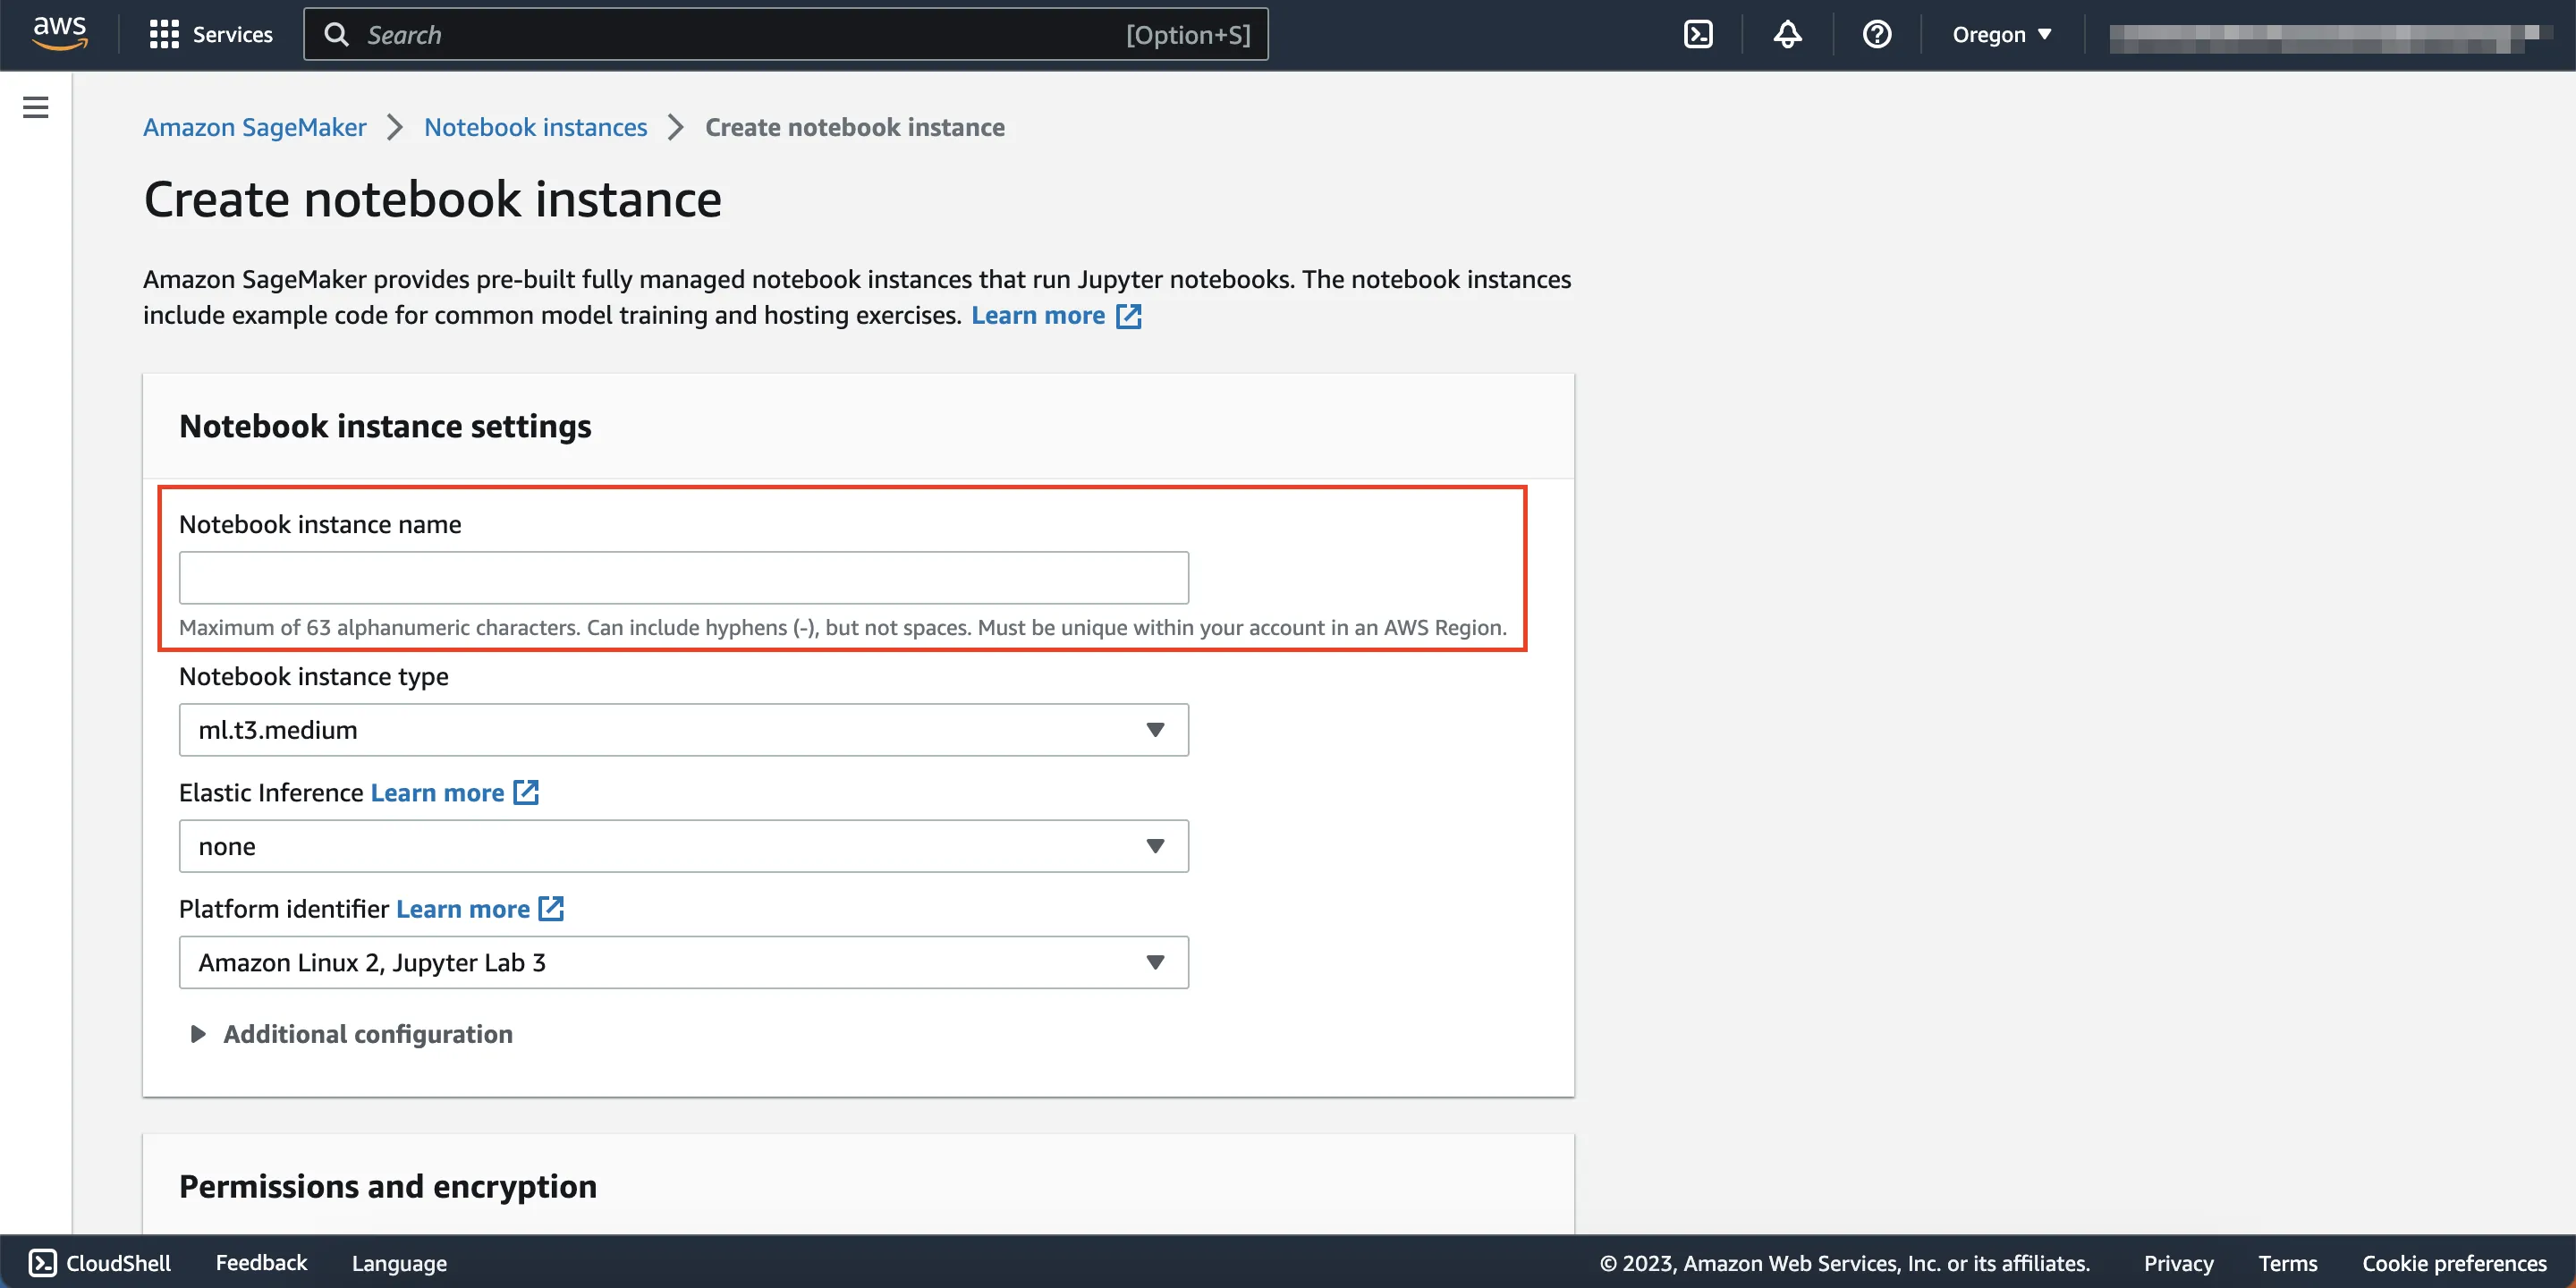
Enter a Notebook instance name. (i.e. beam-sagemaker)
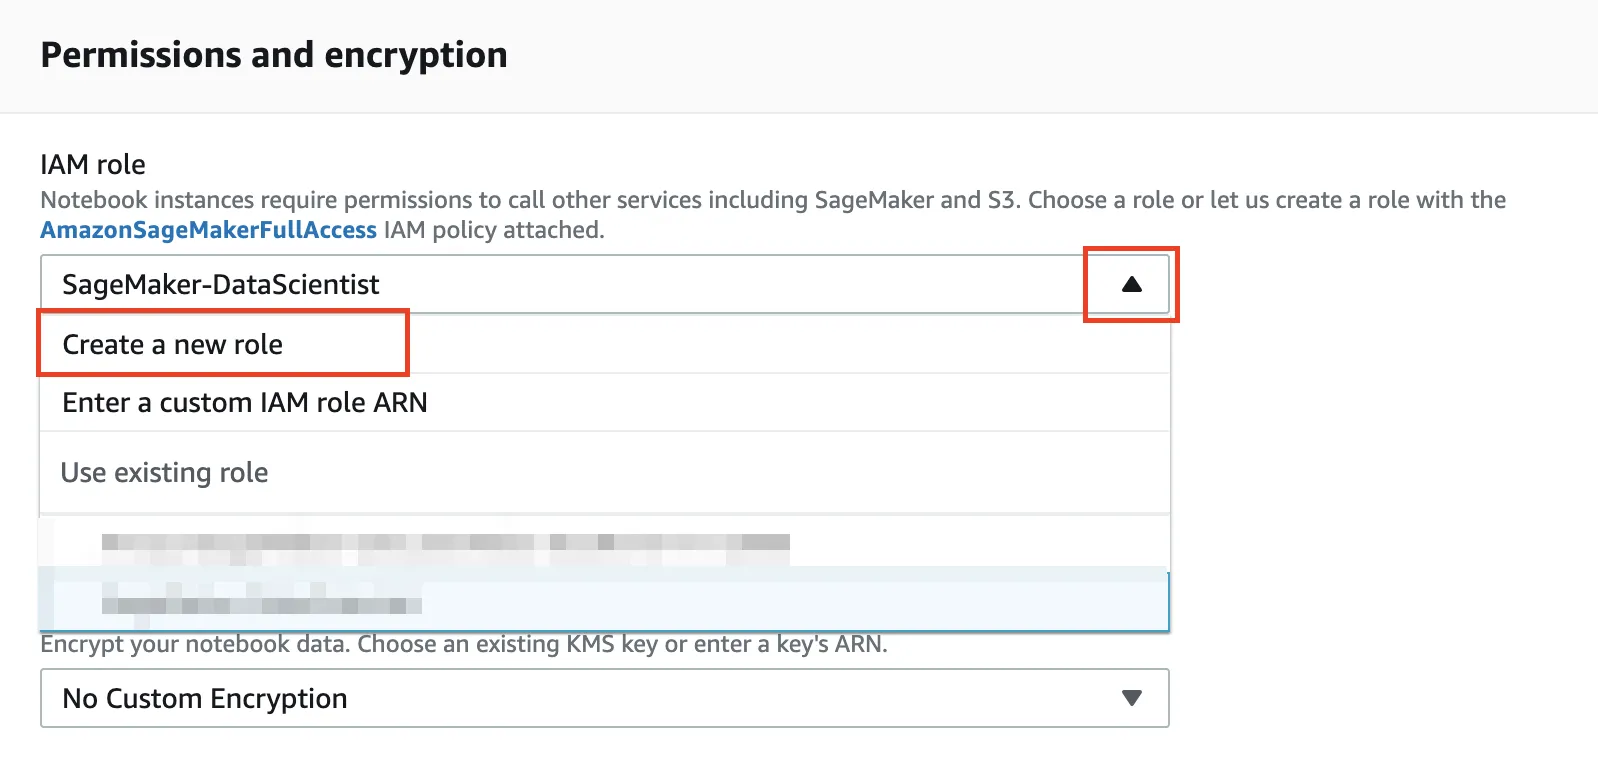
Click the IAM role drop-down menu and select Create a new role
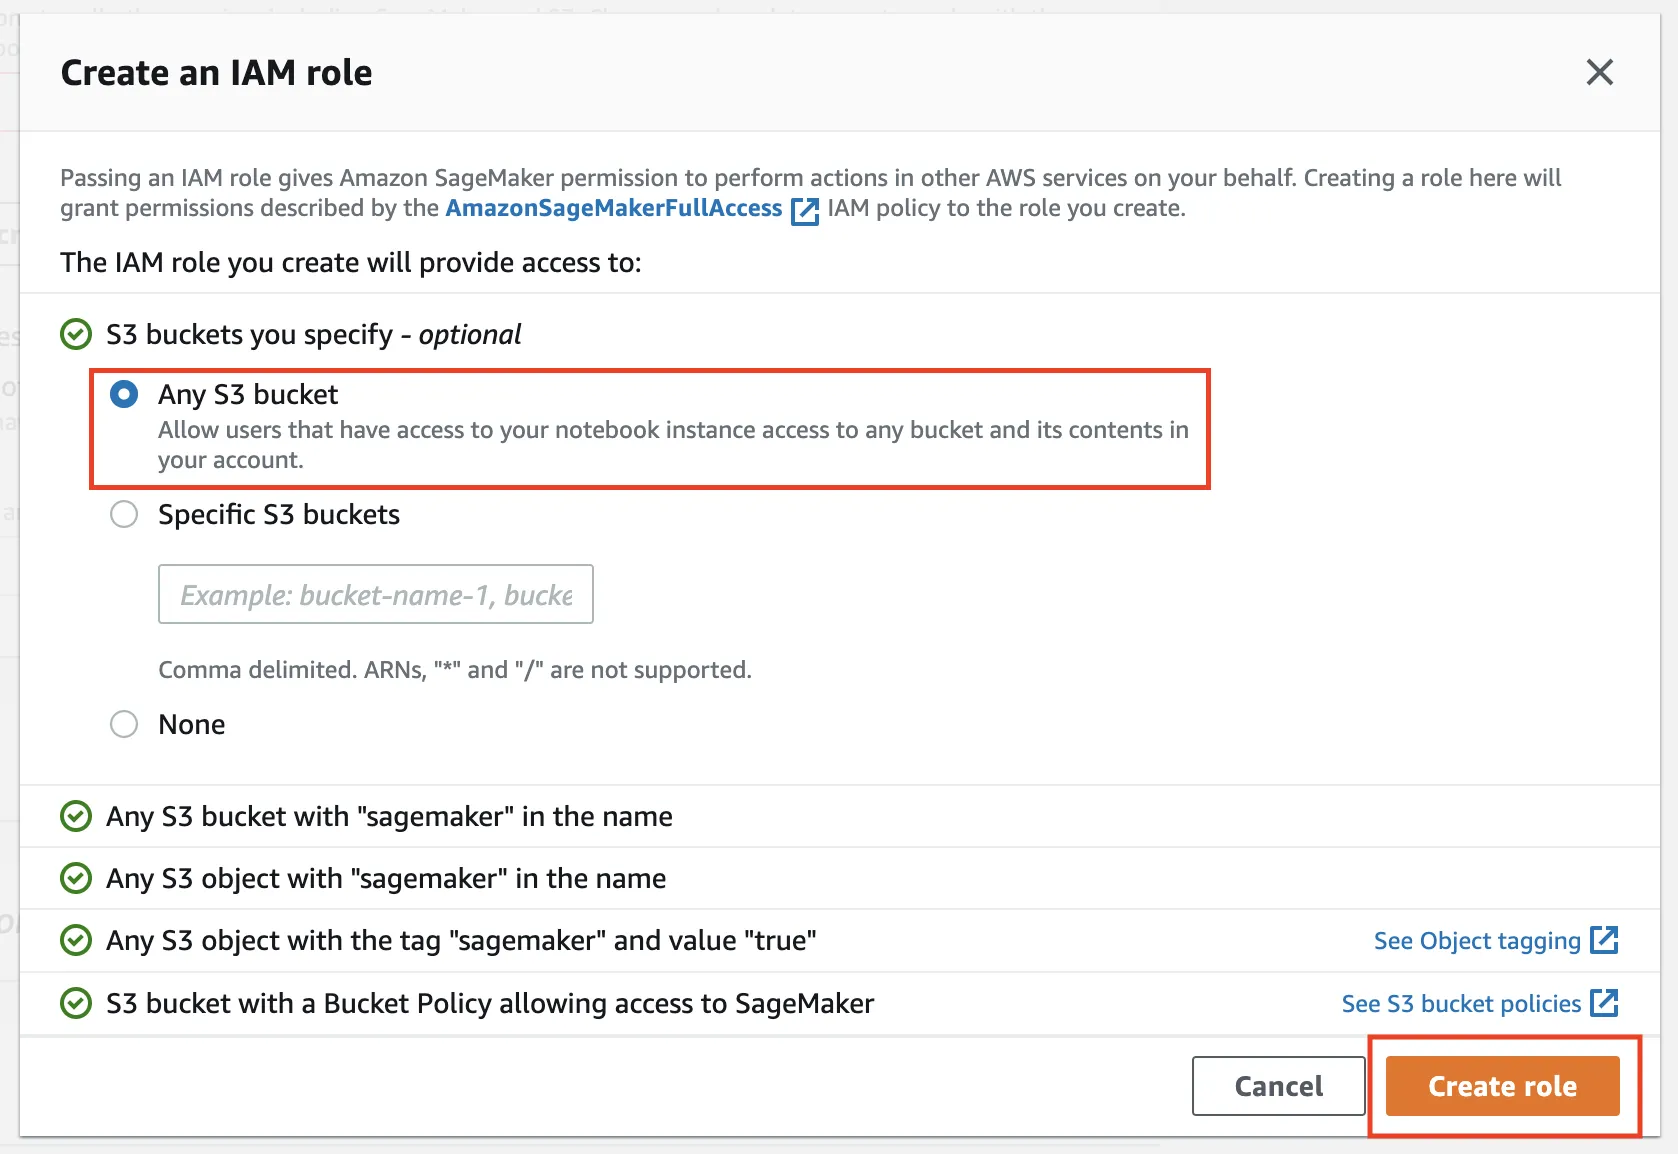
Click the Any S3 bucket option, then click Create role.
Click Create notebook instance at the bottom of the page.
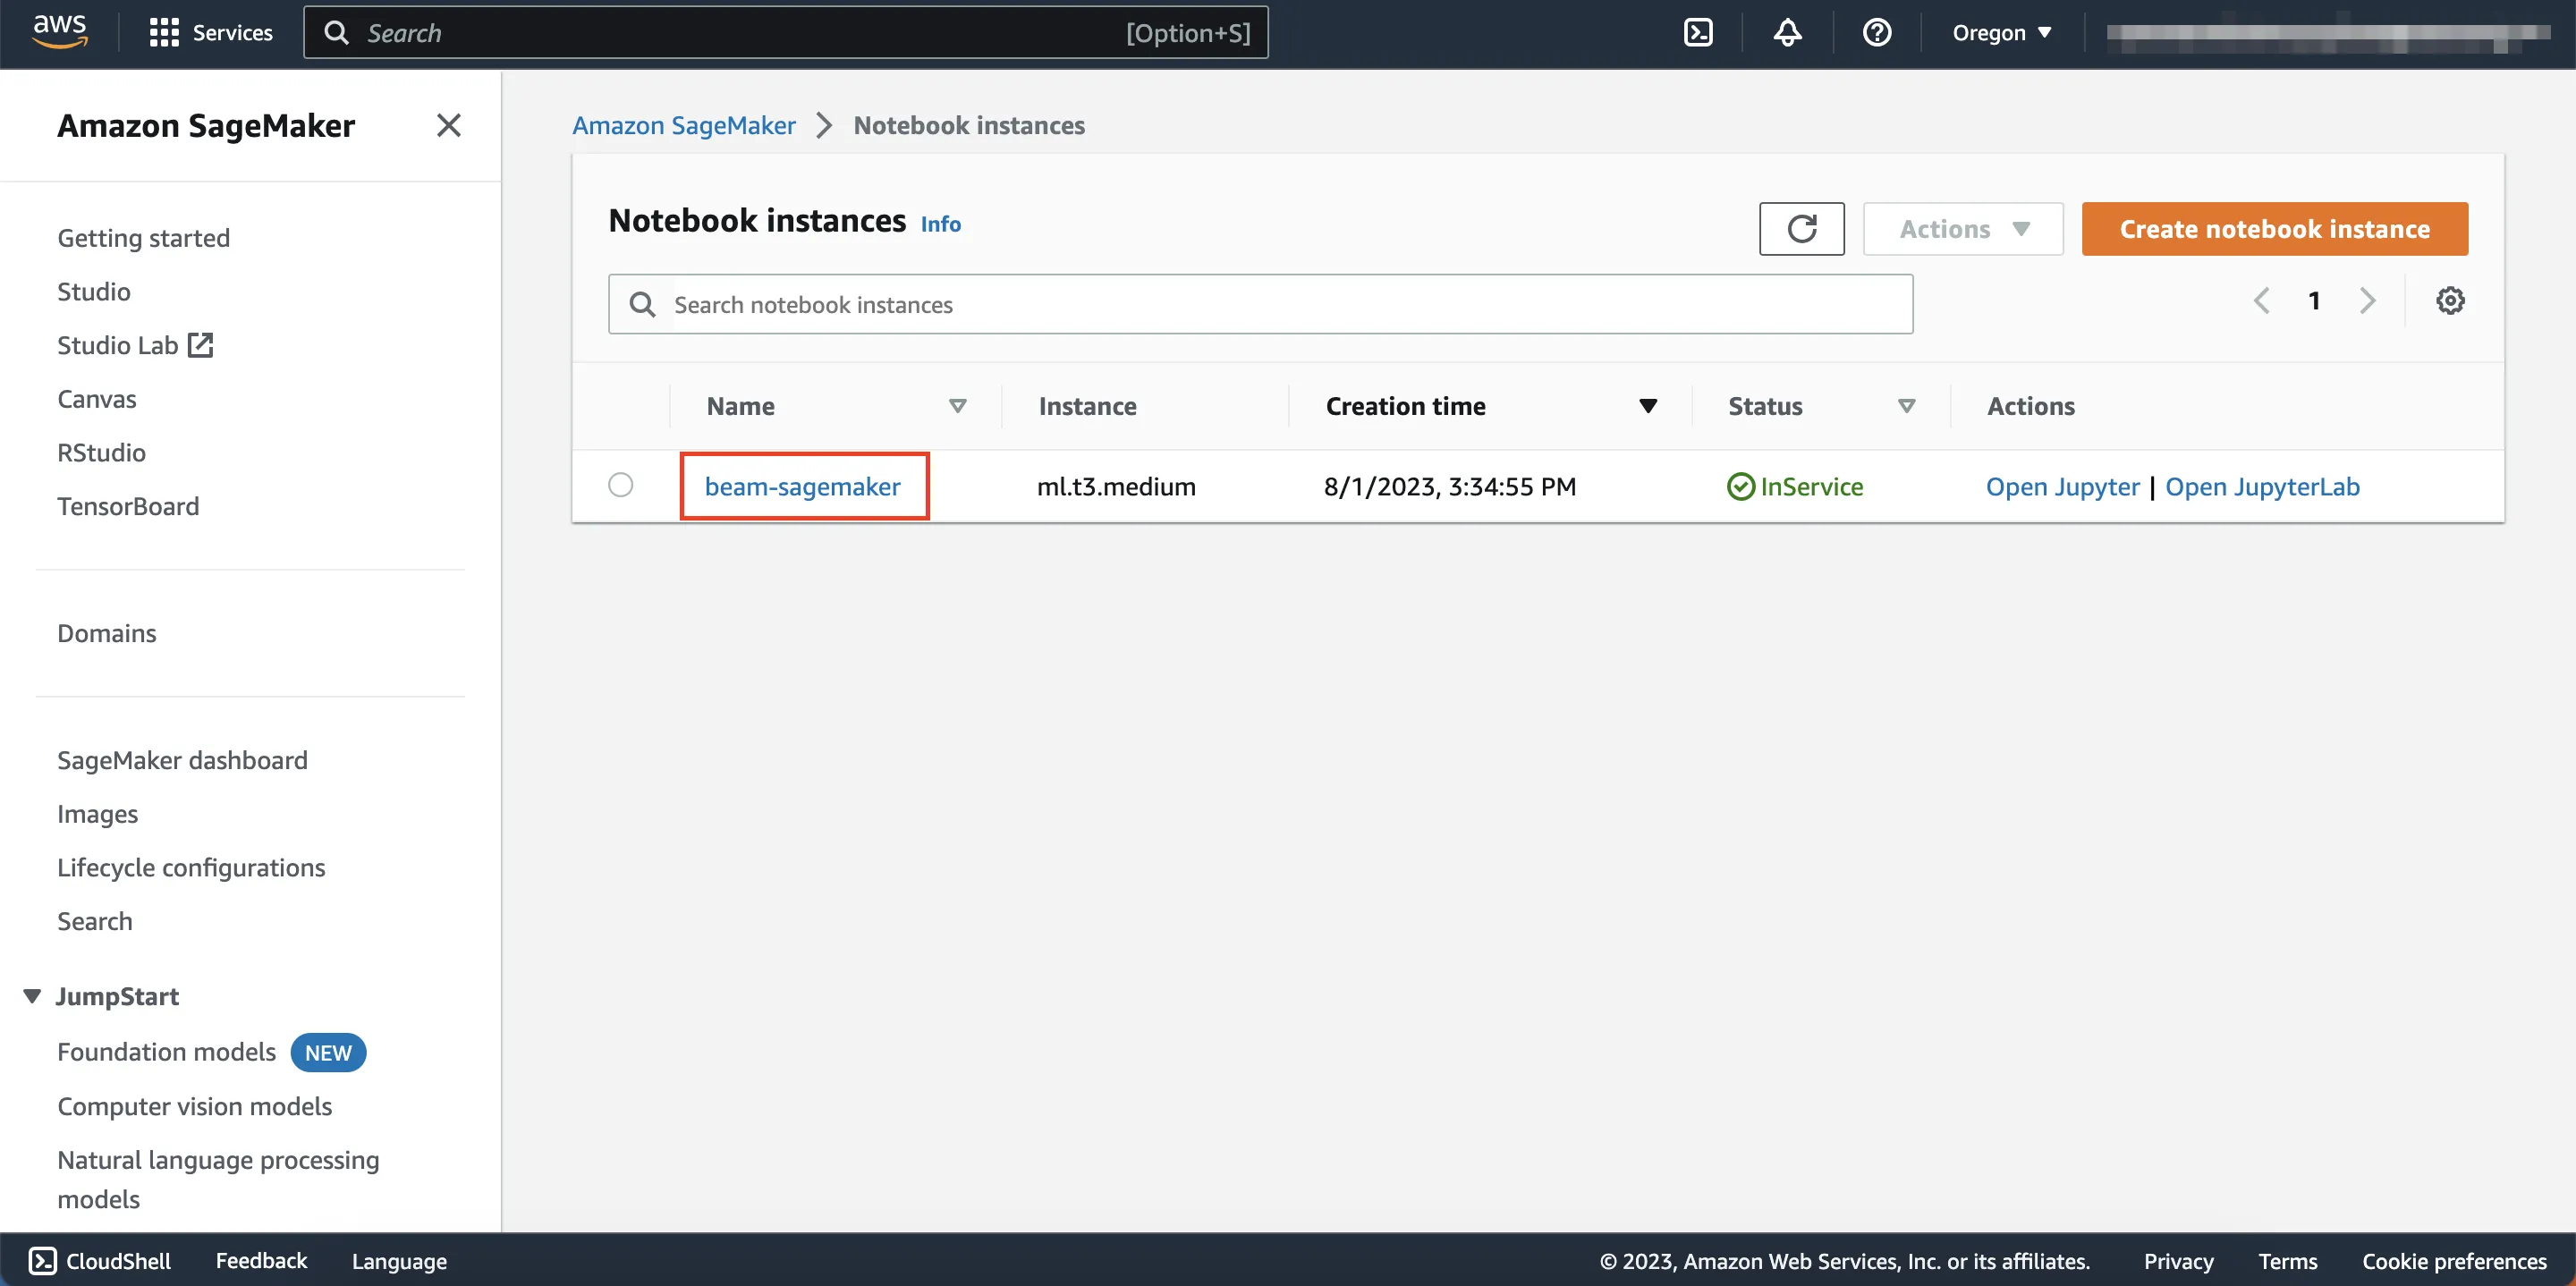
Wait until the status column of the notebook instance that you created reads In Service instead of Pending.
Click the reload button (left of the actions drop-down menu) to see any updates to your instance’s status.
Step 2: Use Jupyter Notebook to Create a Model
Using the notebook instance from Step 1, you will create an AI model that predicts energy consumption levels from the time of day, temperature, and humidity.
Create a Jupyter Notebook Instance
Confirm that the notebook instance that you plan on using is InService under the status column. Click the name of the instance you plan on using. (e.g., beam-sagemaker, this text should be in blue.)
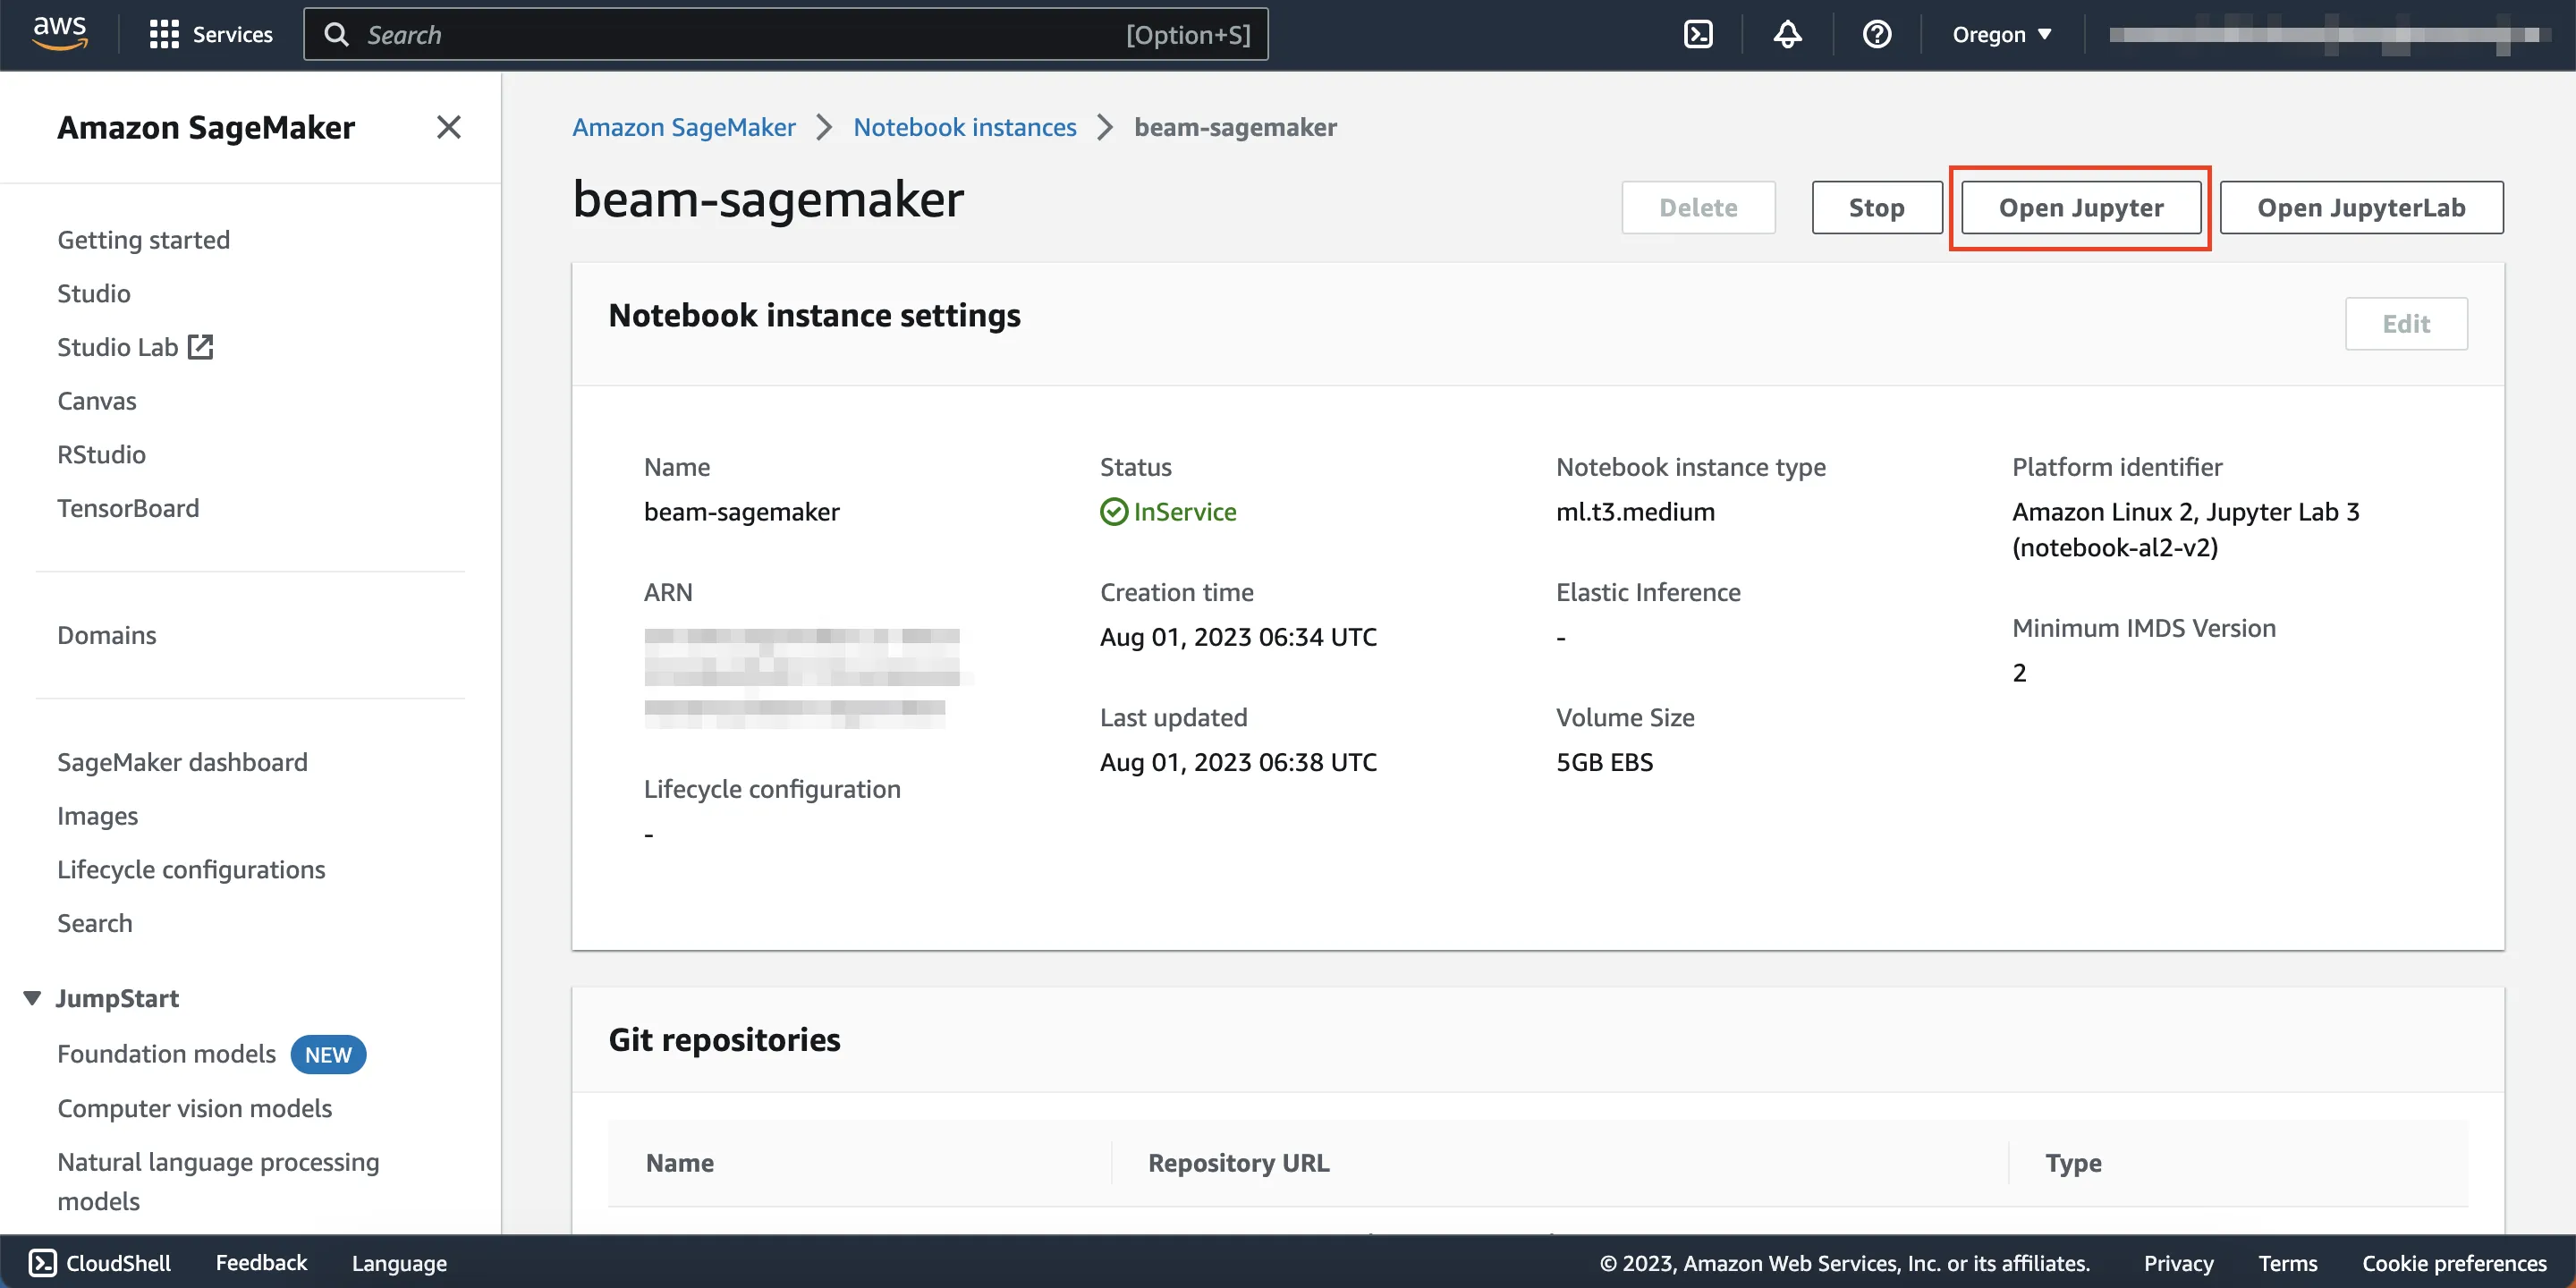
Click Open Jupyter on the top right.
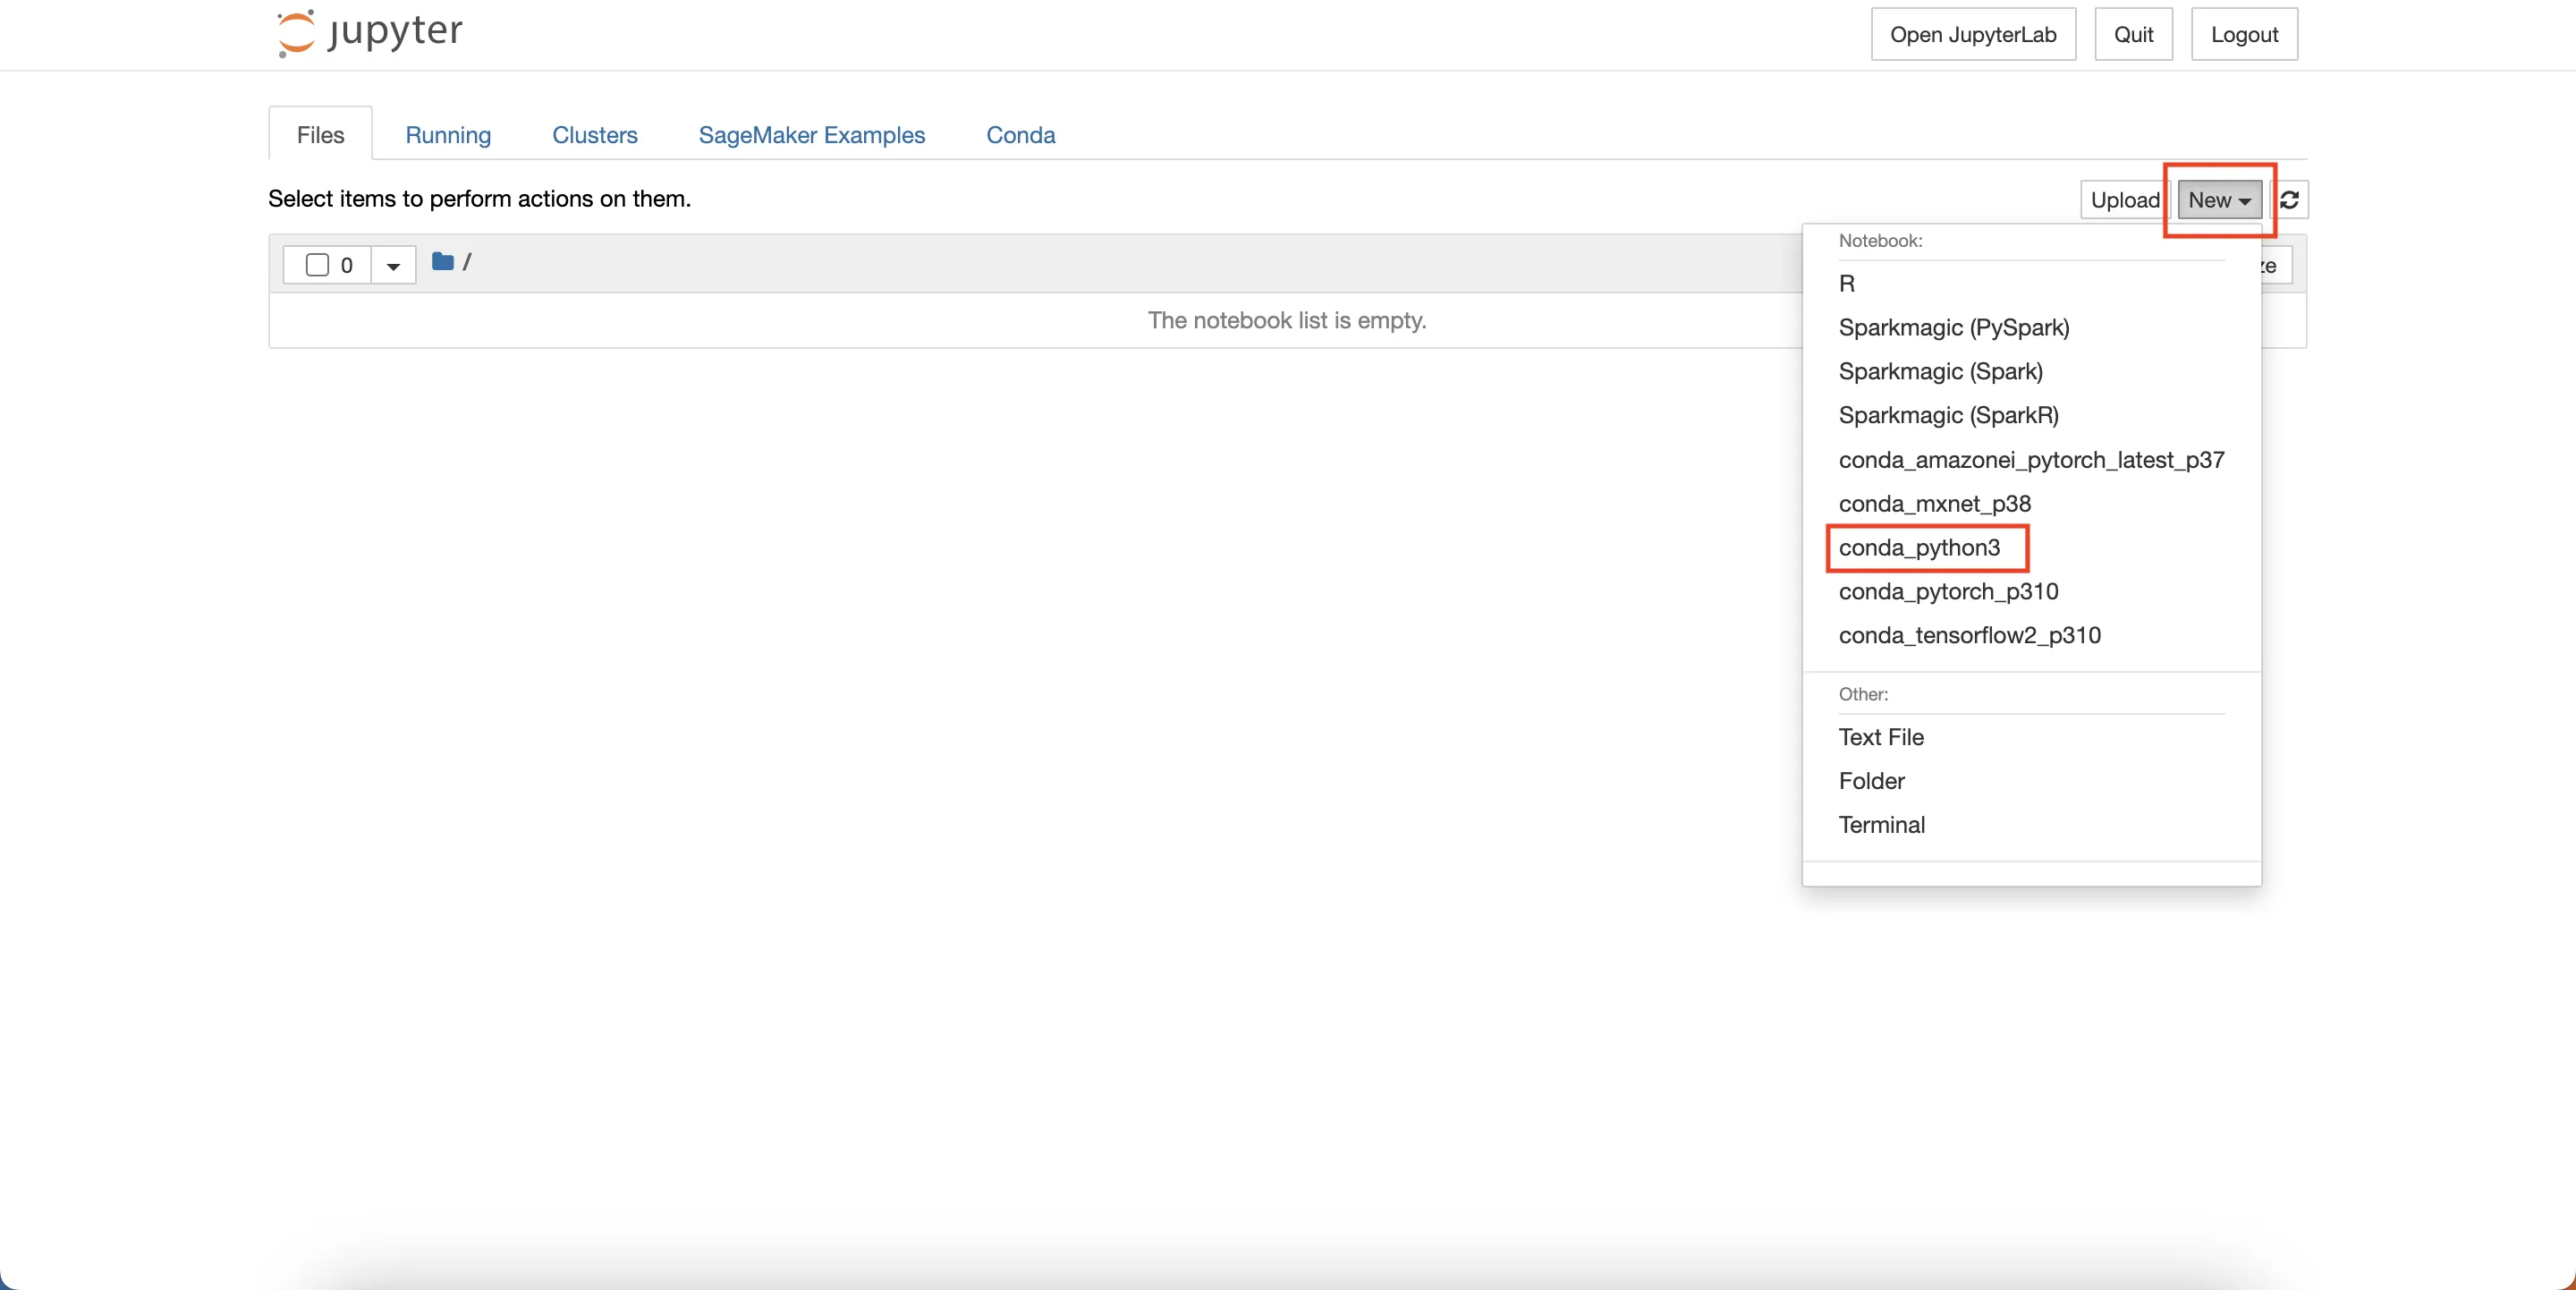
Click New then click conda_python3 This will create a Jupyter Notebook.
Create and Test the AI Model
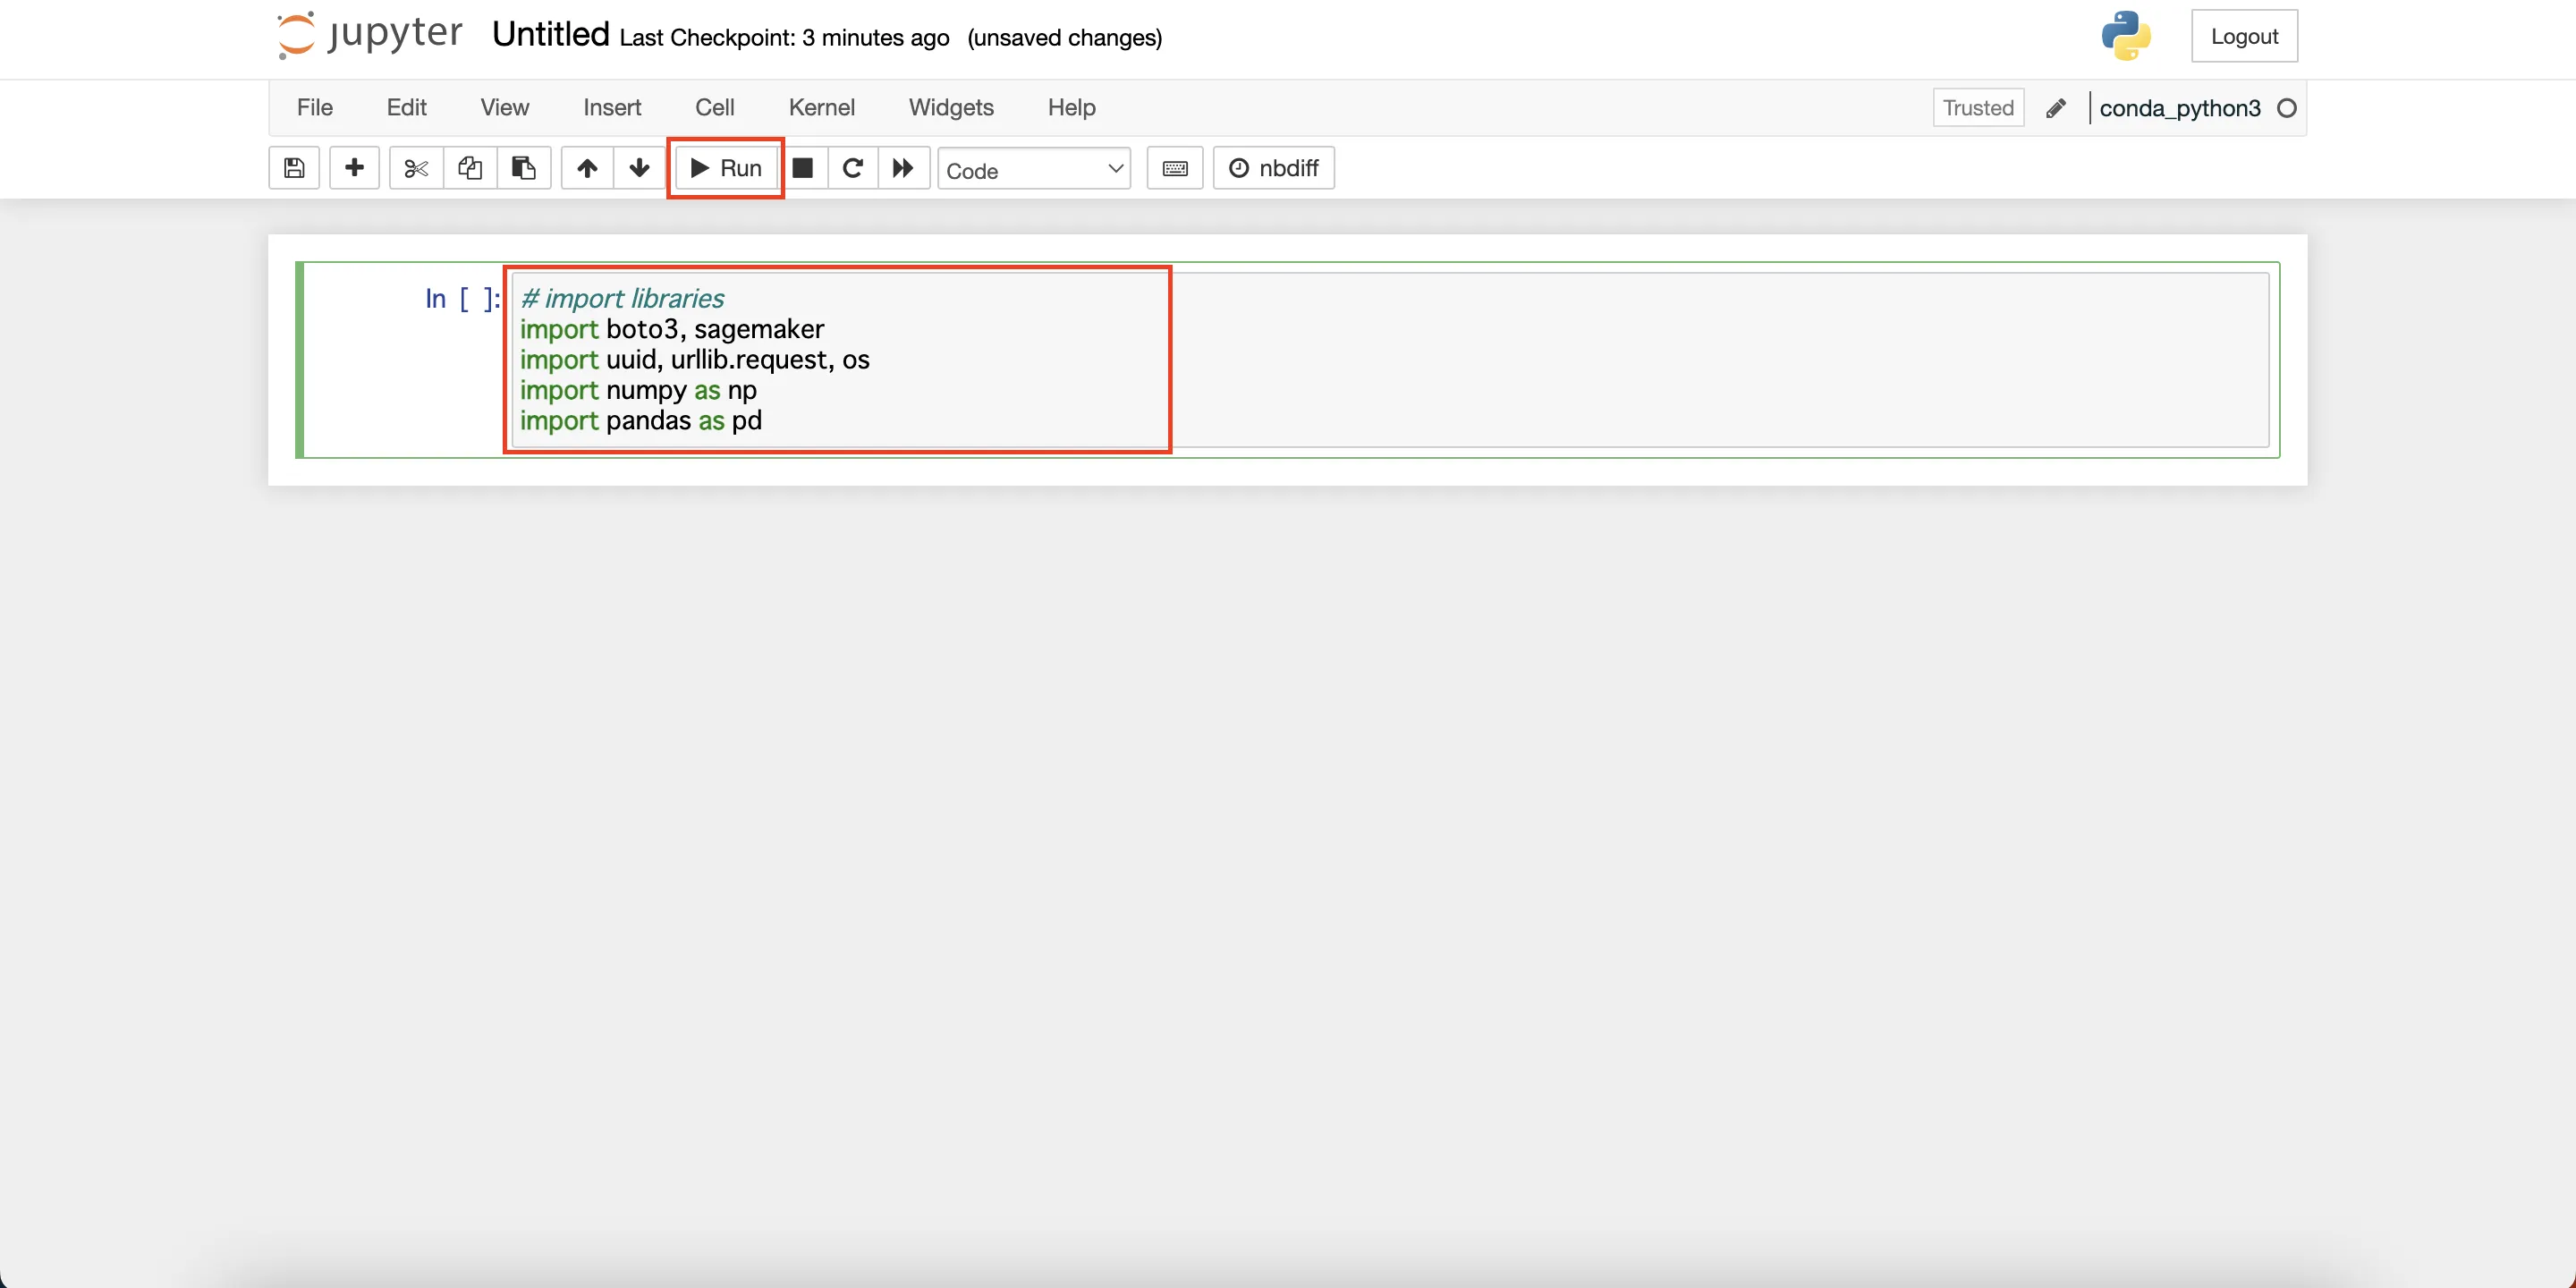
Insert the code below into the cell and click Run.
# import librariesimport boto3, sagemakerimport uuid, urllib.request, osimport numpy as npimport pandas as pd
This will import all the necessary libraries.
If you are completely unfamiliar with Jupyter Notebook and would like to learn, refer to Jupyter Notebook's Official User Documentation.
In the next cell, paste the below code block and click Run
This prompts Amazon SageMaker to create a training job.
In this example, for training, the inputs are set to be time, temperature, and humidity, and the output to be actual_power (actual recorded energy consumption).
Paste the code below and click Run.
xgb.fit({'train': s3_input_train})
This will initiate the training job. Training can take a few minutes.
Once the training job is done, the console should read something like the below.
[Training job completed, training seconds: XXX, Billable seconds: XXX]
The trained model will be deployed on a serverless endpoint and the name of the endpoint will be displayed (e.g., sagemaker-xgboost-2023-07-06-08-53-15-937). Save this somewhere, you will need this endpoint name later.
The created model can also be seen in the model tab within Amazon SageMaker.
Here you are testing the accuracy of the model by passing in the testing data (test_data) and printing the RMSE (root mean squared error). It should return something like this...
364.0653729628472
You have successfully created the model and tested its accuracy!
Step 3: Create and Assign an IAM Role
In order to run the model with data from your IoT devices, you need to enable Soracom Beam to call the model. To give Soracom Beam sufficient authorization to access the model you just created, you need to create an IAM role. You will configure this role with specific permissions that will allow Soracom Beam to access Amazon SageMaker.
Start Creating an IAM Role
Sign in to your AWS account and open the IAM console.
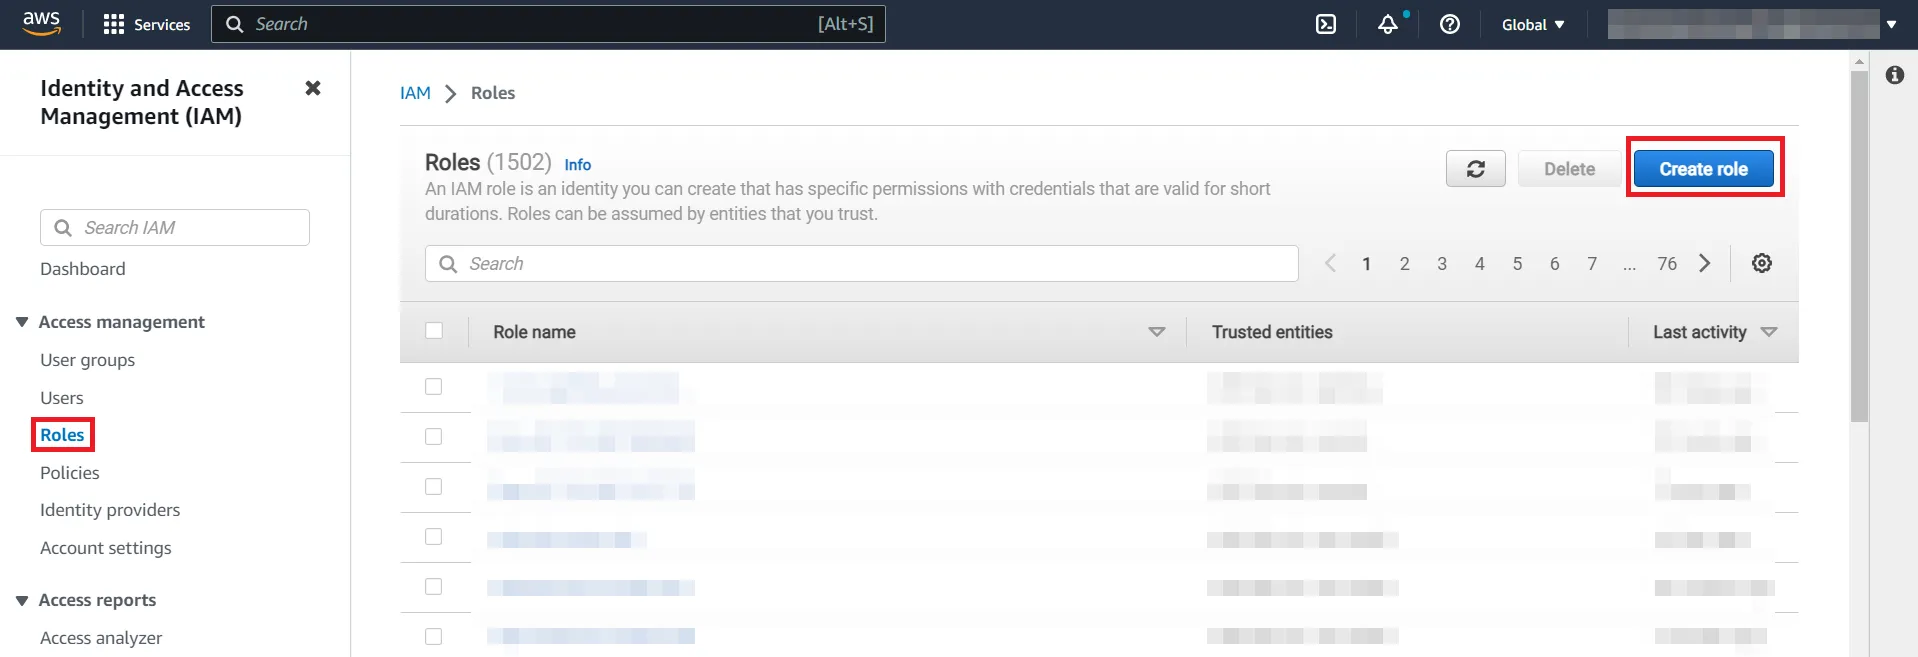
Click Access management, click Roles, and then click Create role.
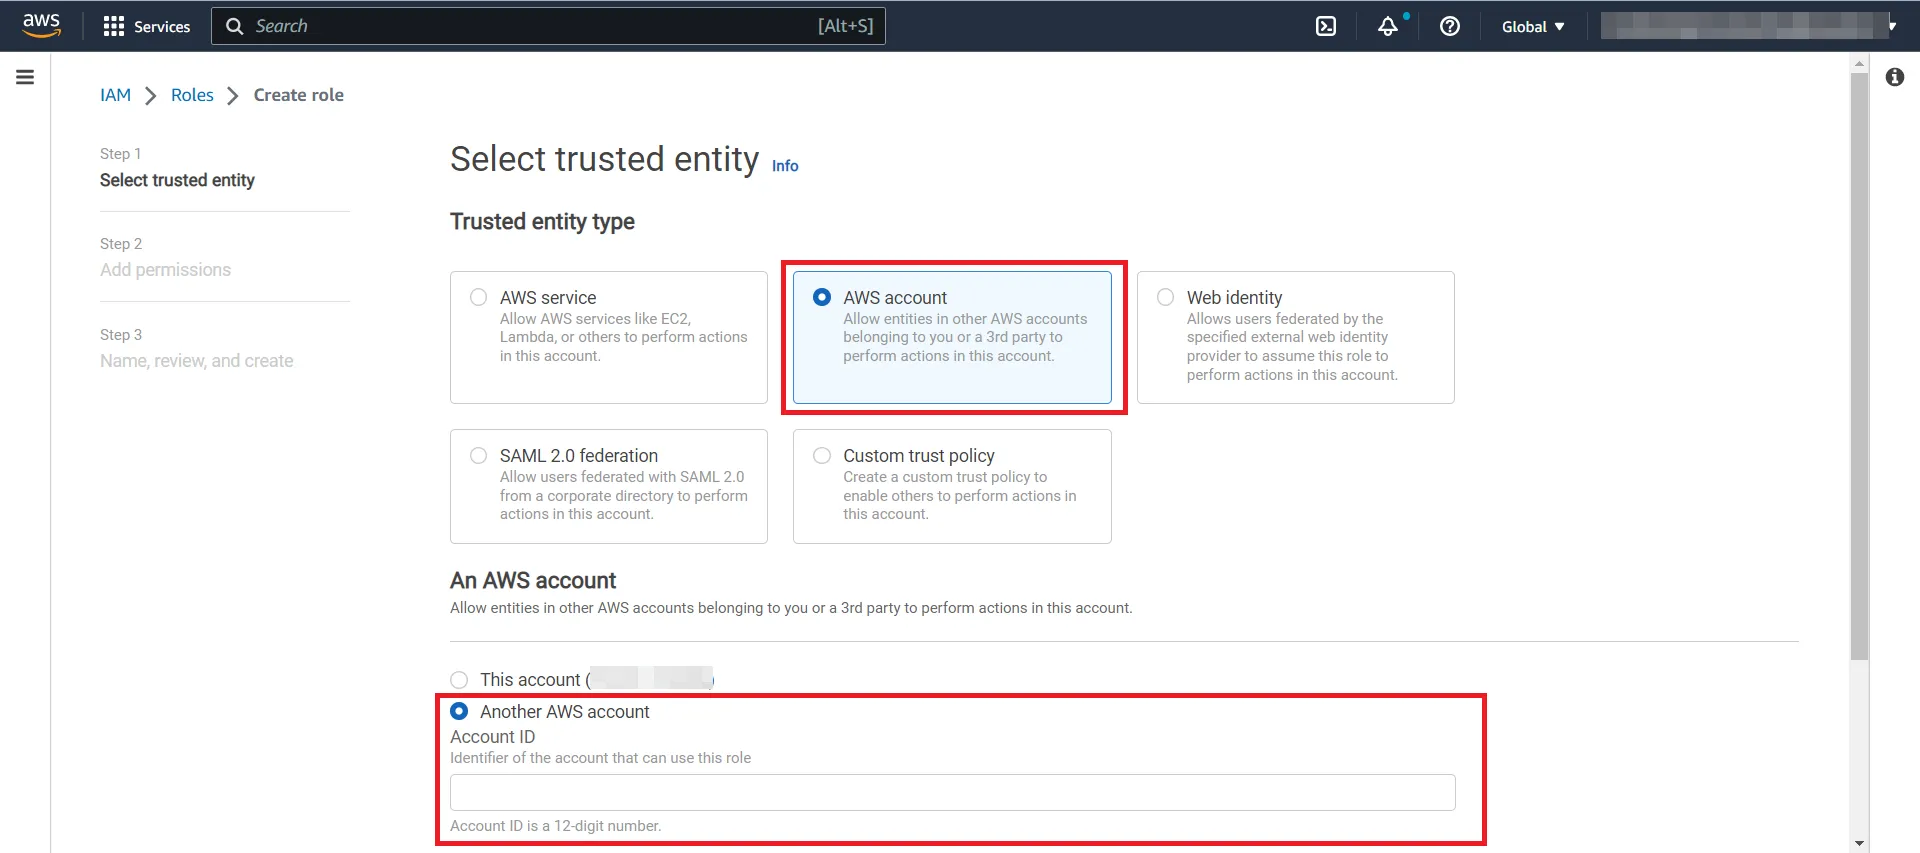
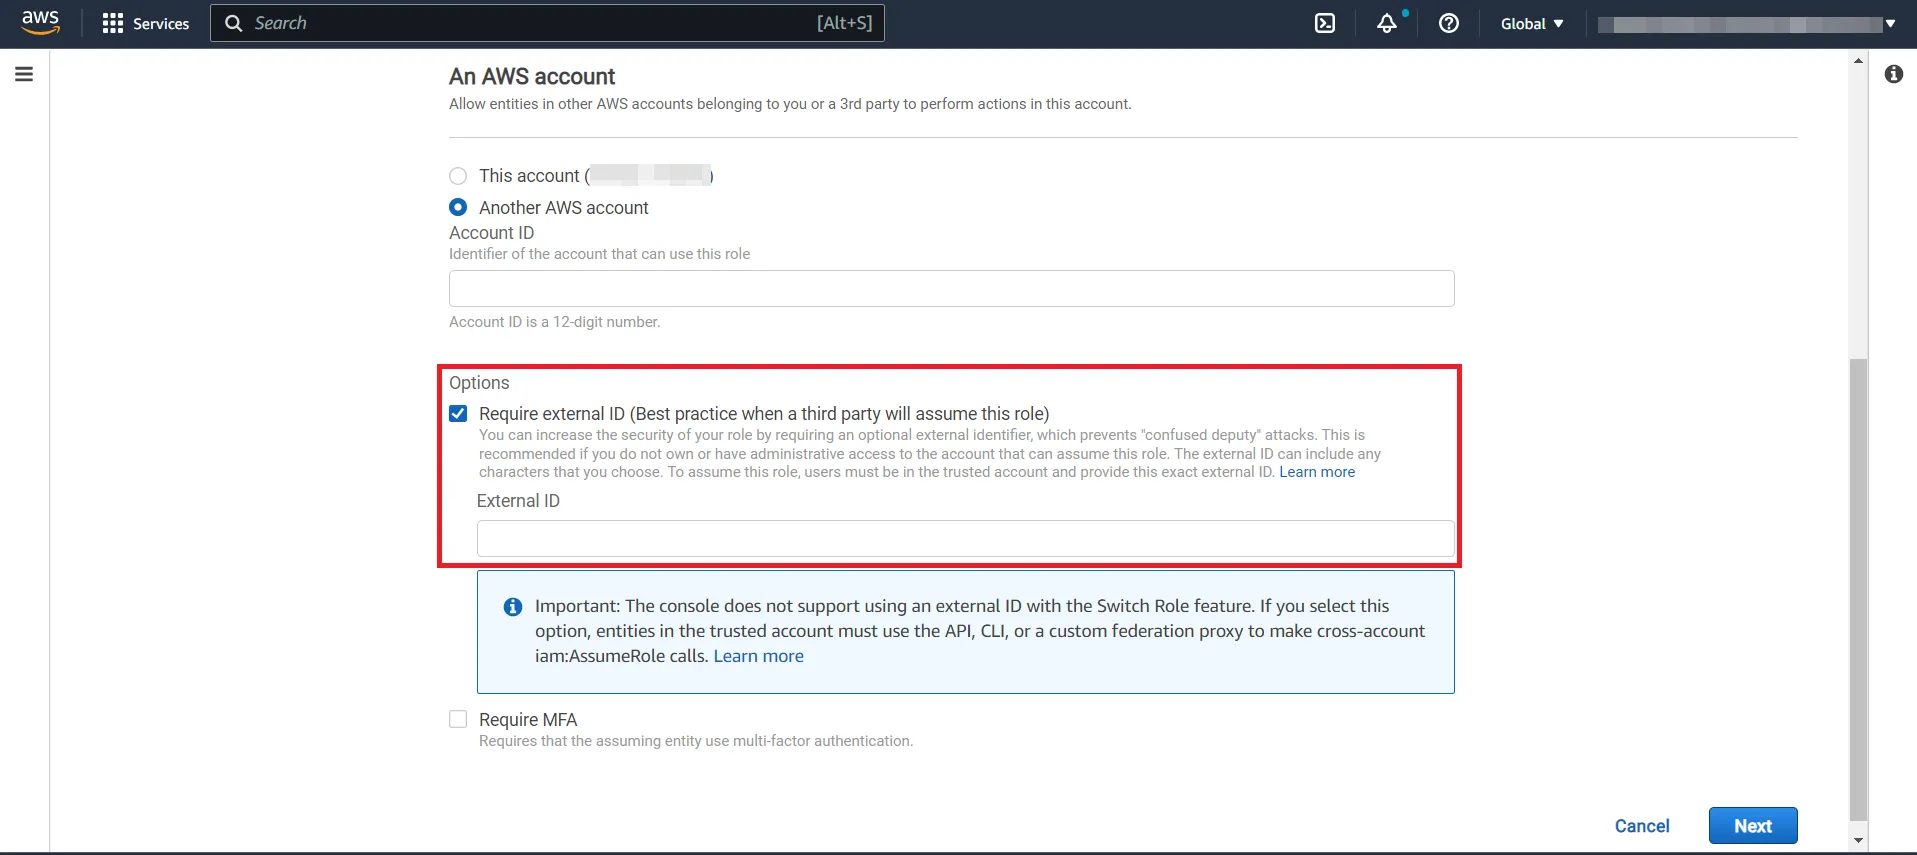
Click the AWS account option, then click Another AWS account. In the account ID, enter one of the following:
For plans with Global coverage: 950858143650
For plans with only JP coverage: 762707677580
Click the Require external ID checkbox and enter any string in the External ID field, such as External-ID-abcdefgh12345678. Make a note of this External ID as you will use it later.
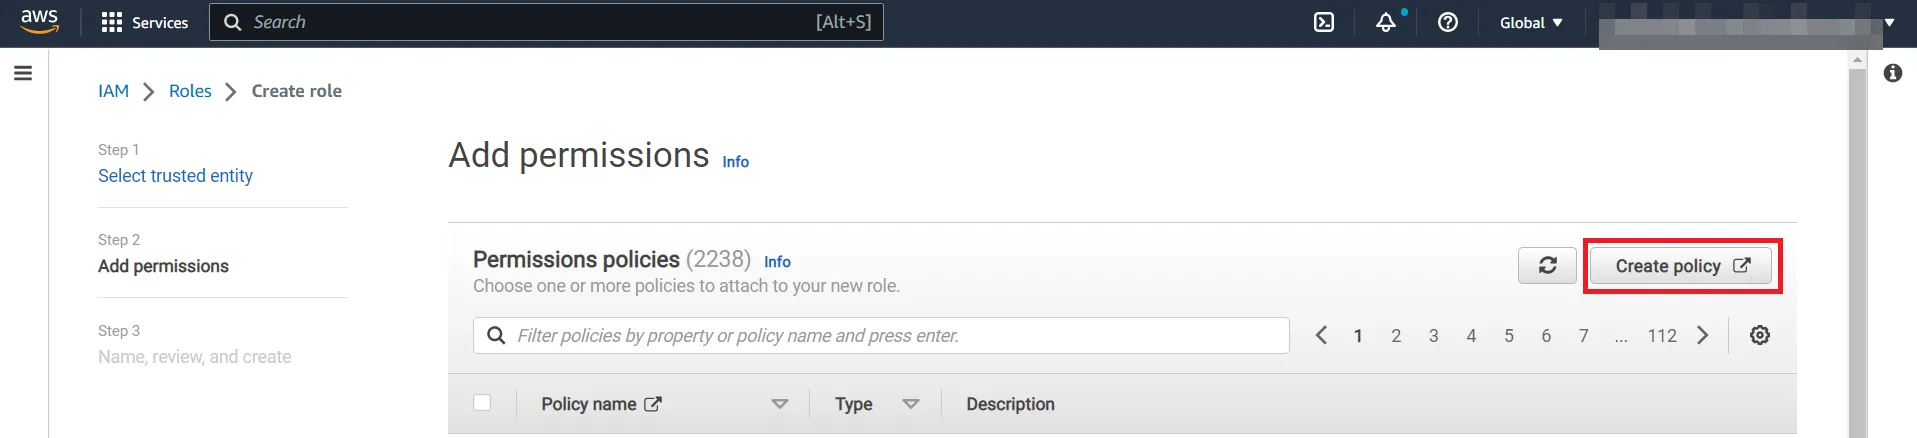
In a separate window or tab, the Create Policy screen will appear.
When you are done with the Create Policy screen, come back to the Add Permissions screen where you see Create Policy and continue with the creation of the IAM role. Do not close the screen.
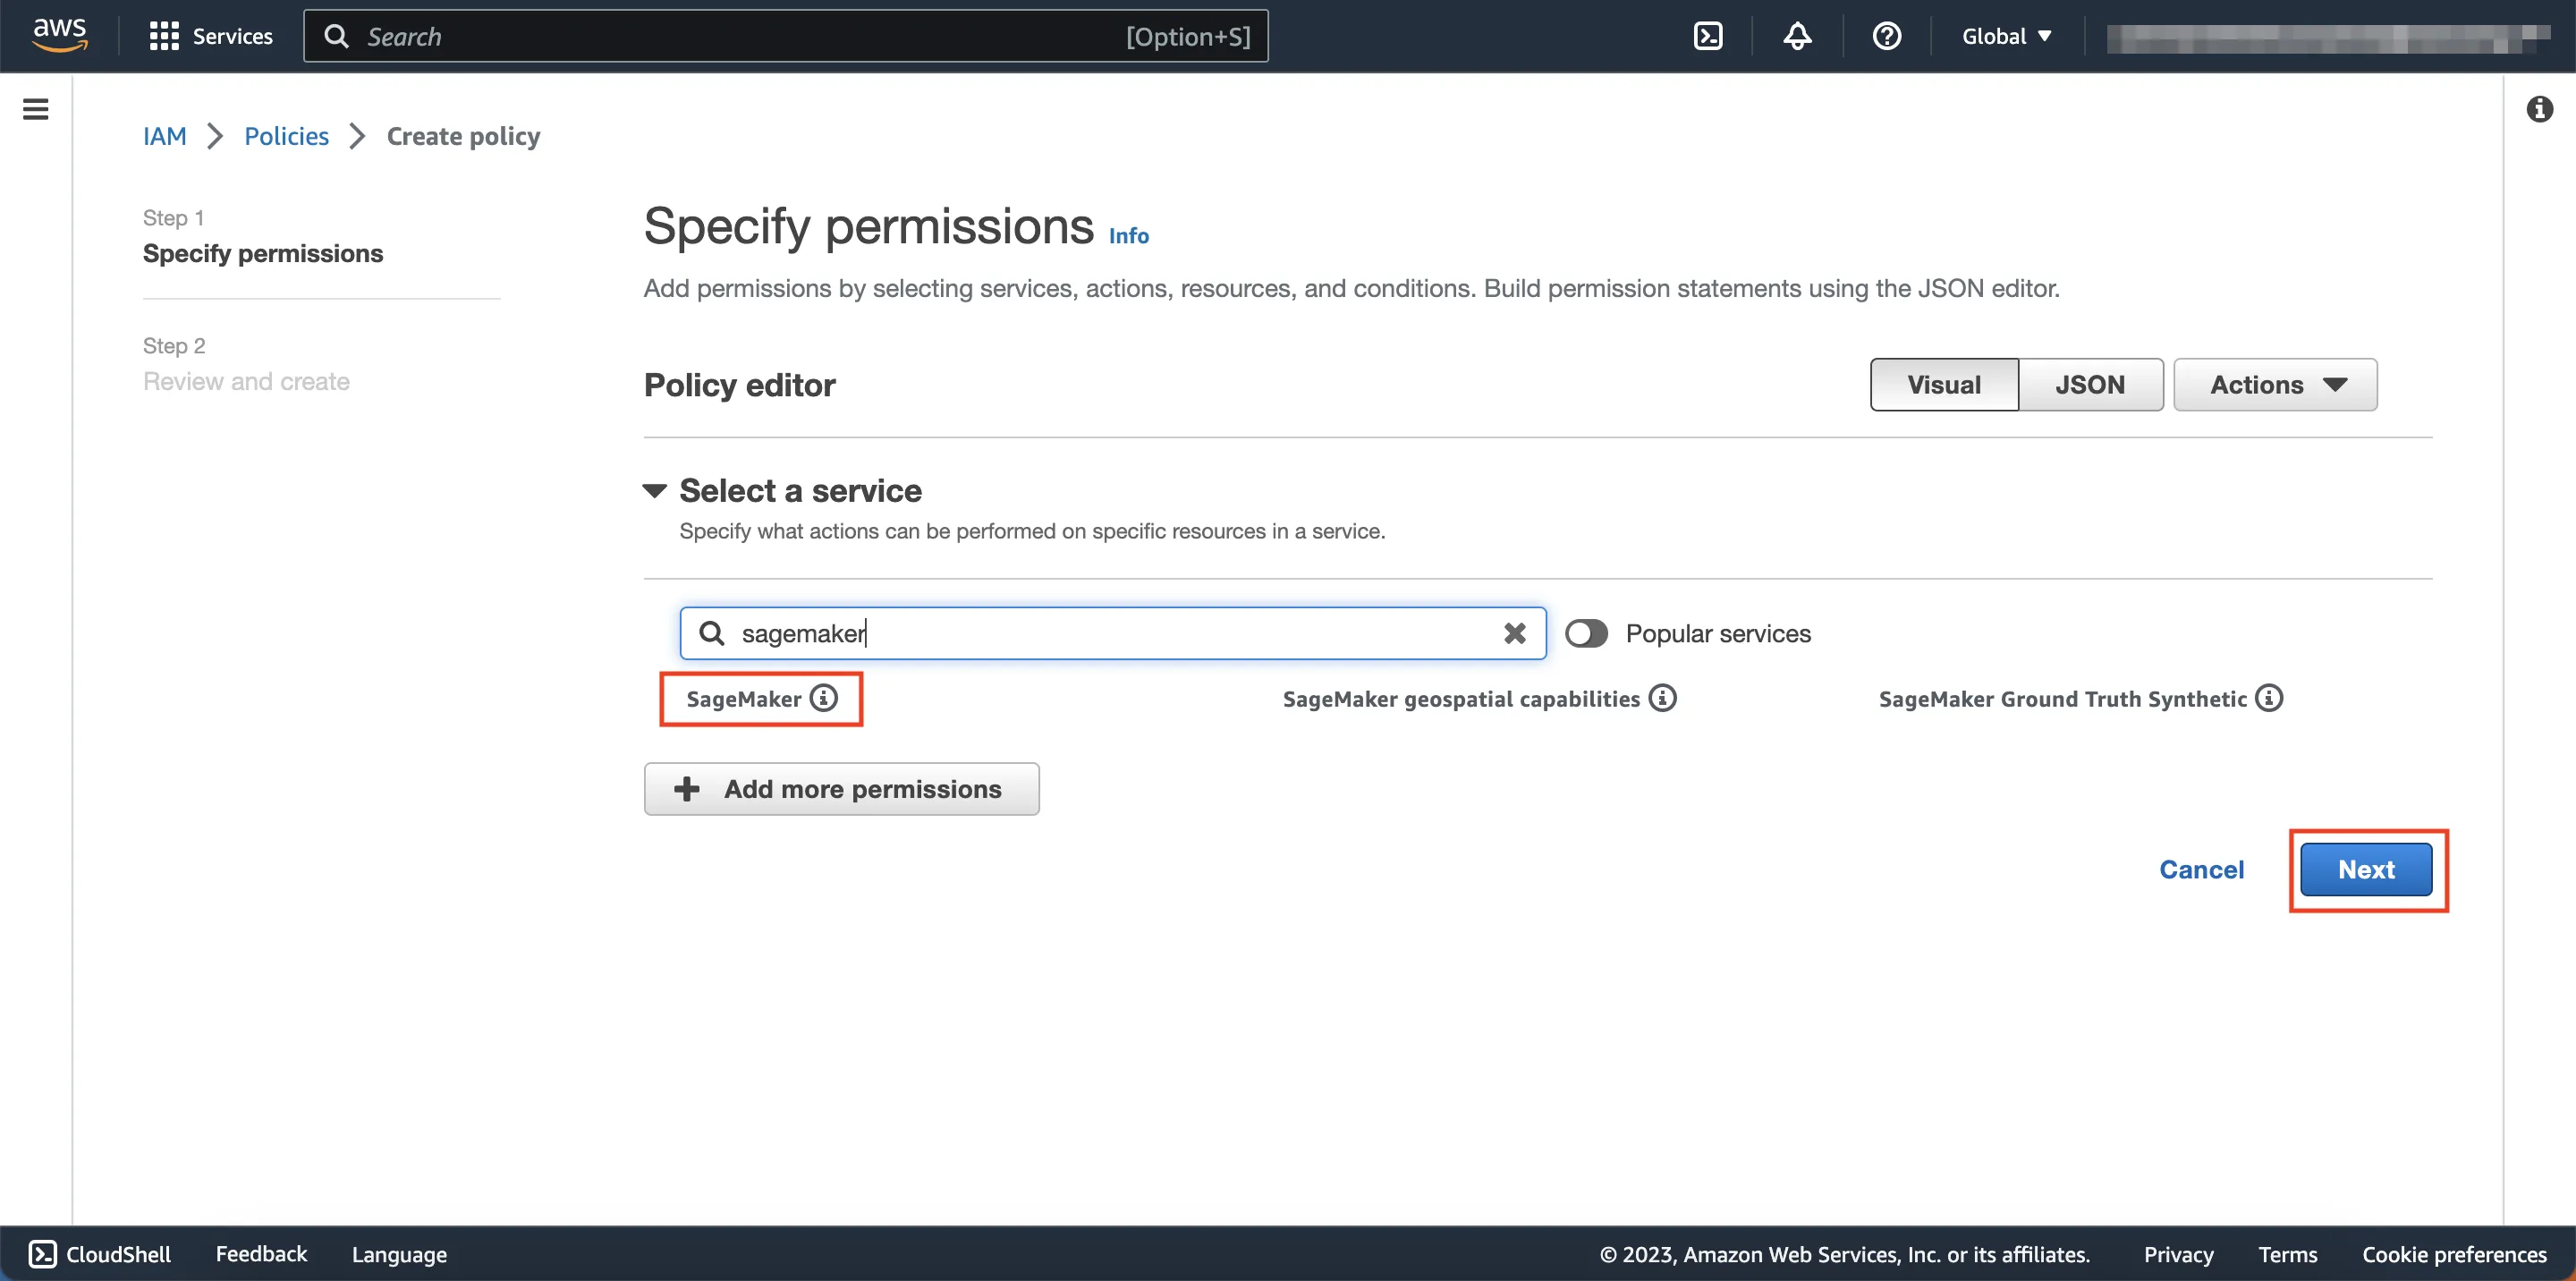
Under Select a Service, search for then click SageMaker.
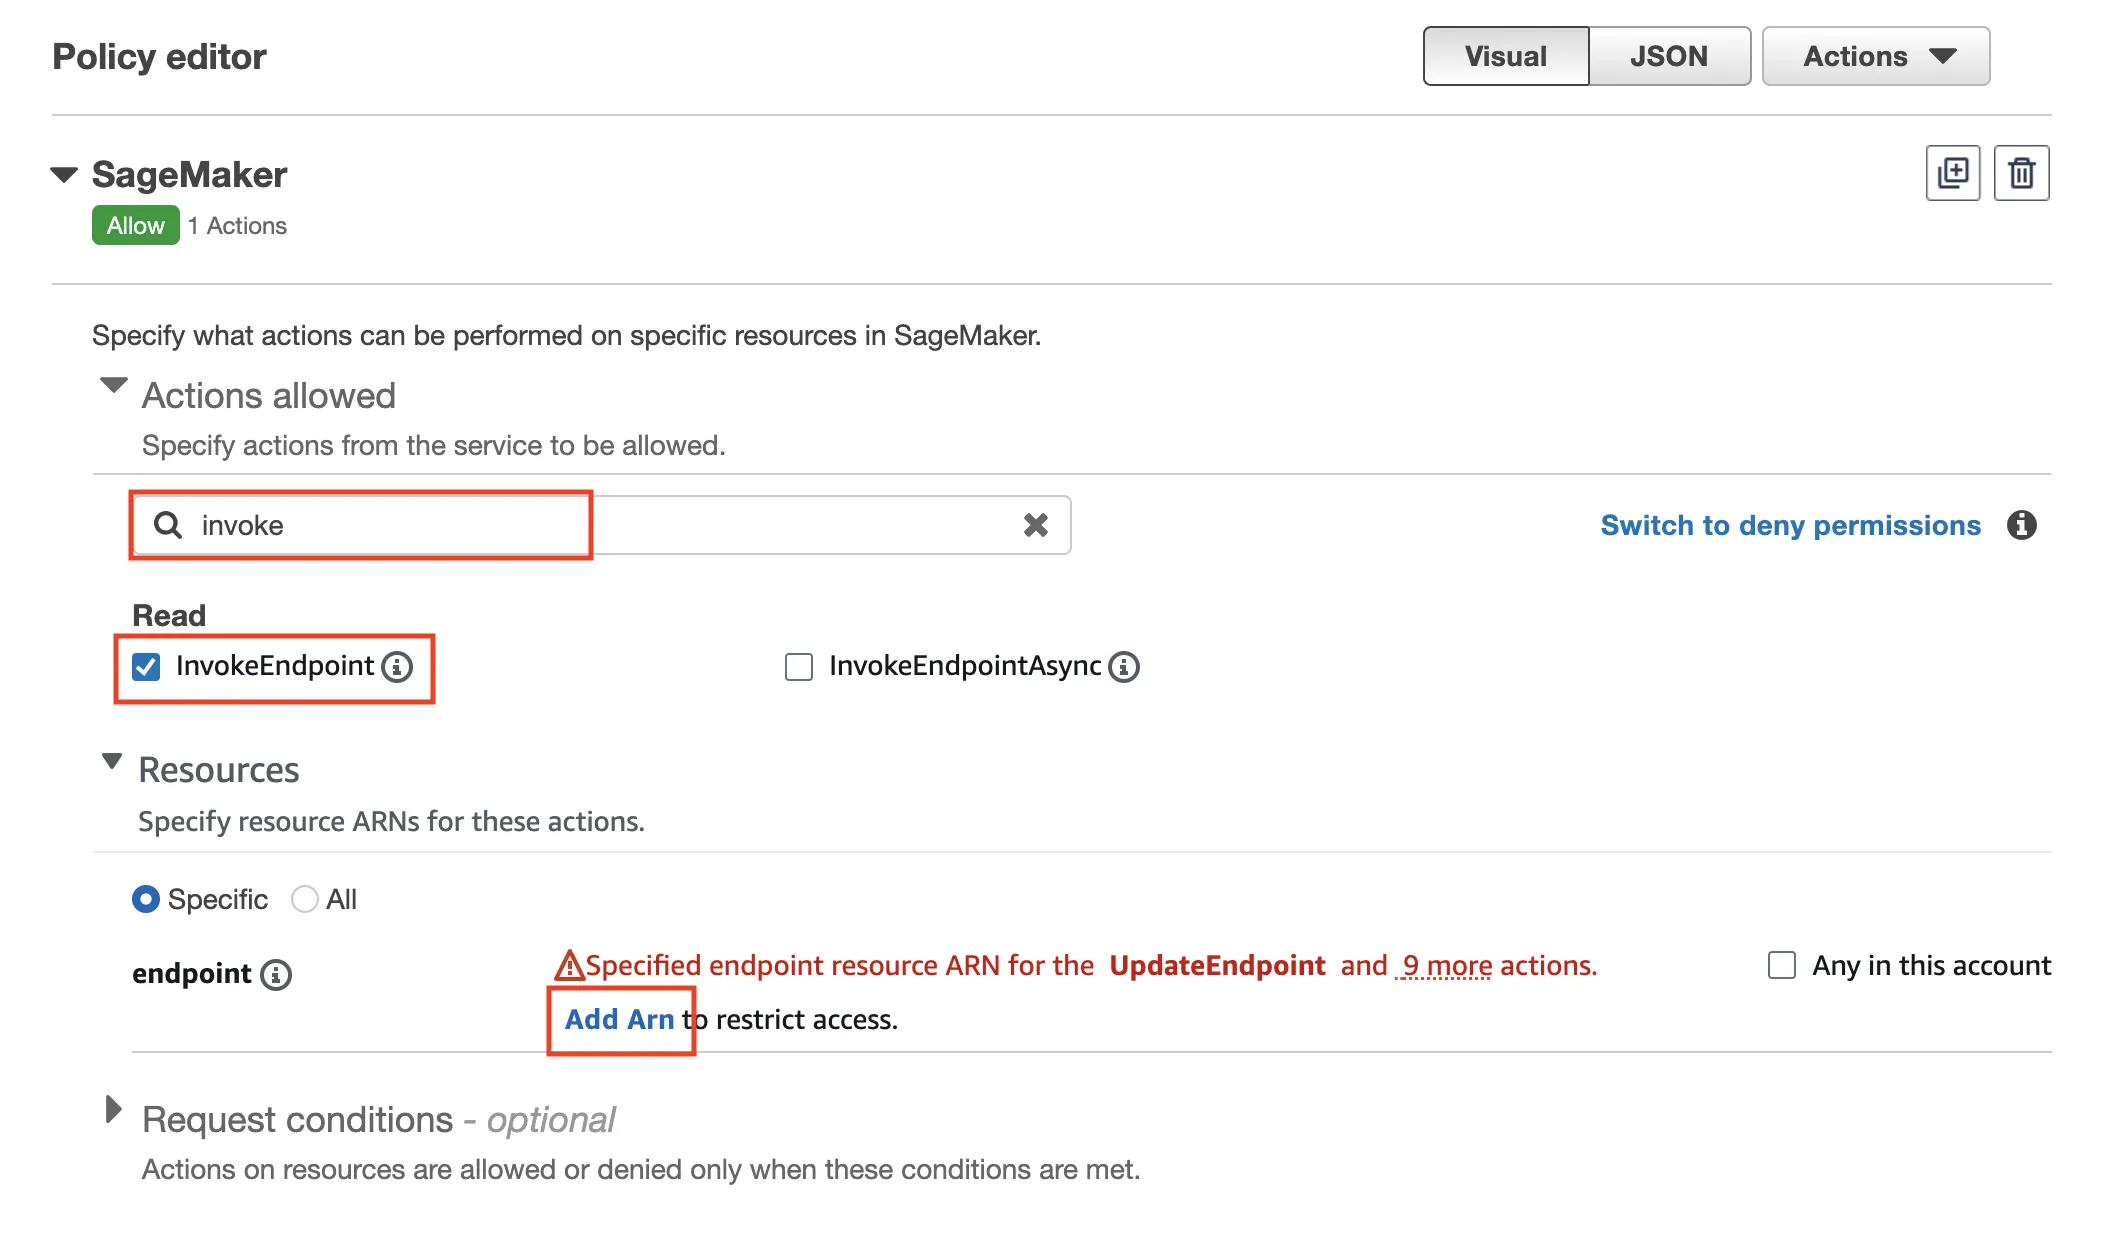
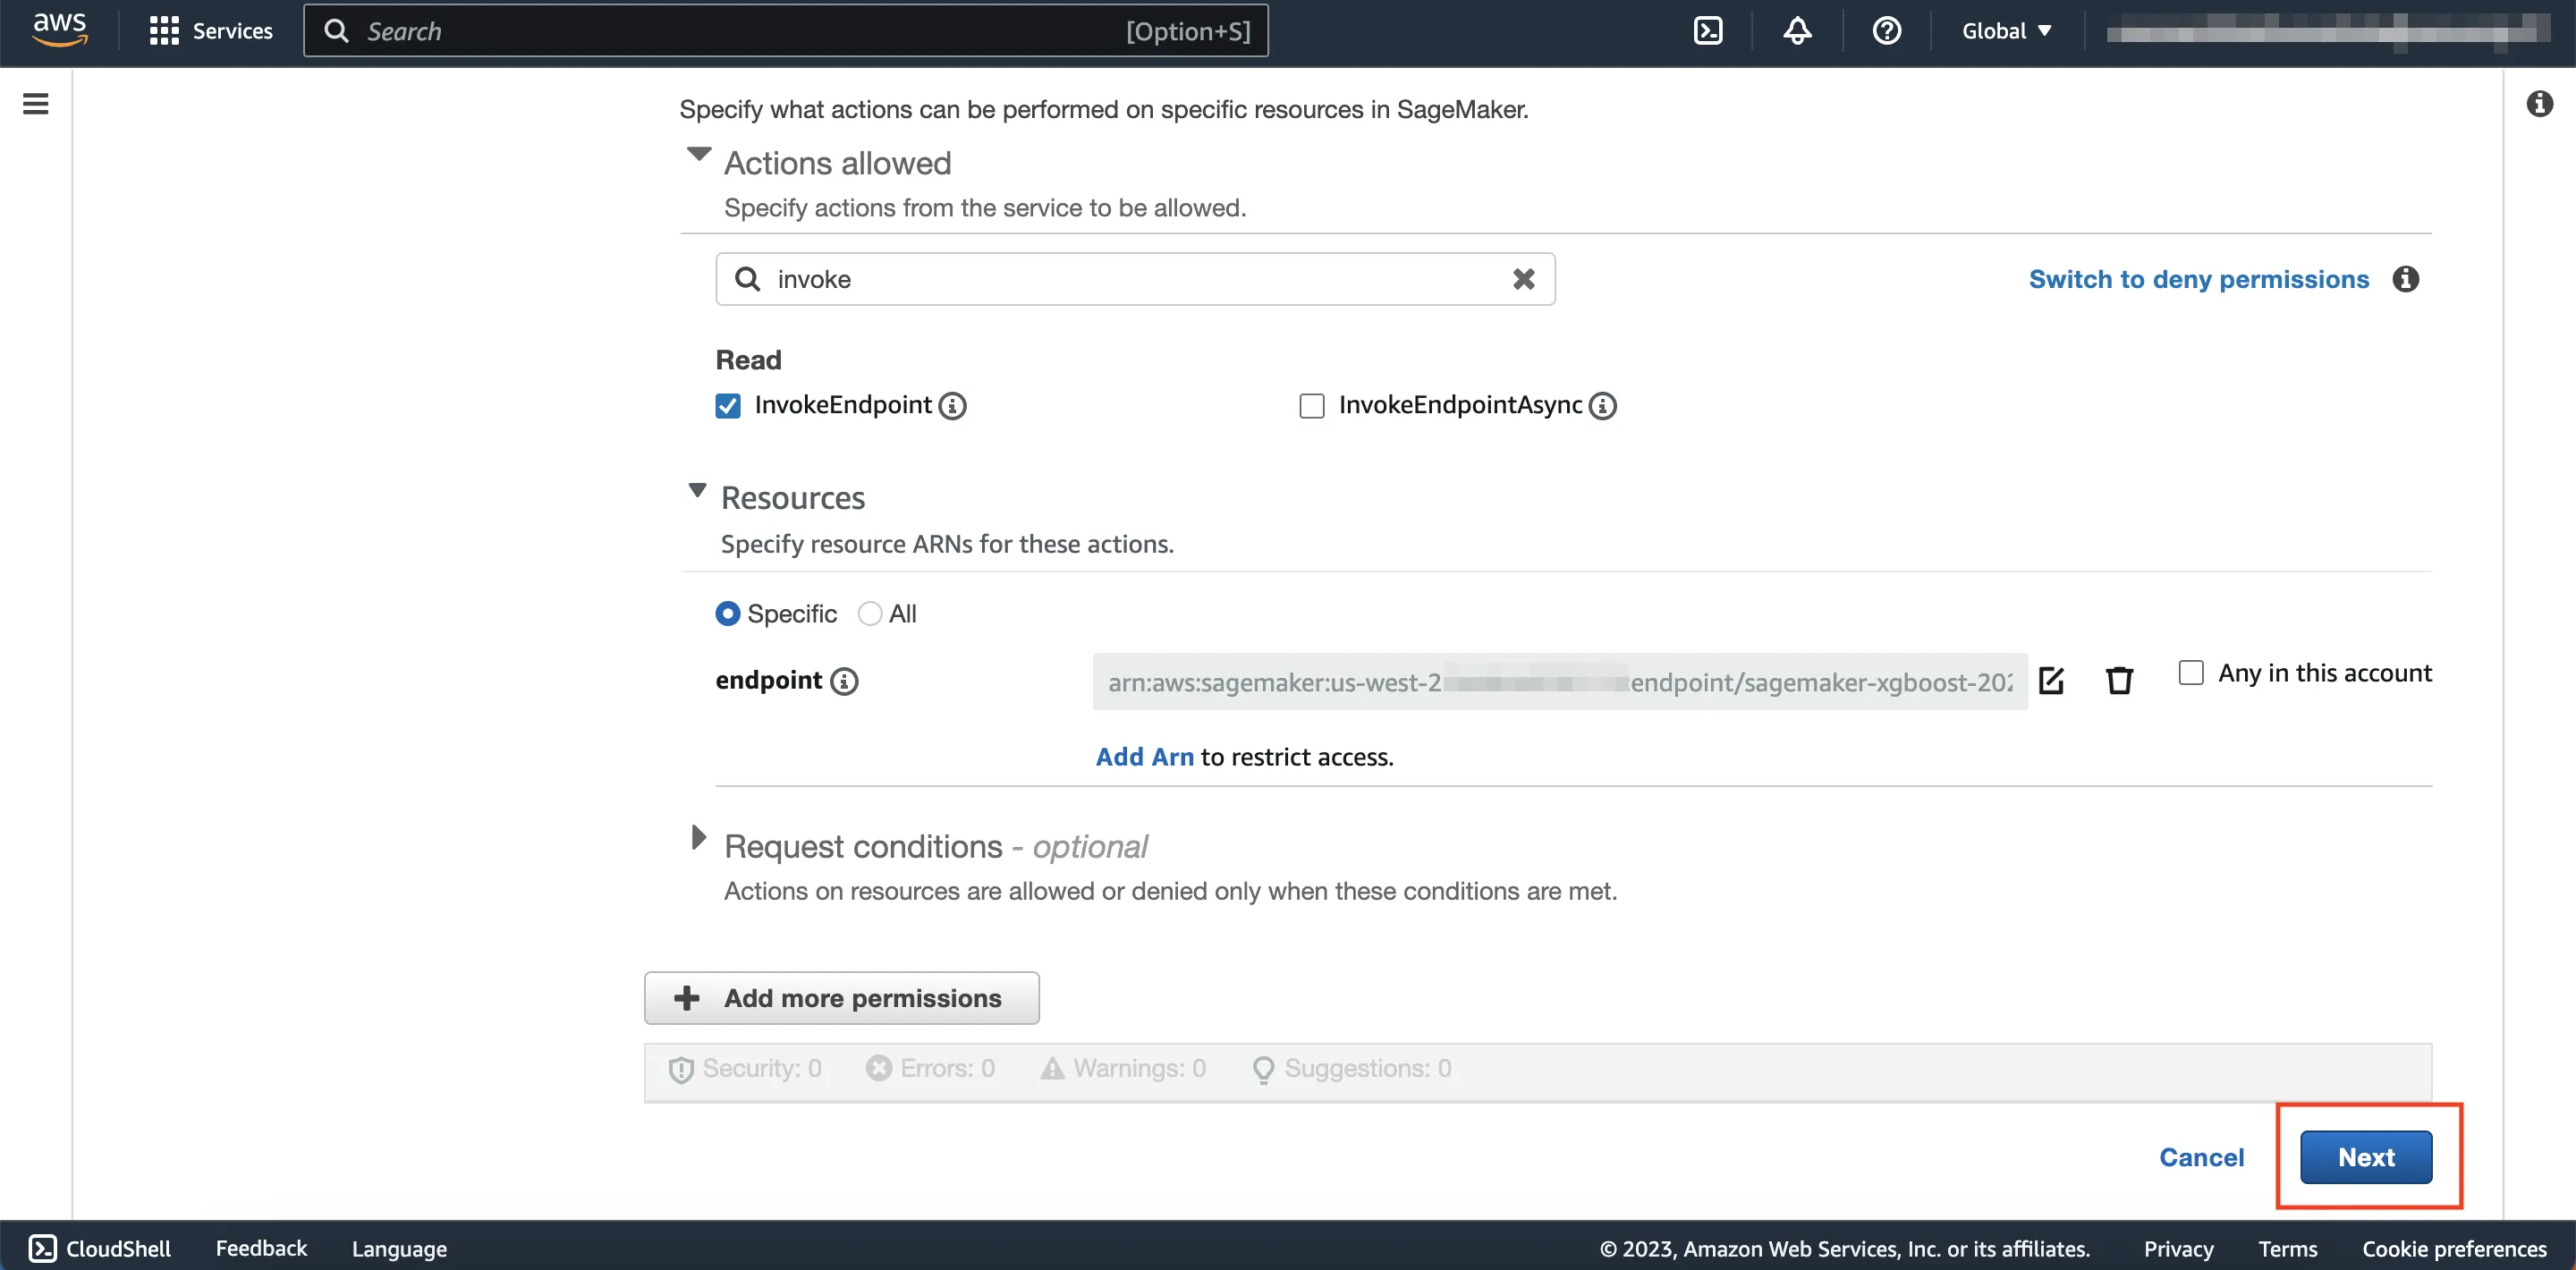
Under Actions allowed, search for InvokeEndpoint in the text field called Filter action, then click InvokeEndpoint. Under Resources, click the Specific option, then click Add Arn.
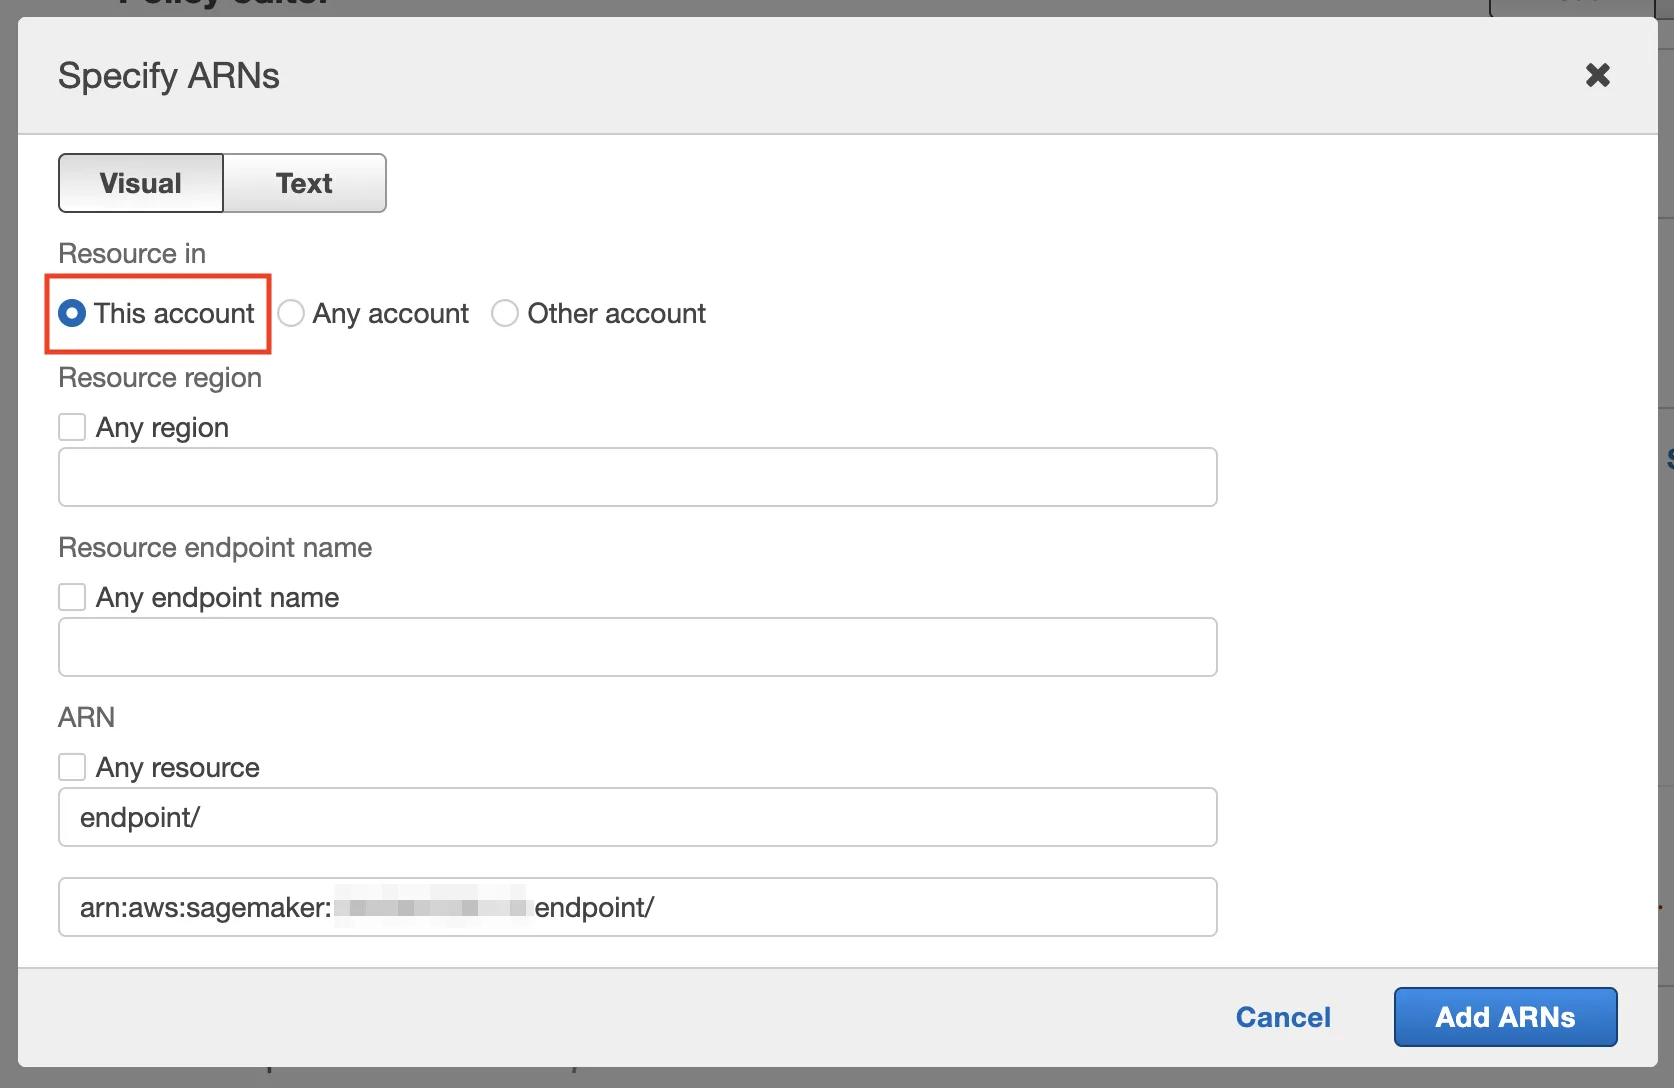
Click This account under Resource in.
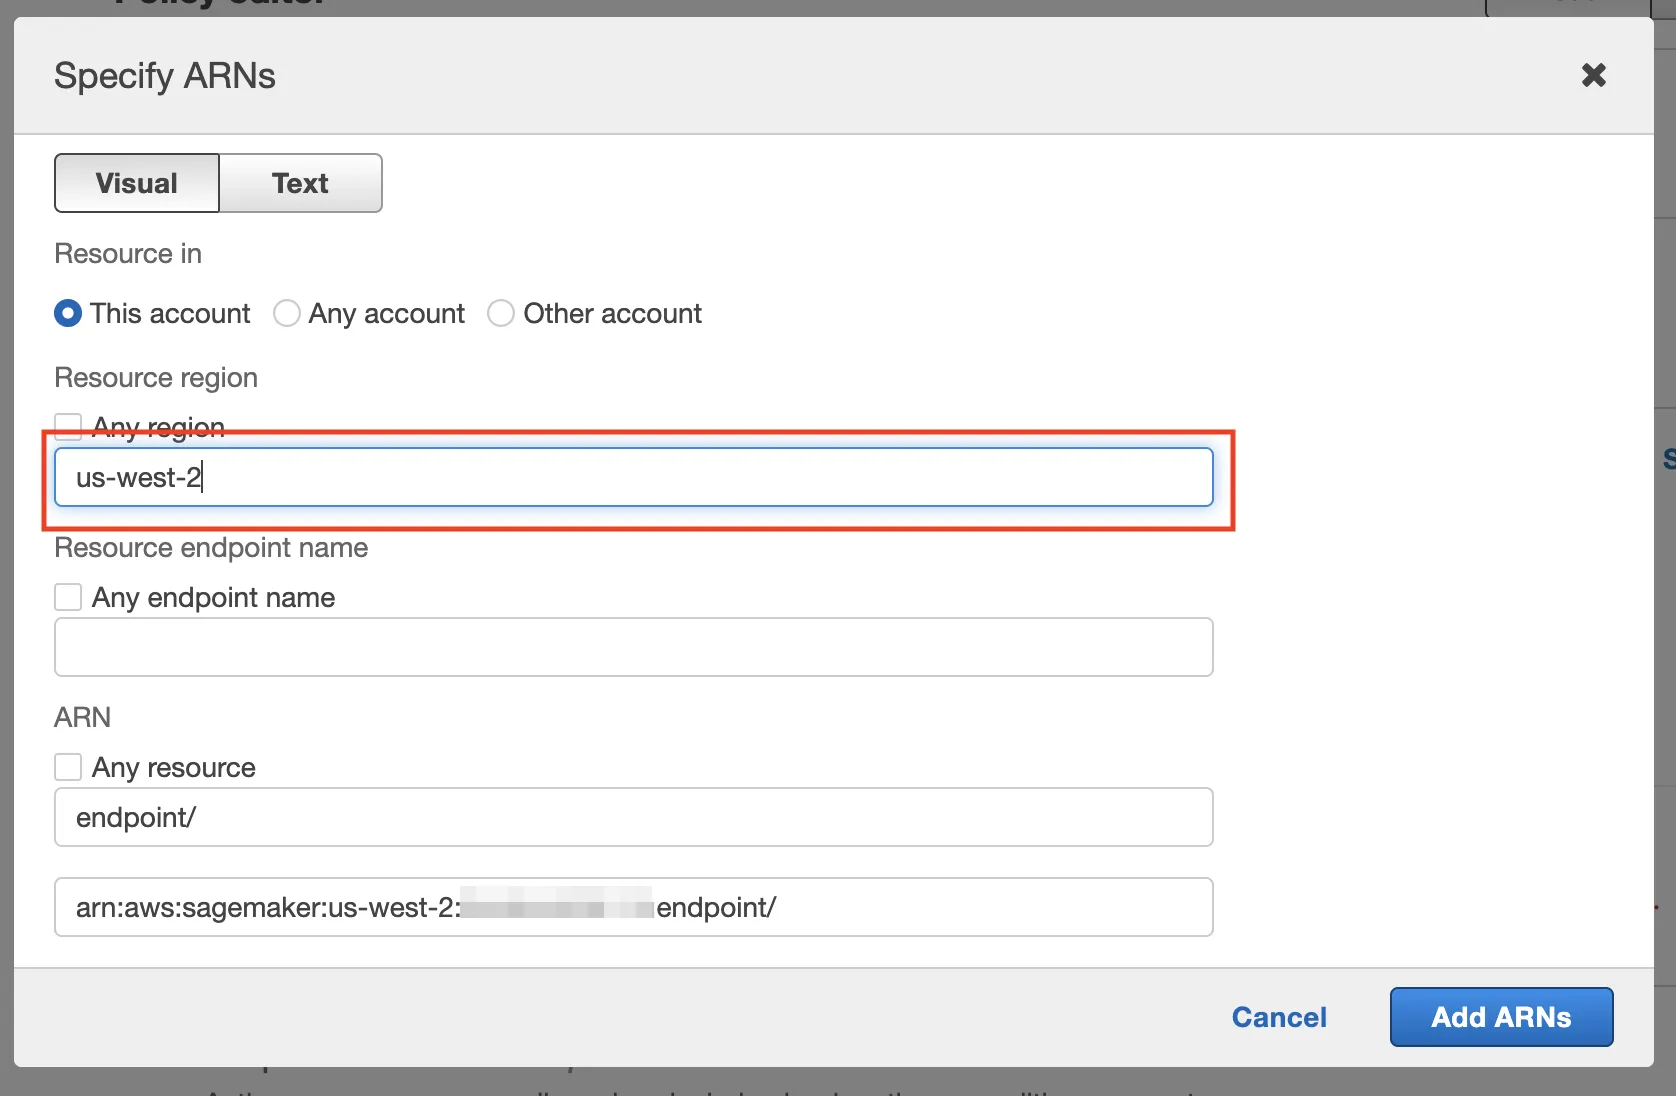
Enter 'us-west-2' under Resource region.
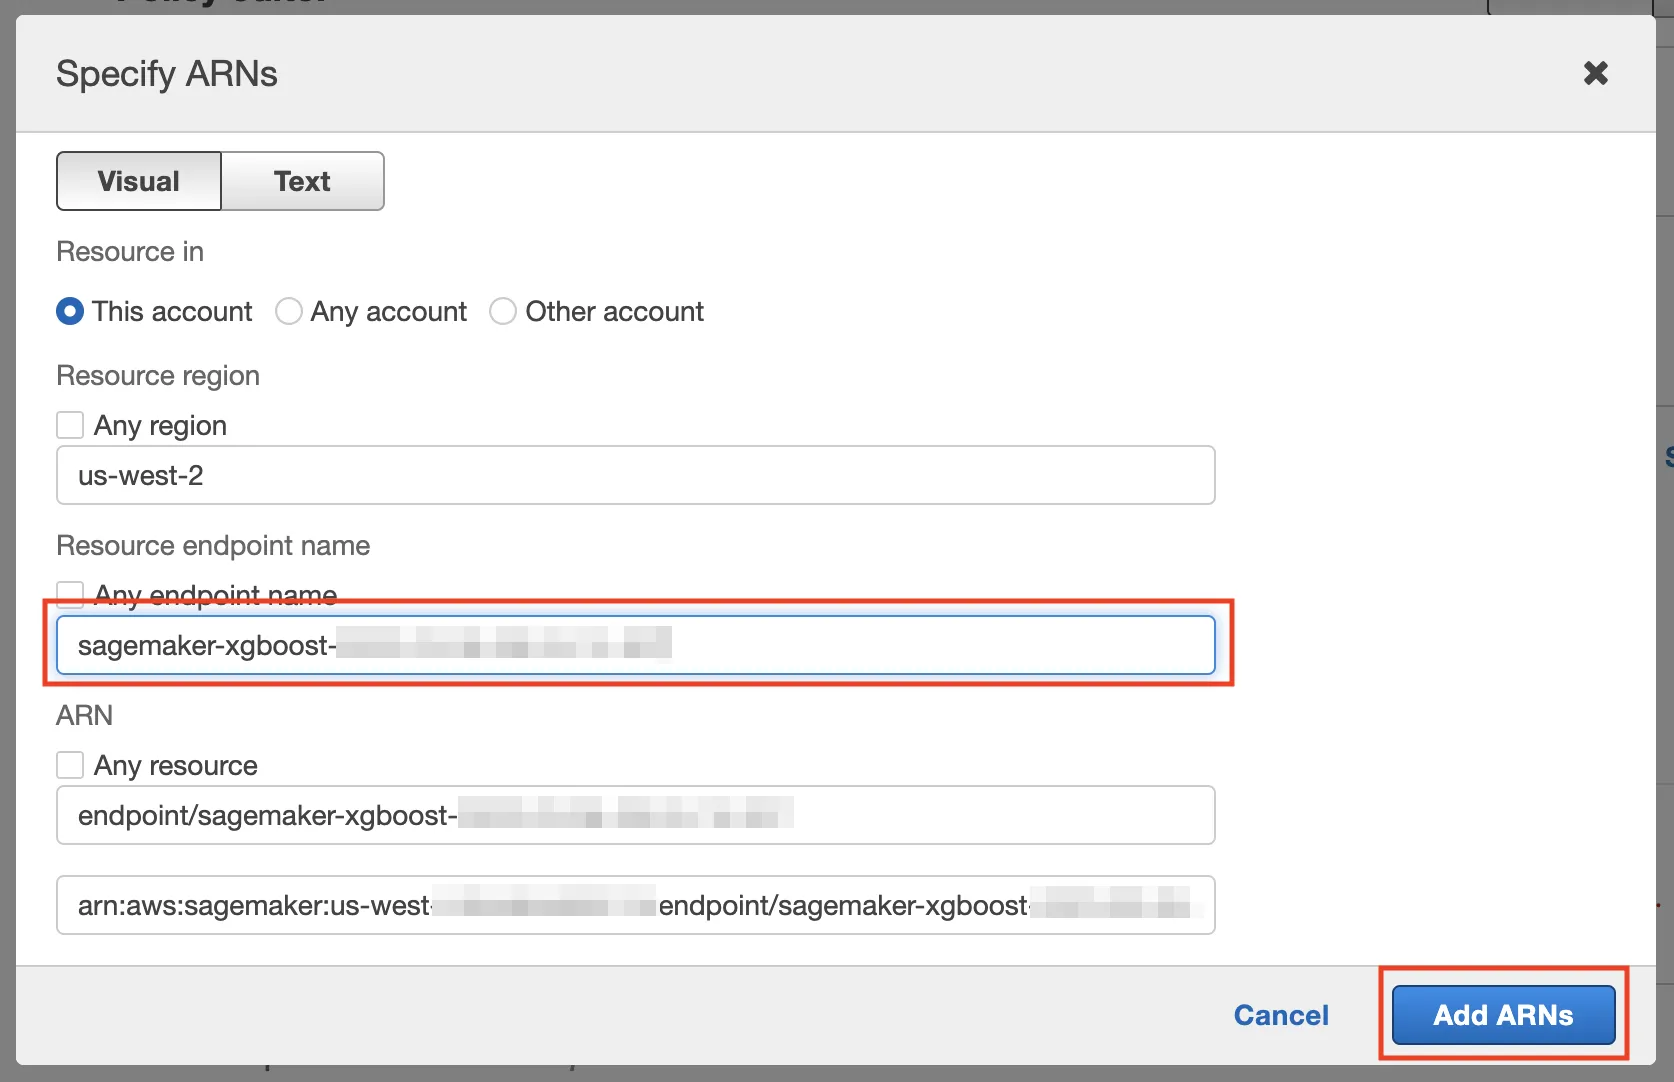
Enter the endpoint name that you saved in Step 2 under Resource endpoint name, then click Add ARNs,
Click Next.
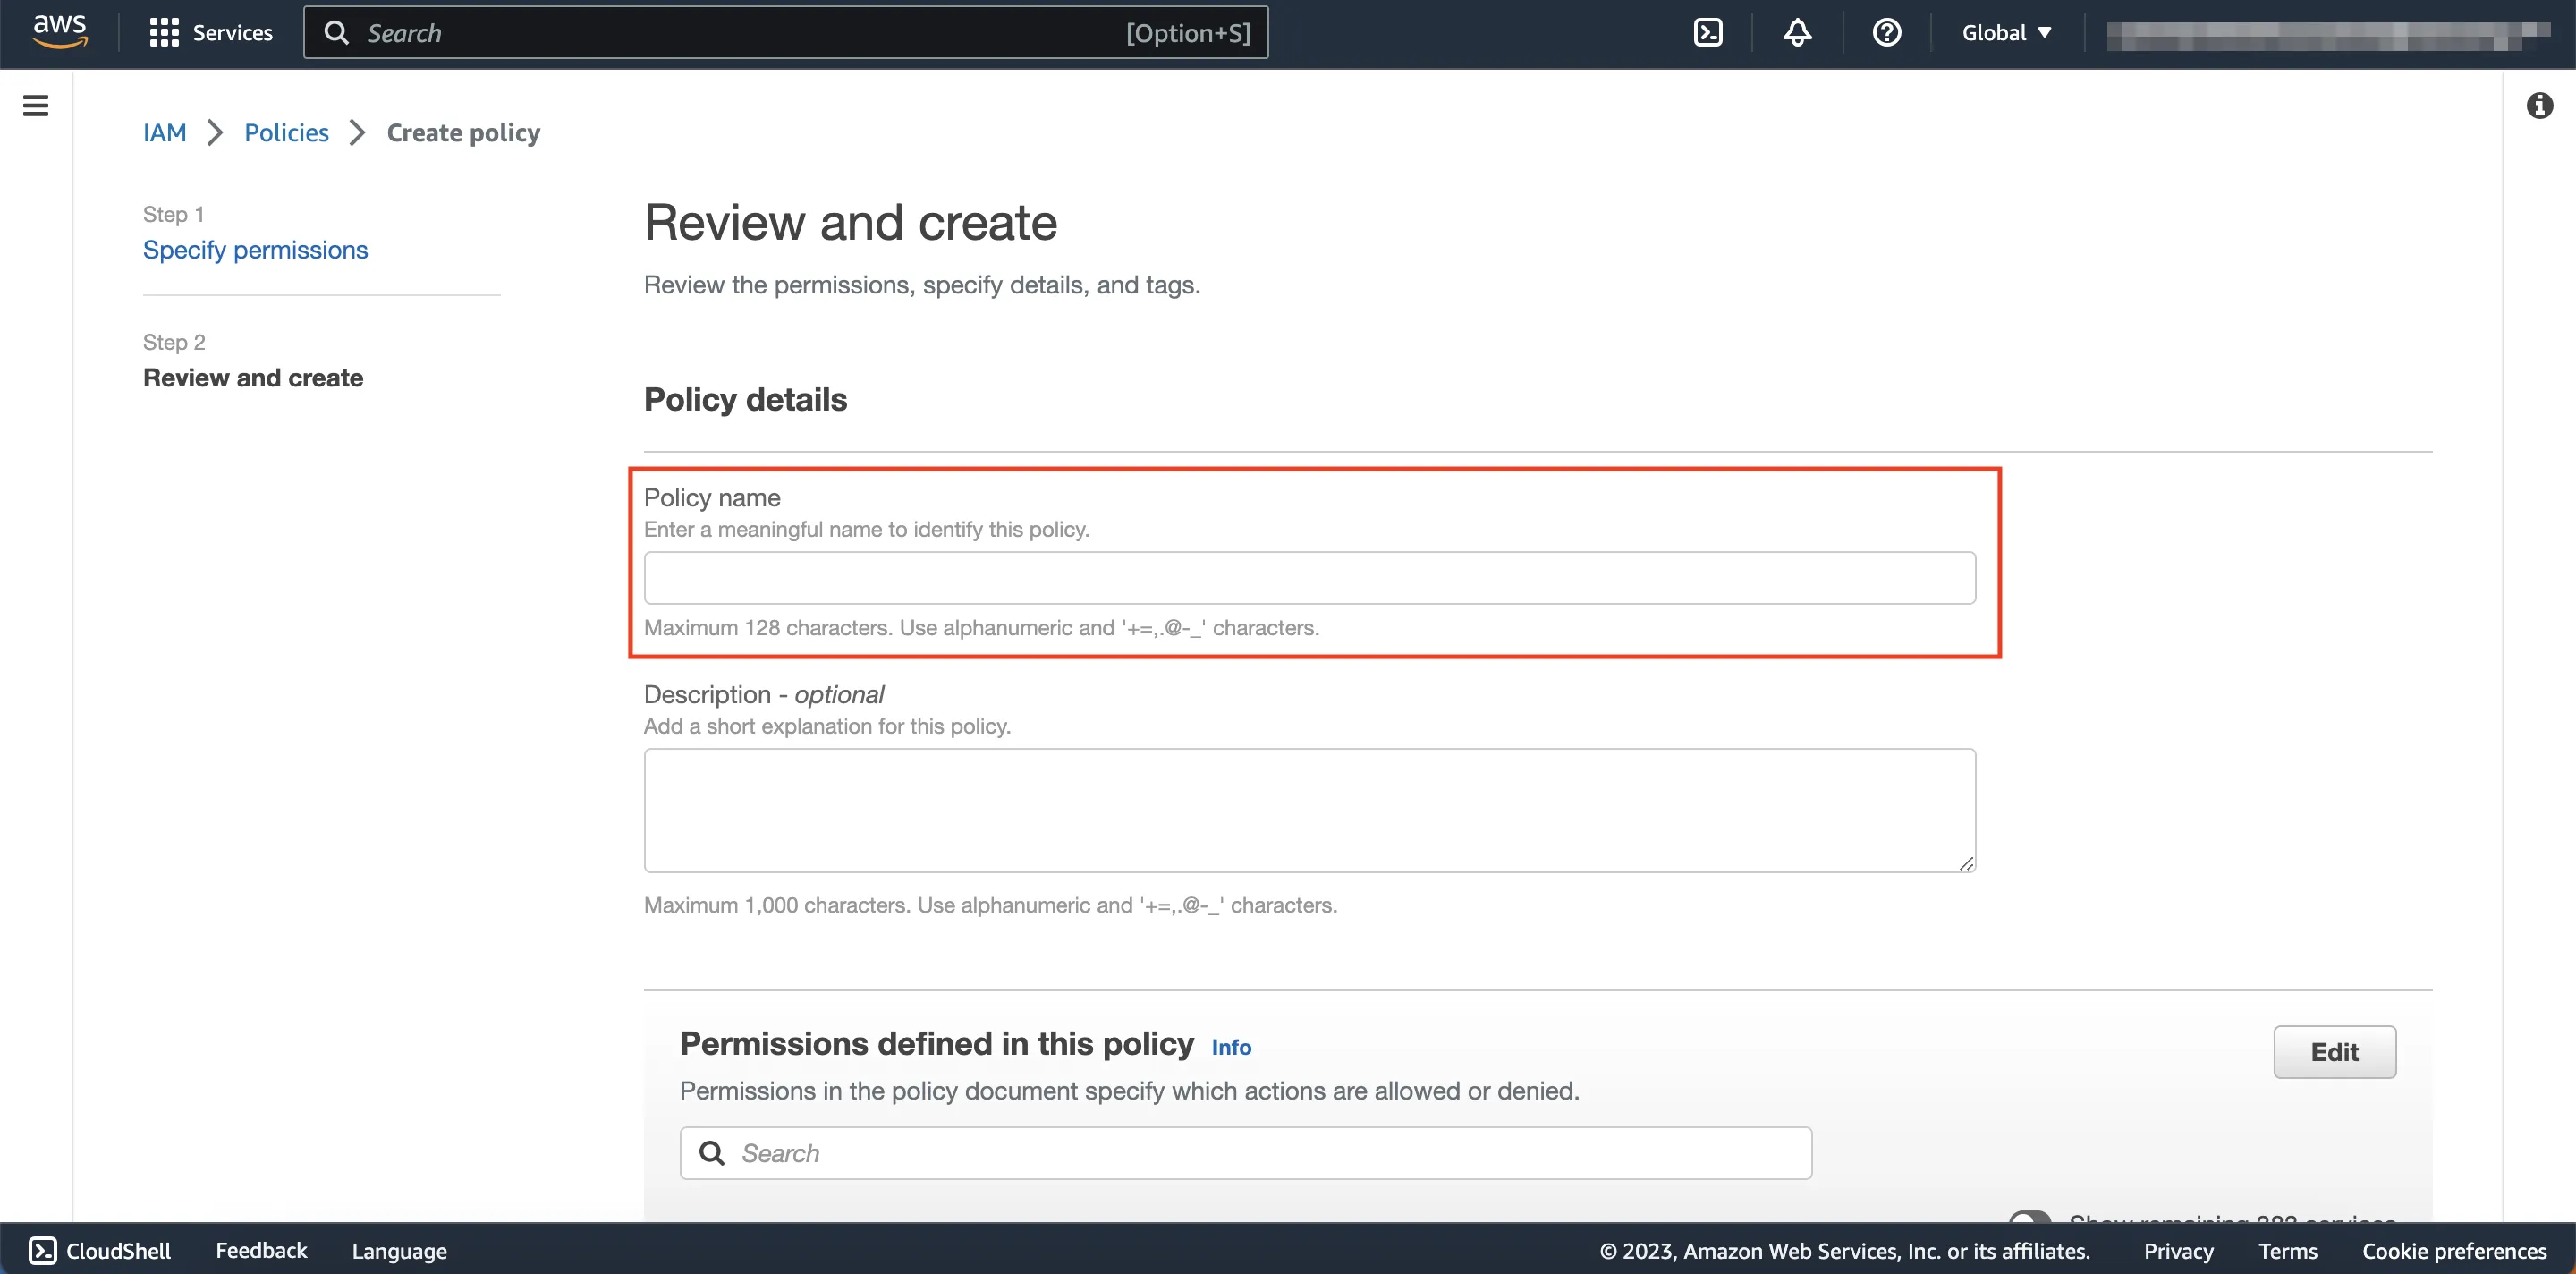
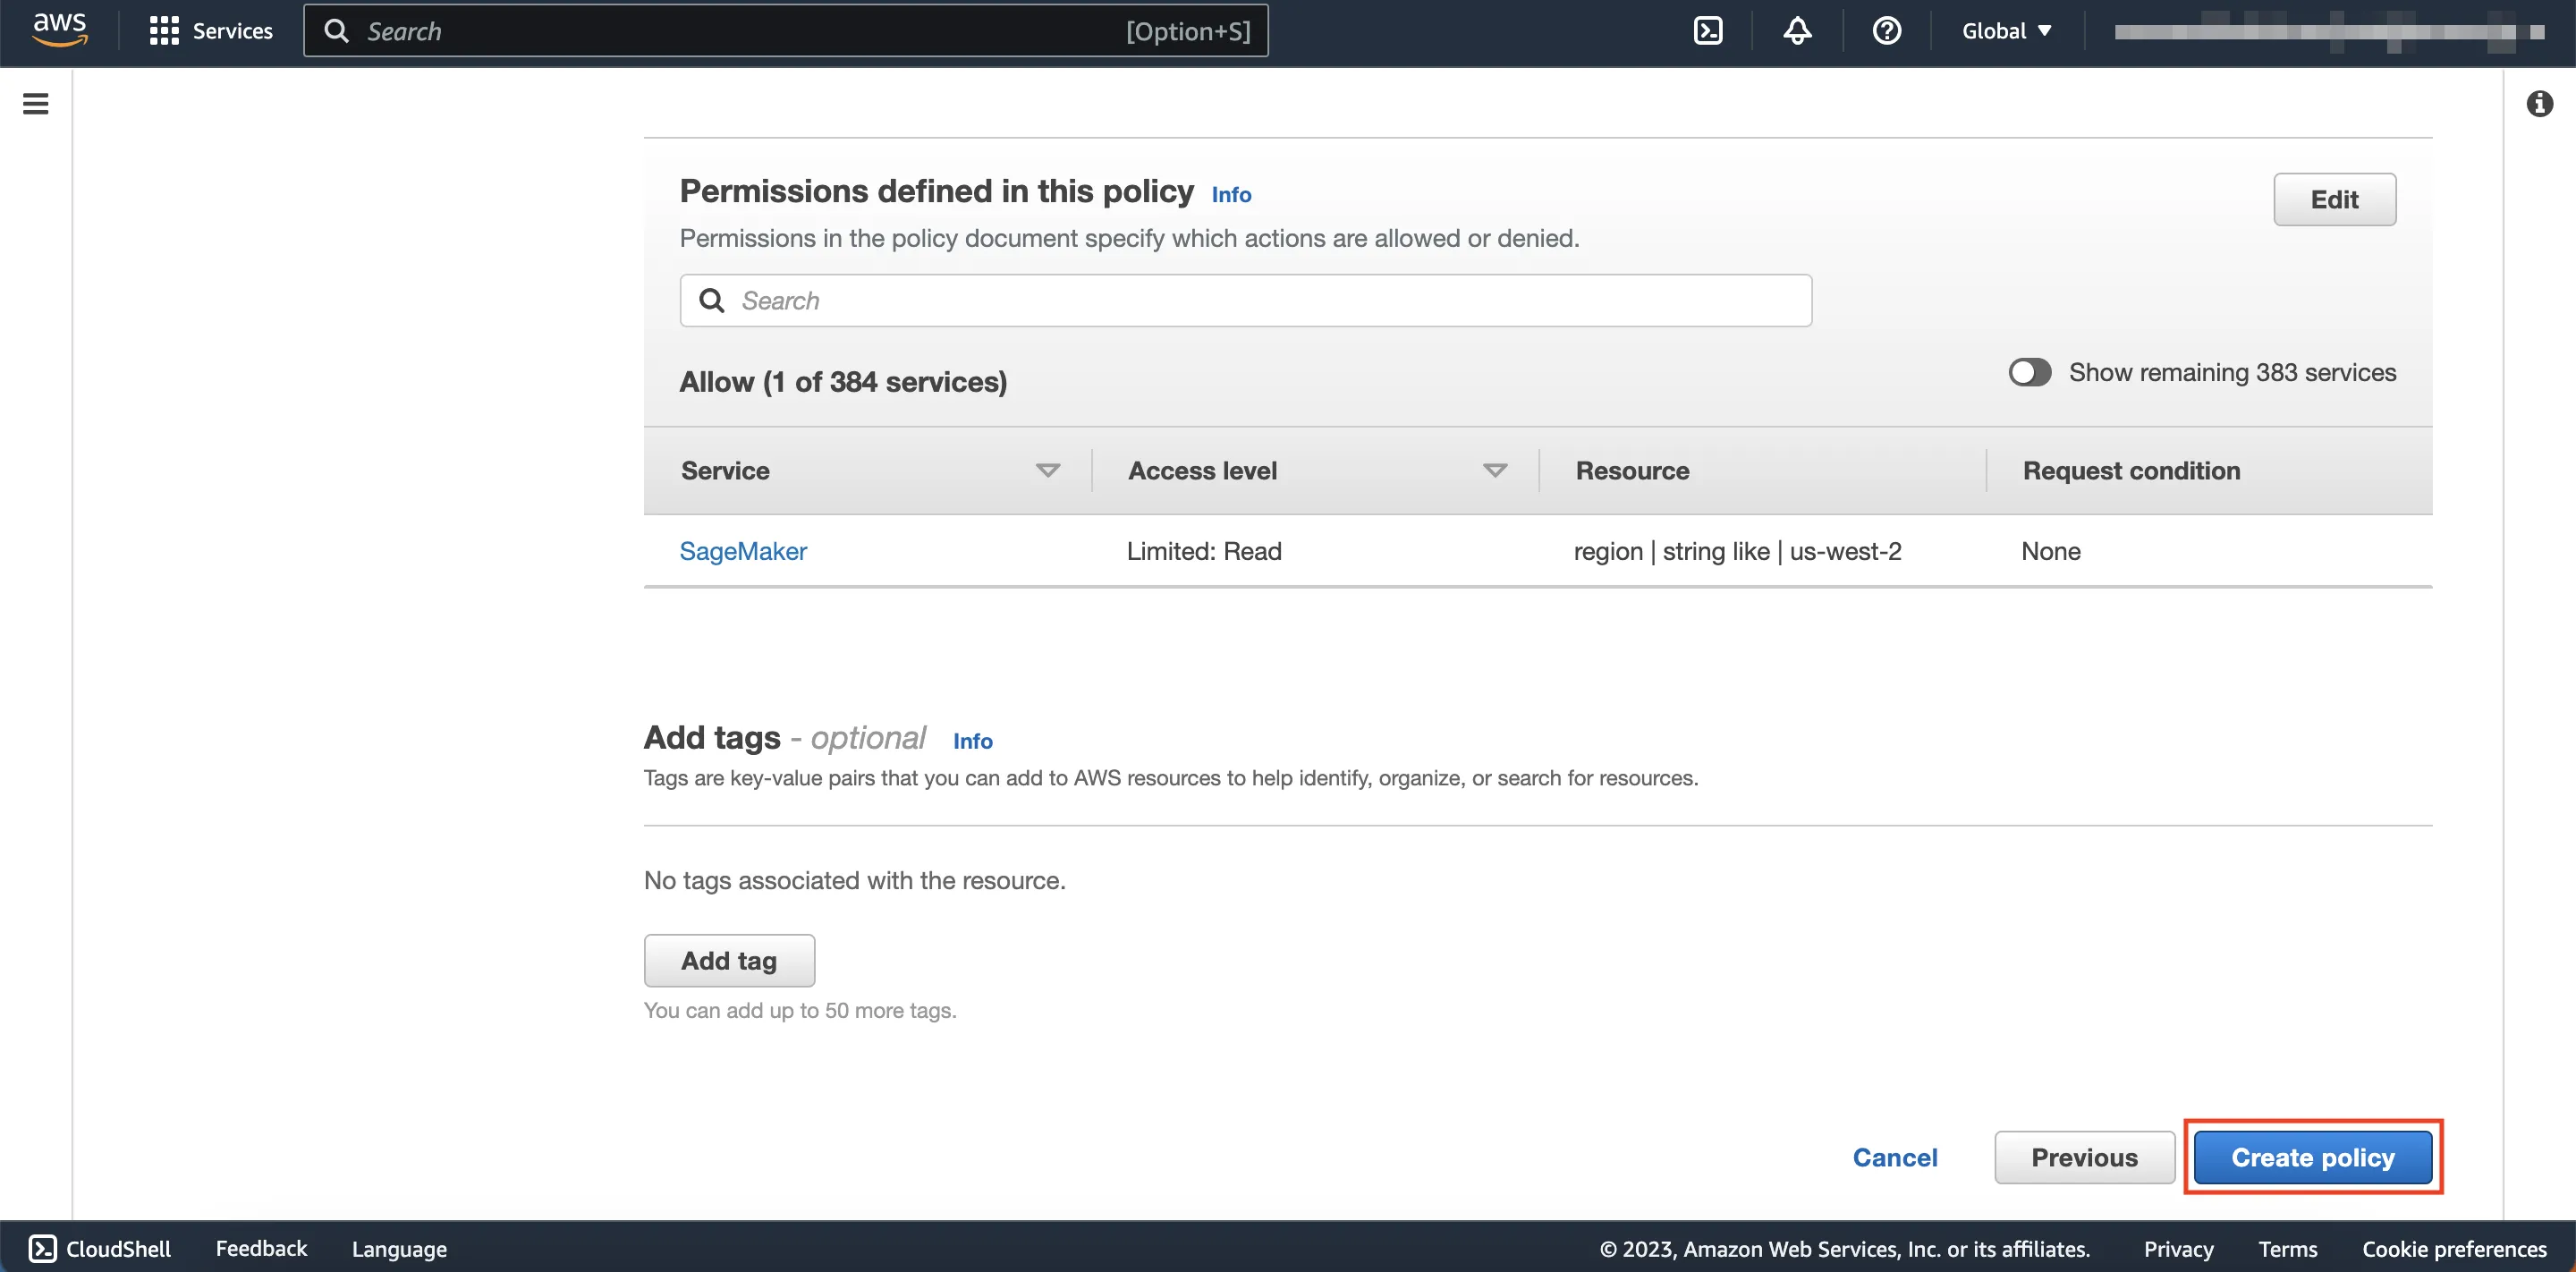
Name the policy however you’d like before clicking Create policy.
Scroll down...
Finish Role Creation by Adding the New Policy
Close the tab you are on, and go back to the page with Add permissions at the top.
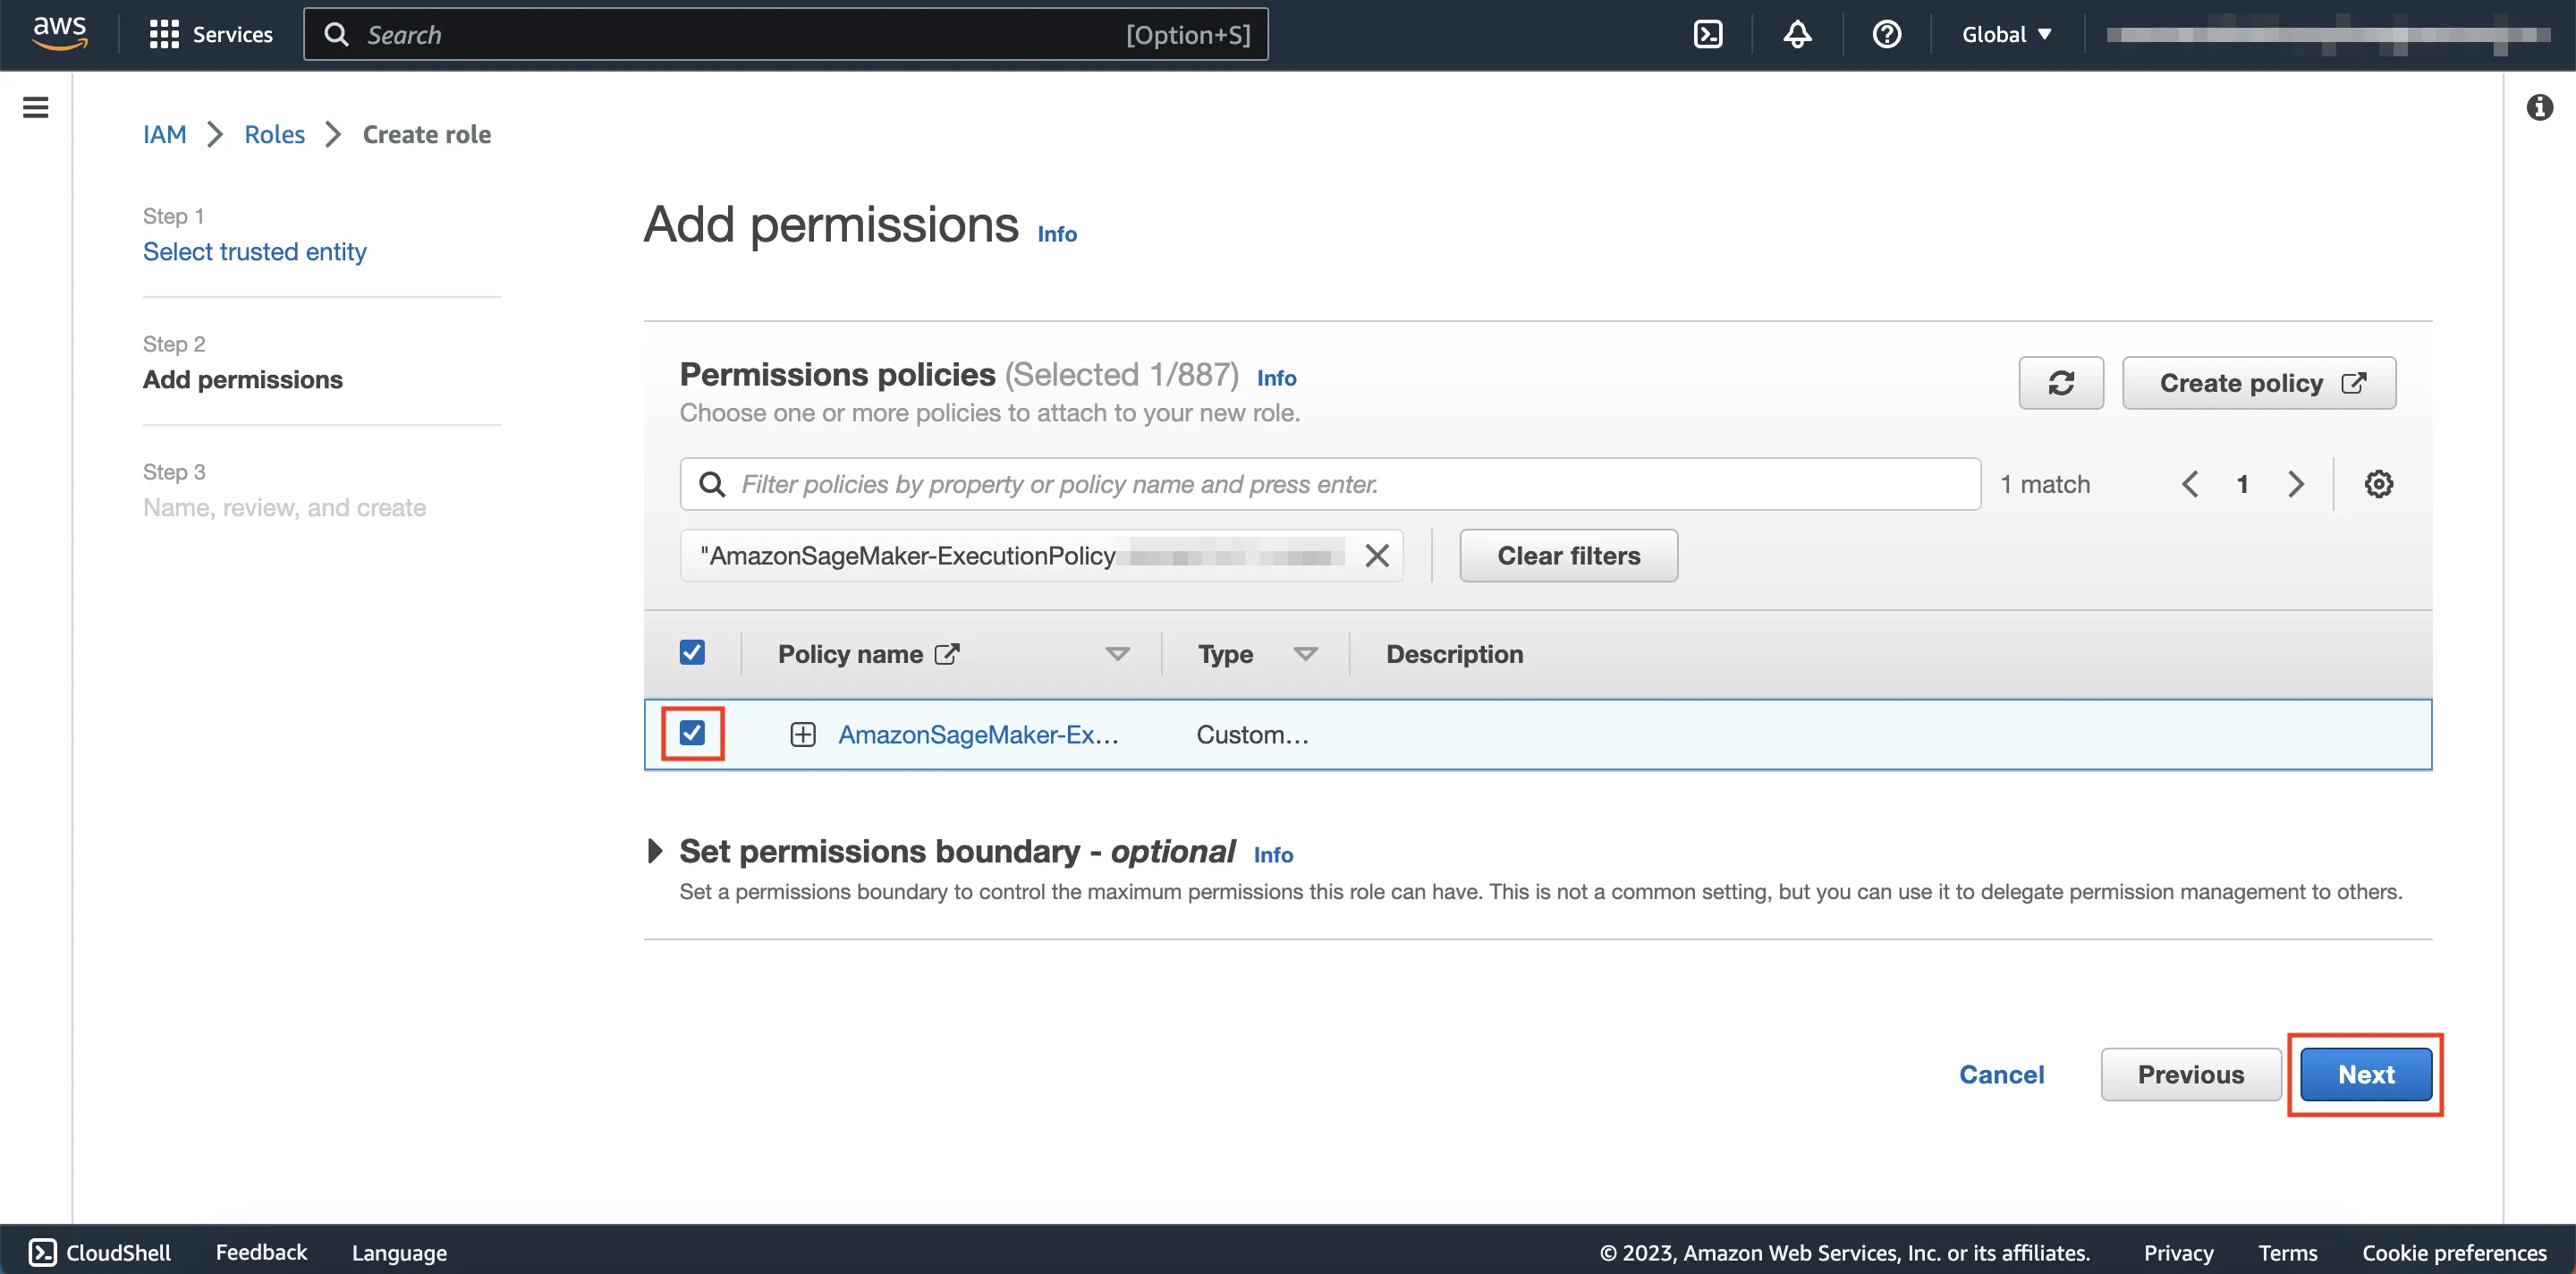
Click the refresh button on the top right, then search for the policy you just created.
Click the check box next to that policy, then click Next.
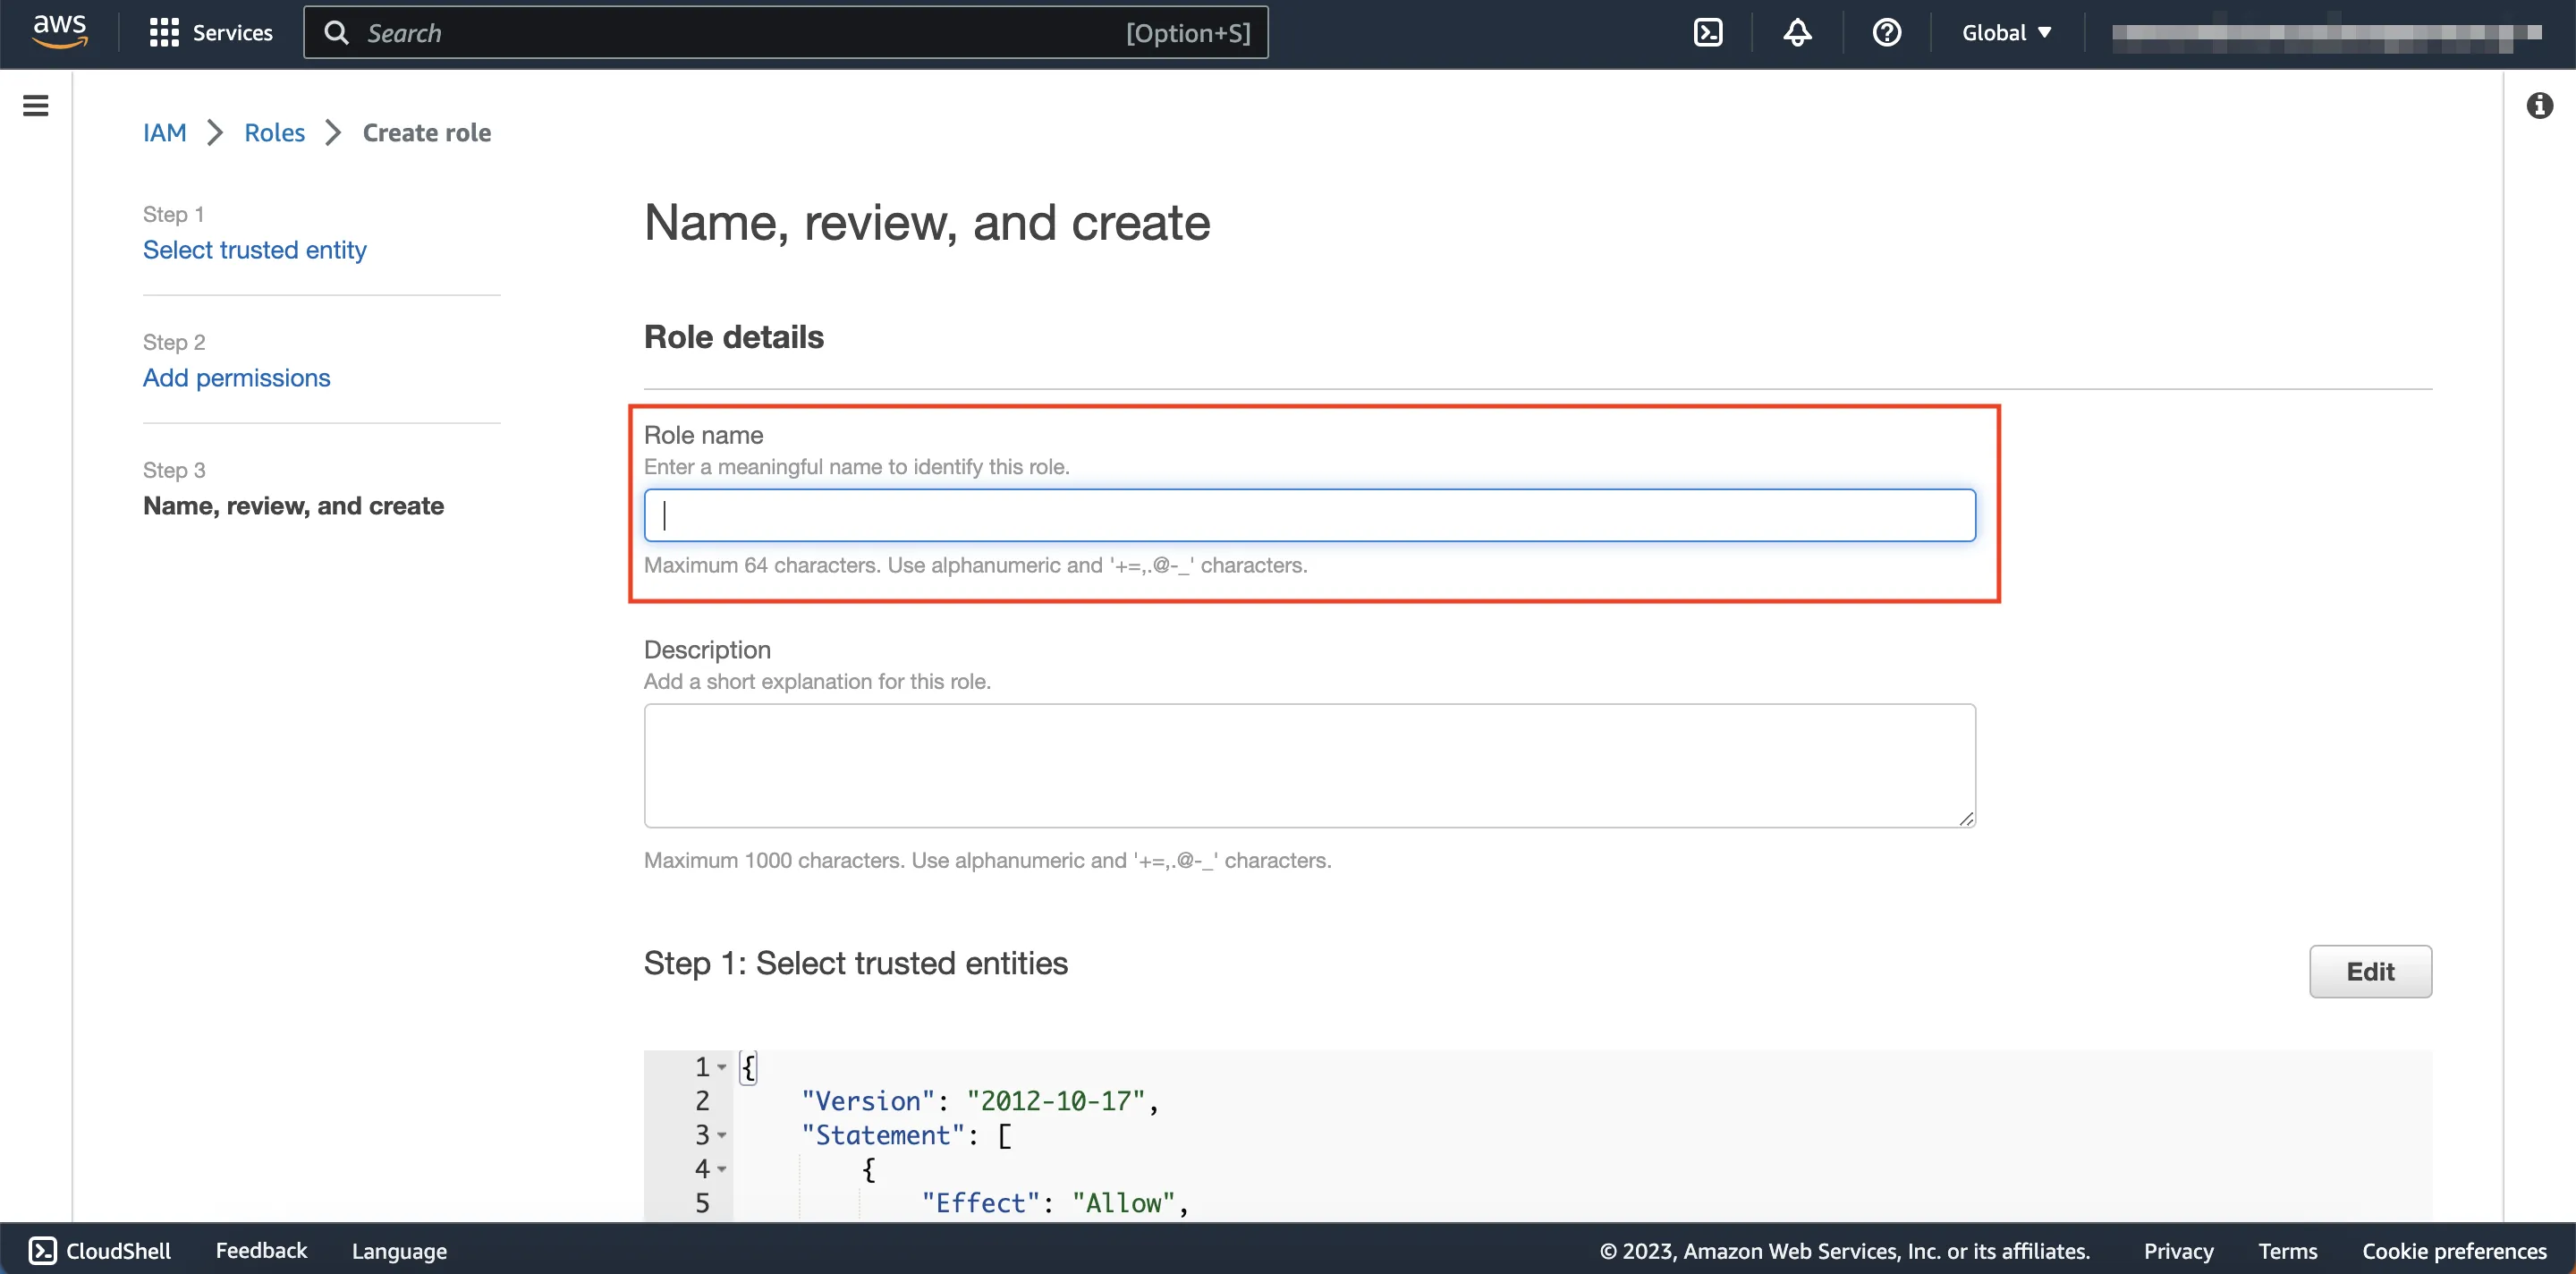
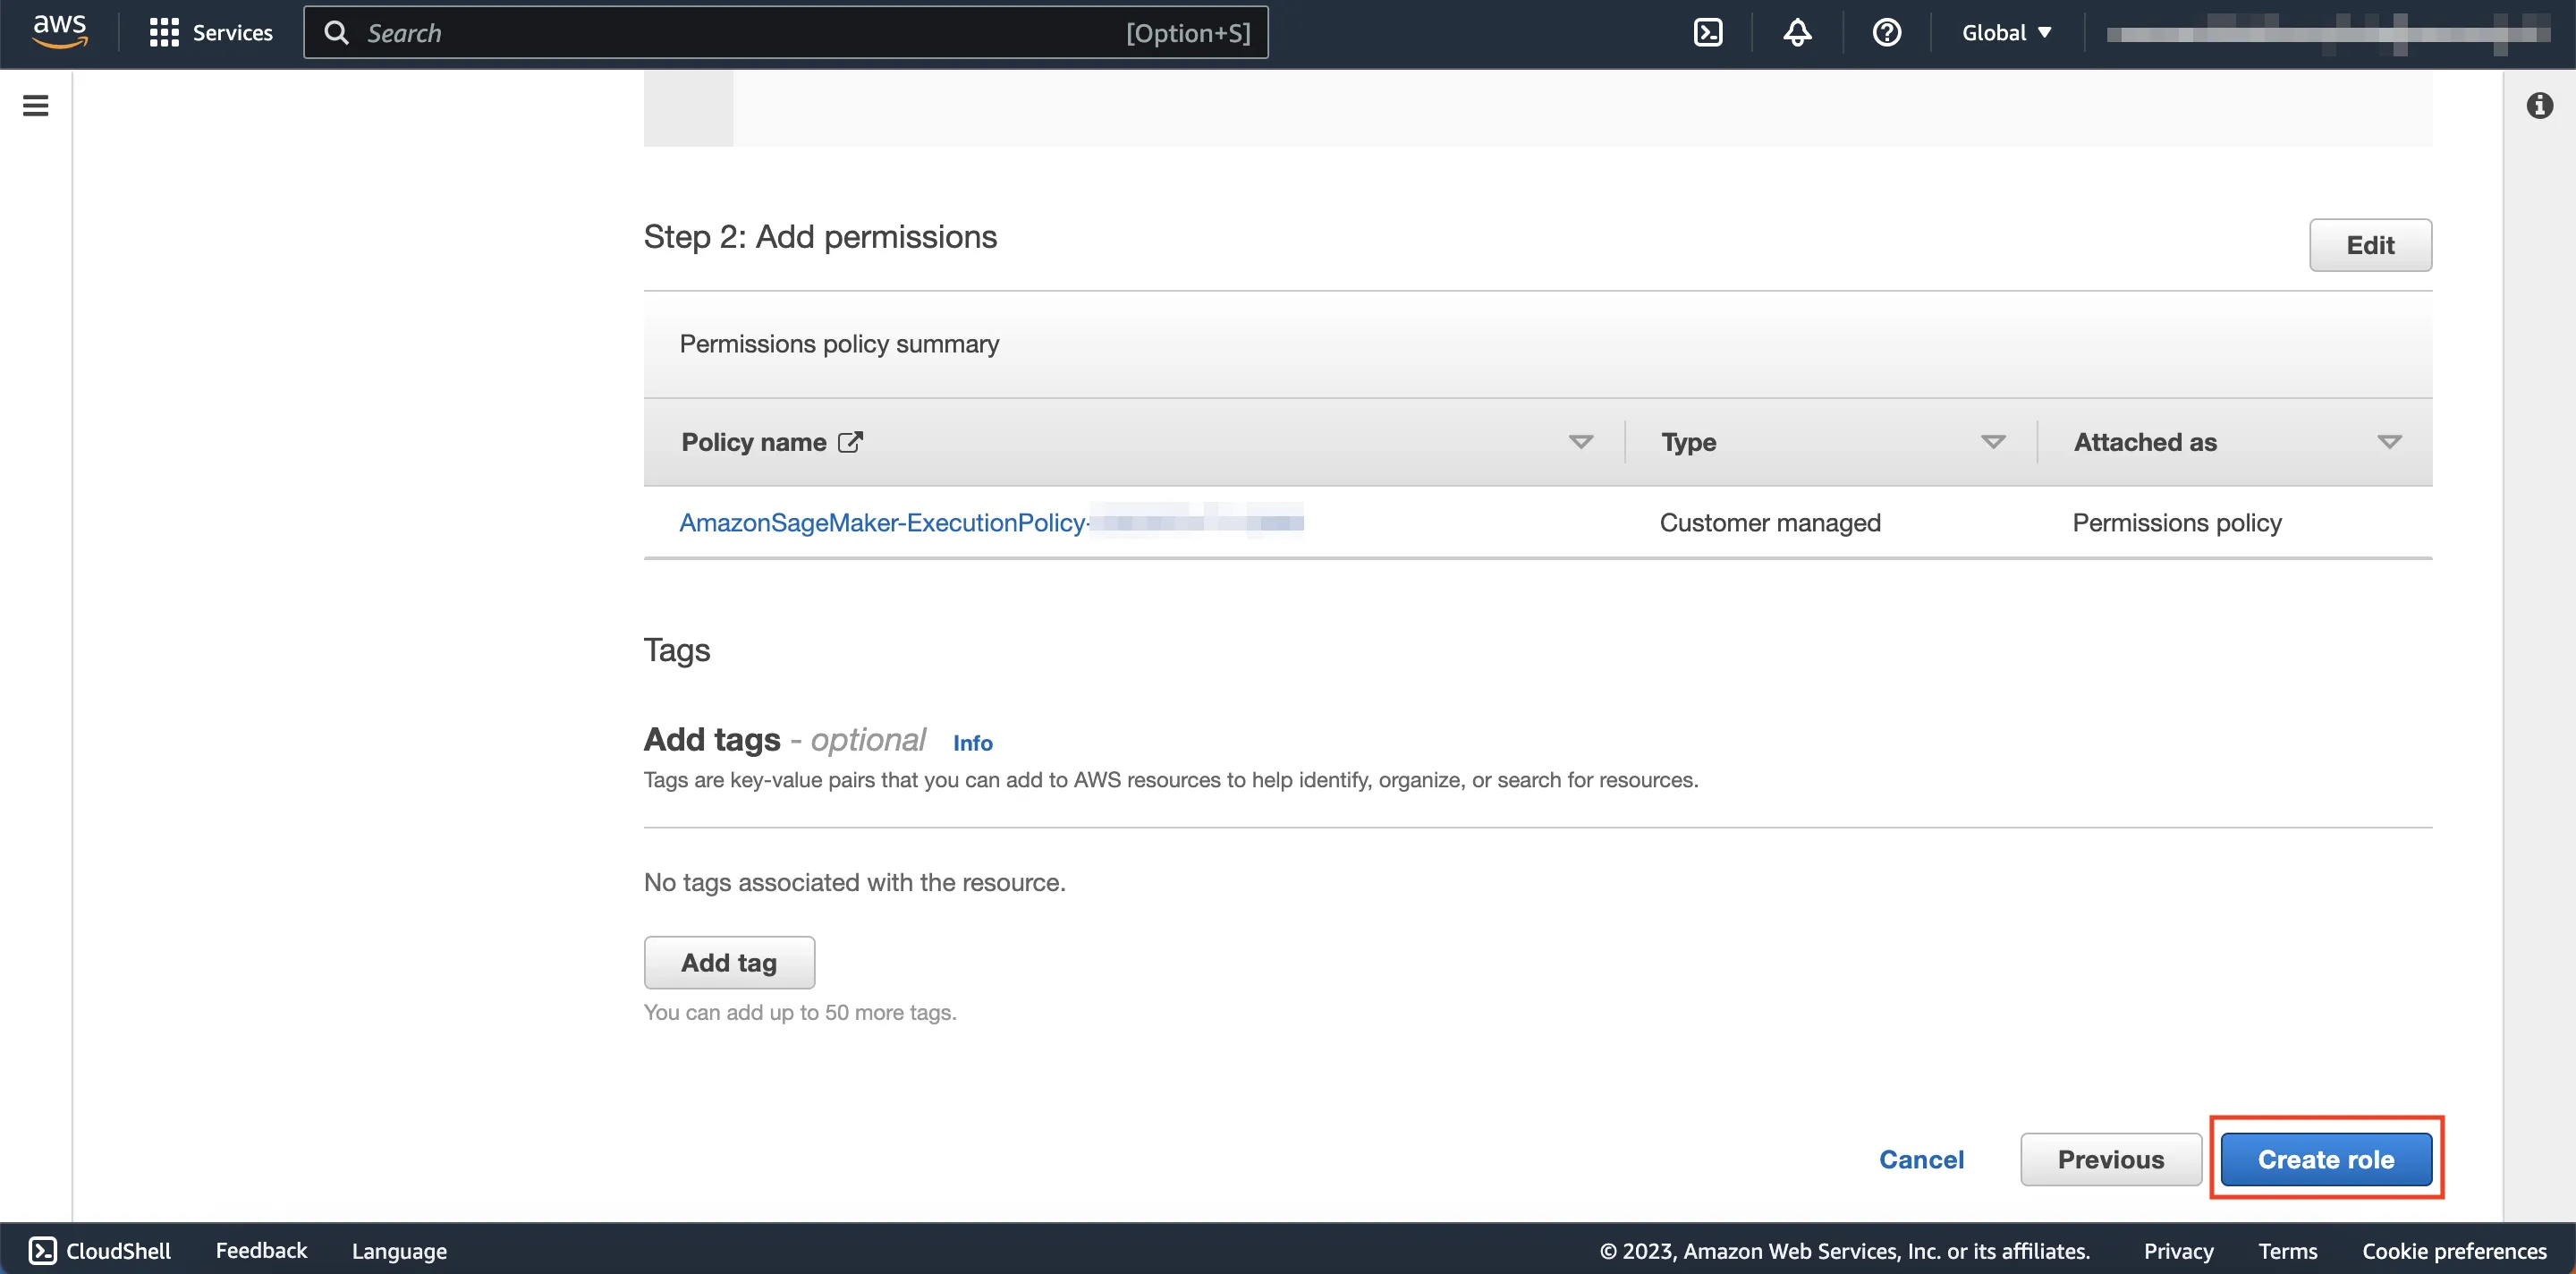
Enter a Role name of your choosing and click Create role located at the bottom of the page.
Scroll down...
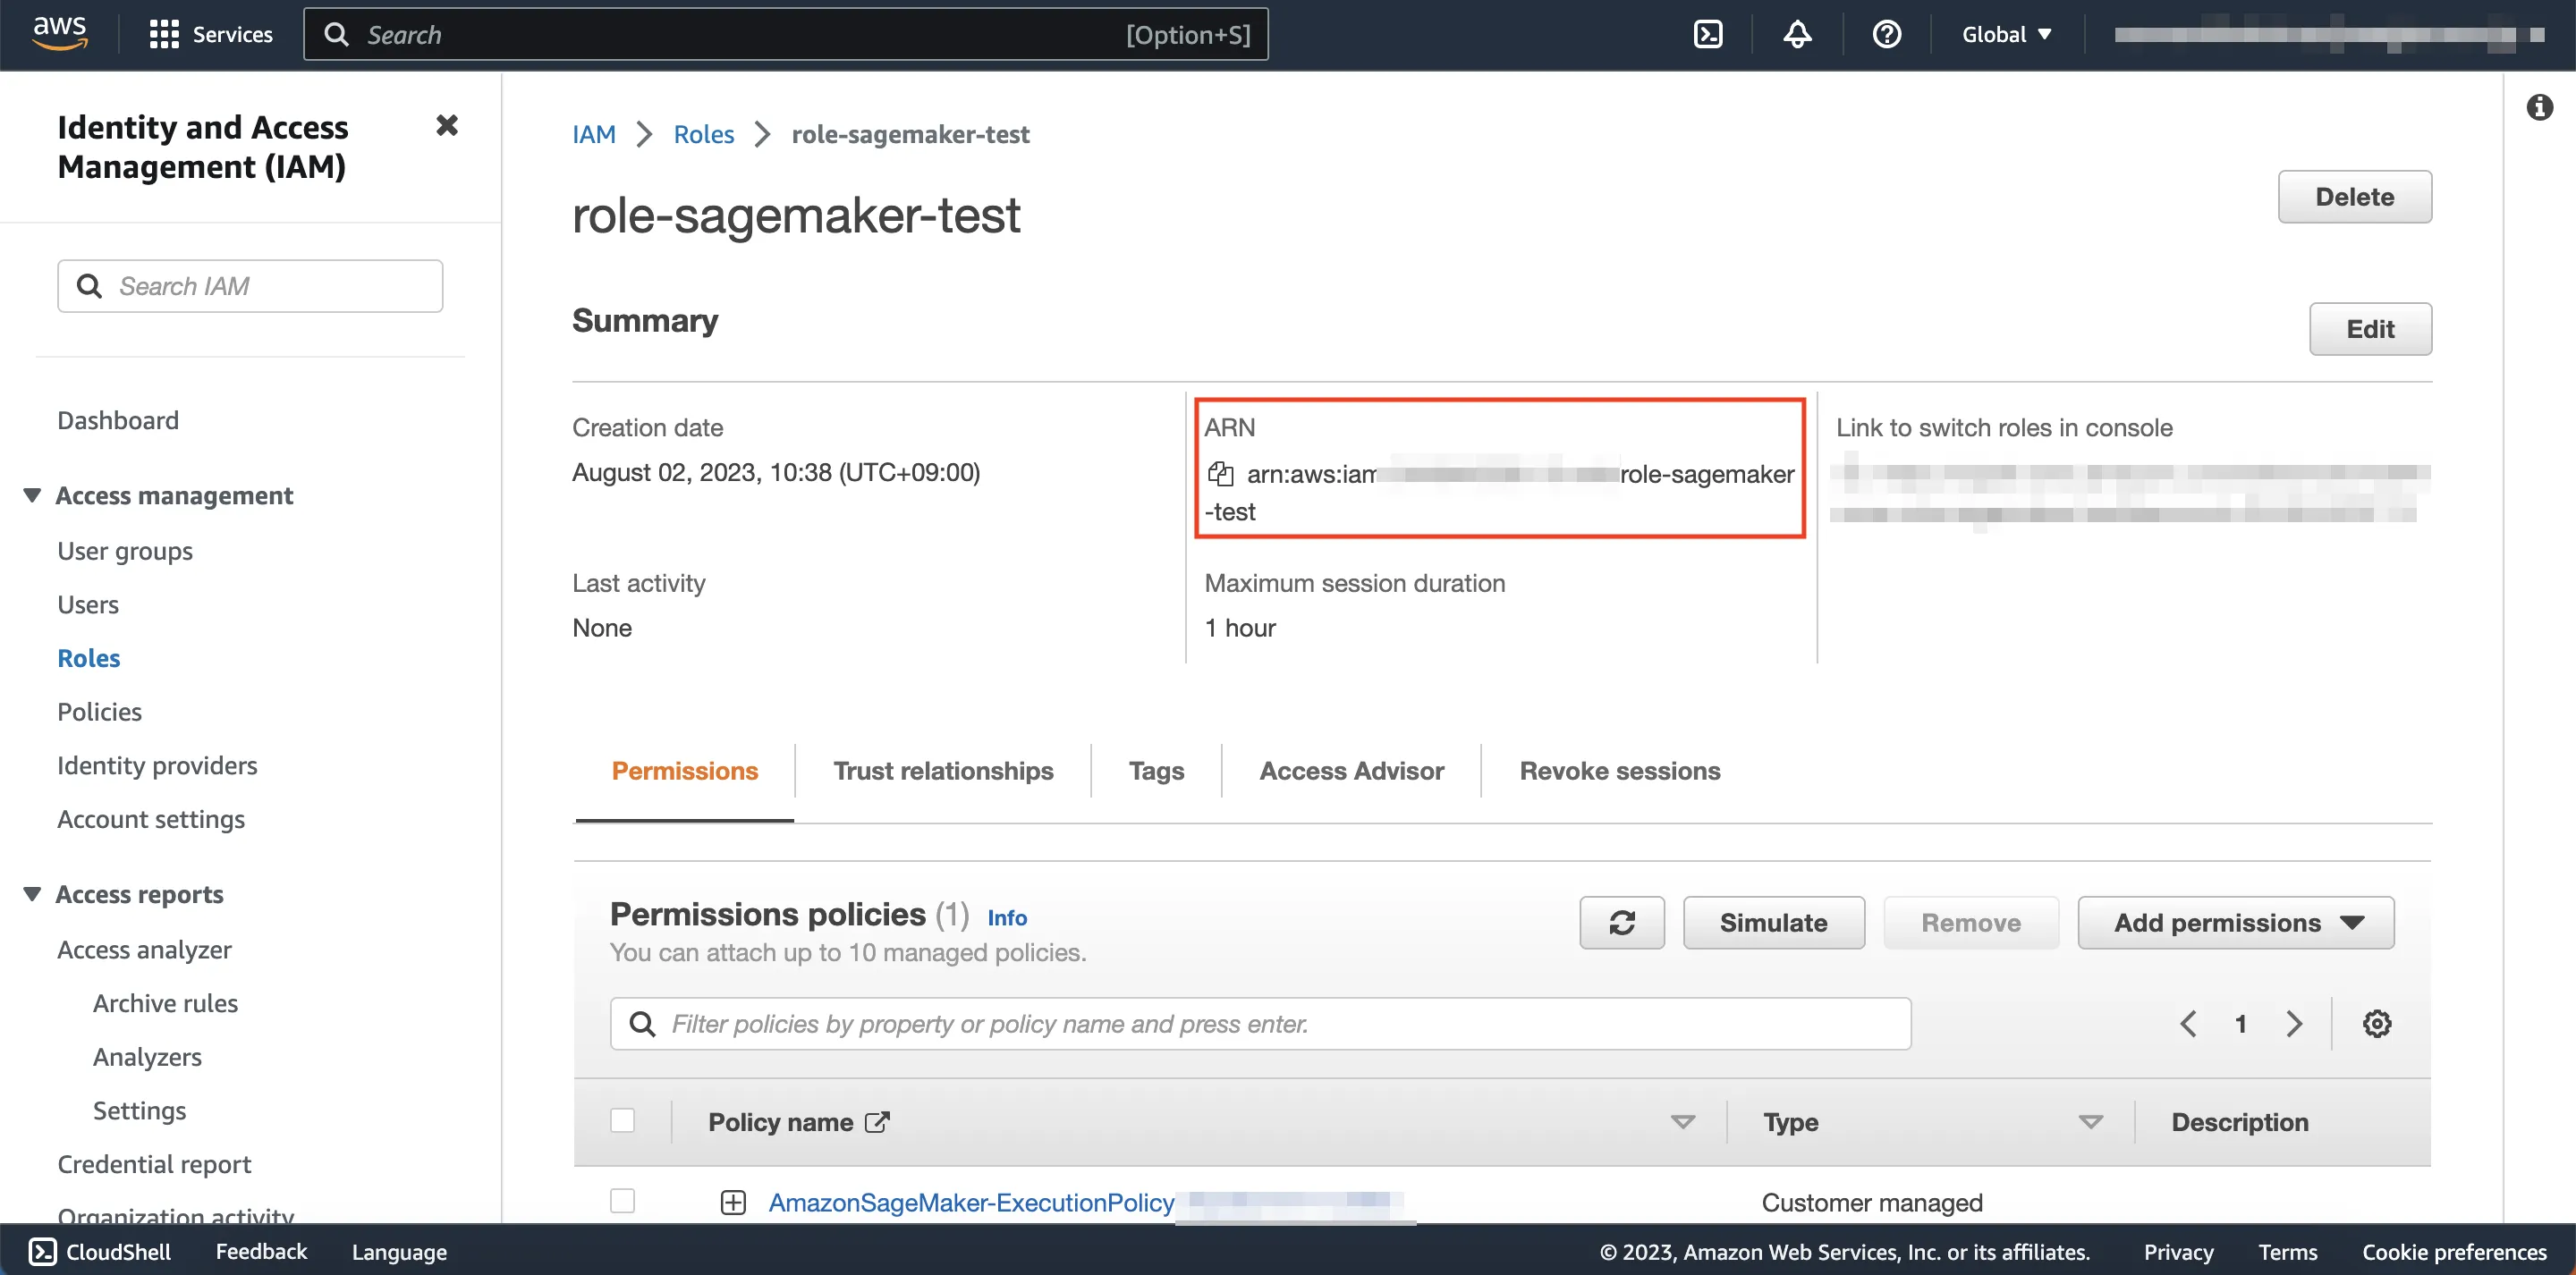
Search for and click the name of the newly created IAM role and copy down the ARN of the role somewhere. You will use this later.
Step 4: Set up Soracom Beam
Next you will set up Soracom Beam’s website entry point. After this step, you will be able to send data points from IoT devices to SageMaker through Soracom Beam.
Register the IAM Role Credentials to Your Soracom Account
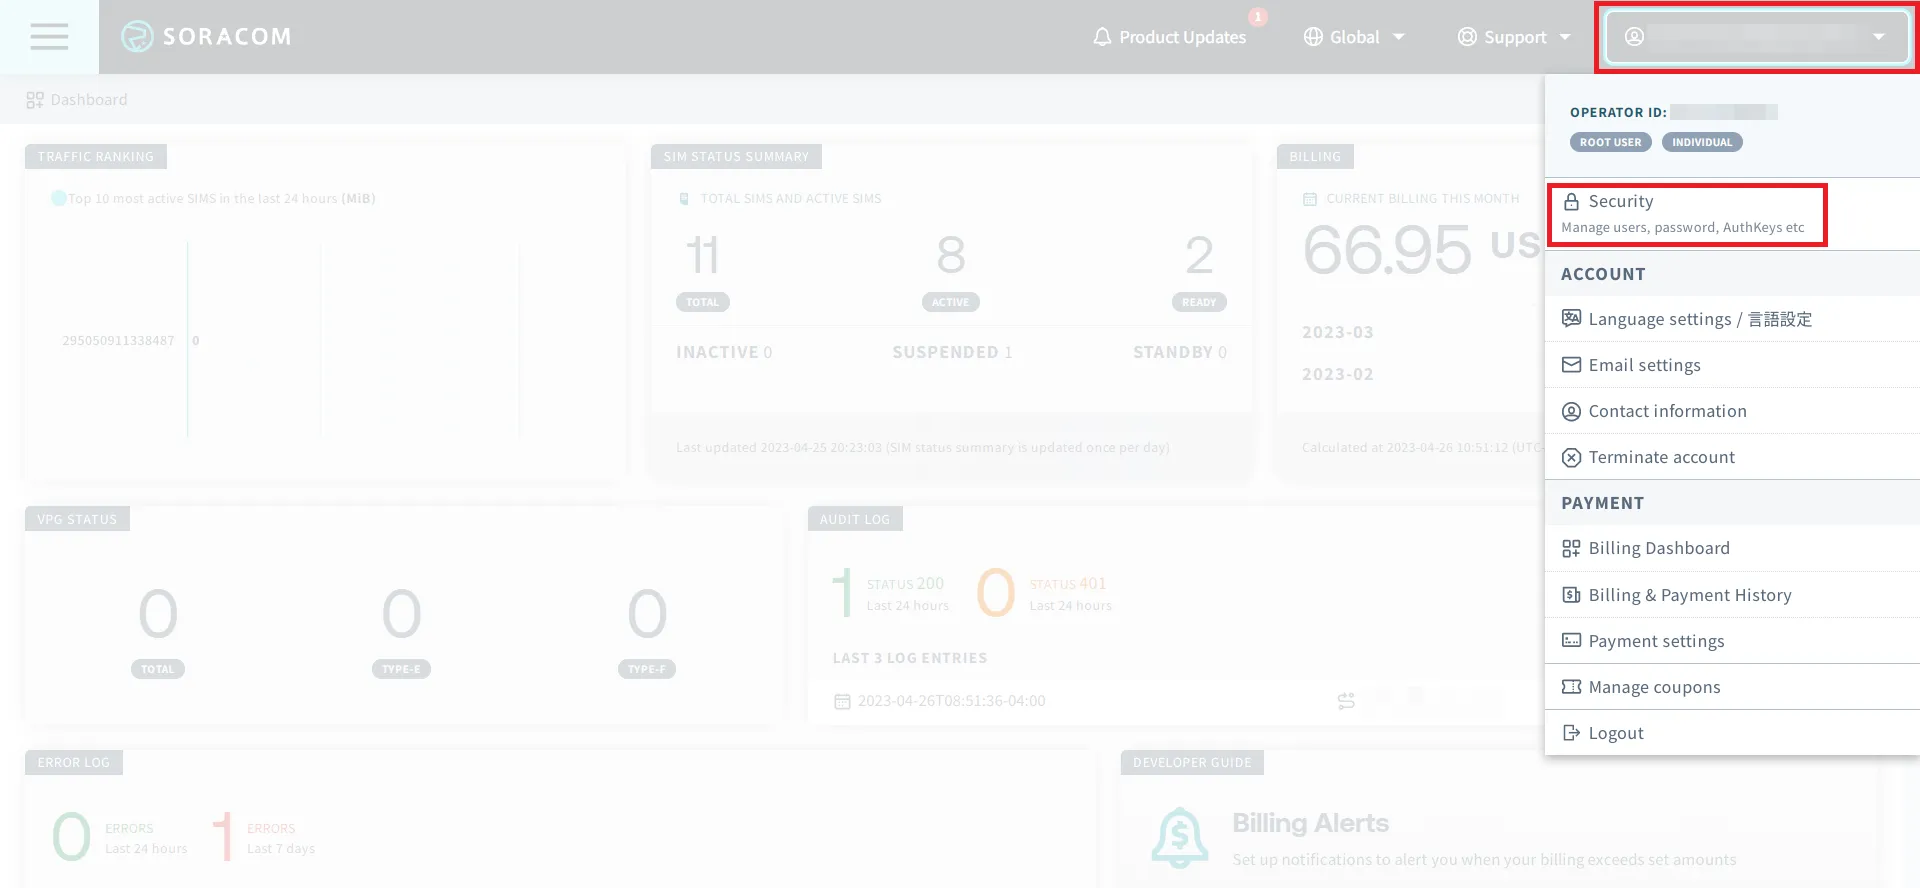
Sign in to the User Console. Click your account menu, then select Security.
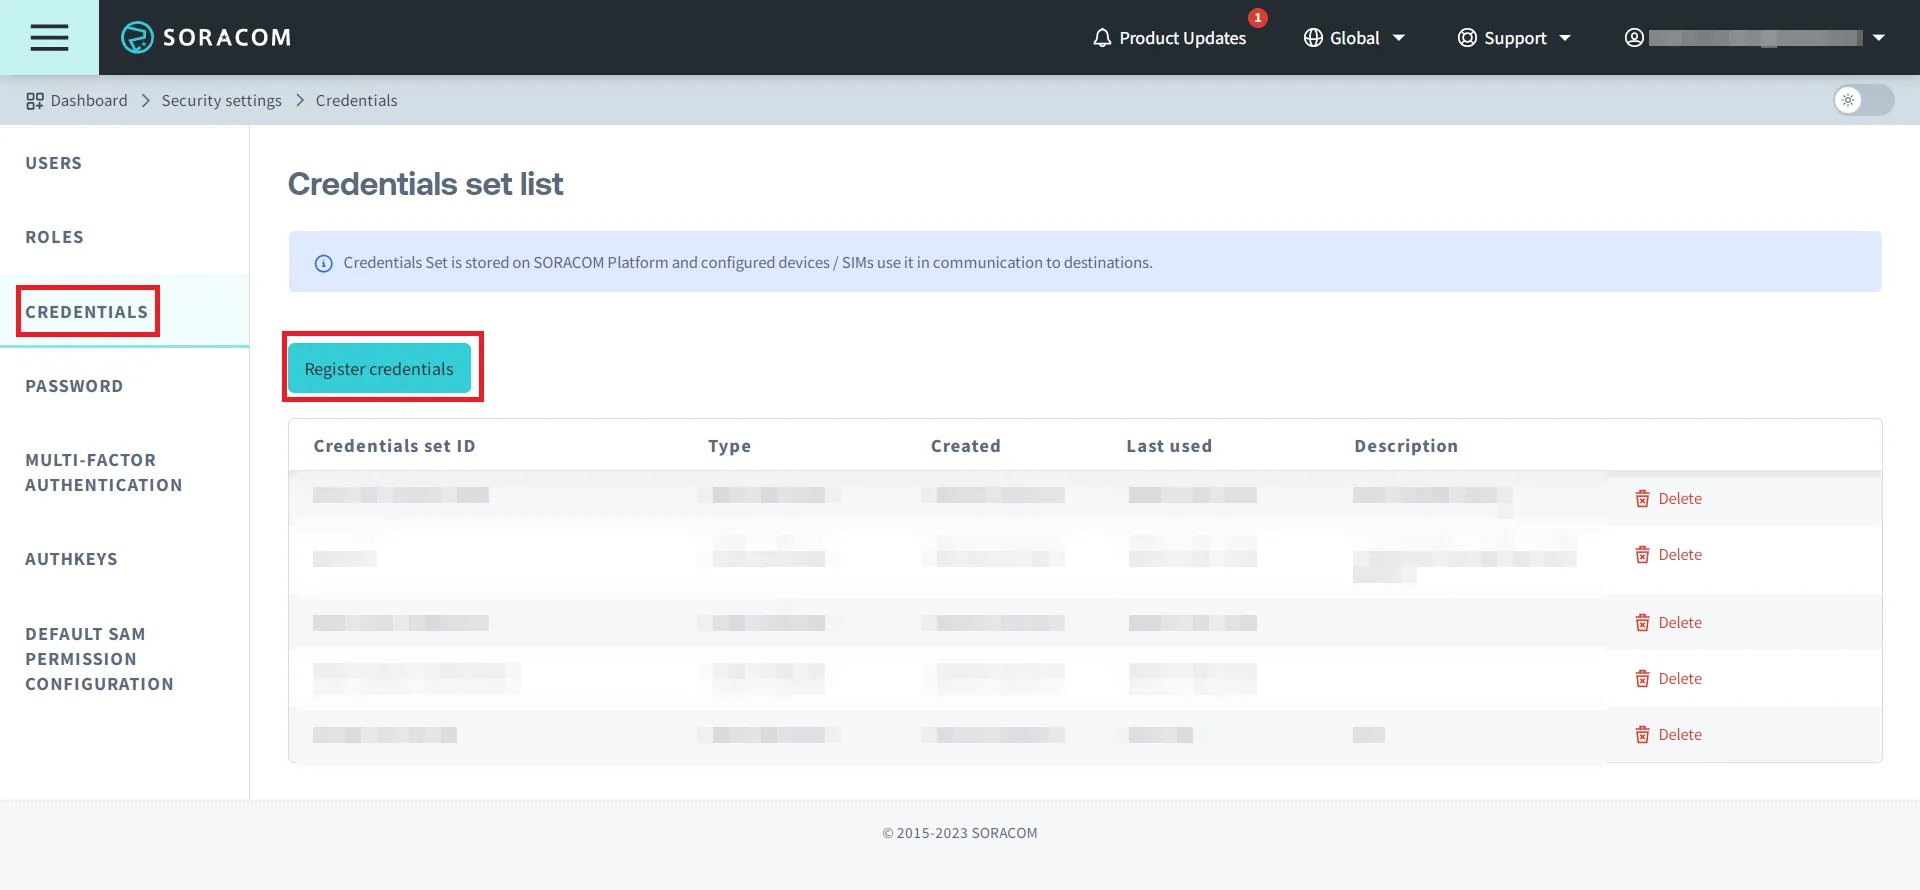
From the Security screen, click the Credentials tab. Then click the Register credentials button.
Enter your IAM credentials as follows, then click Register:
Item
Content
Credential set ID
Any name for this credential set (i.e. AWS-IAM-role-credentials-invokeEndpoint)
Type
AWS IAM Role
Role ARN
Role ARN from Step 3
External ID
External ID from Step 3
For a more detailed guide on this section, go to Creating a Credential Set while using the specifications above:
Set up Soracom Beam’s Website Entry Point
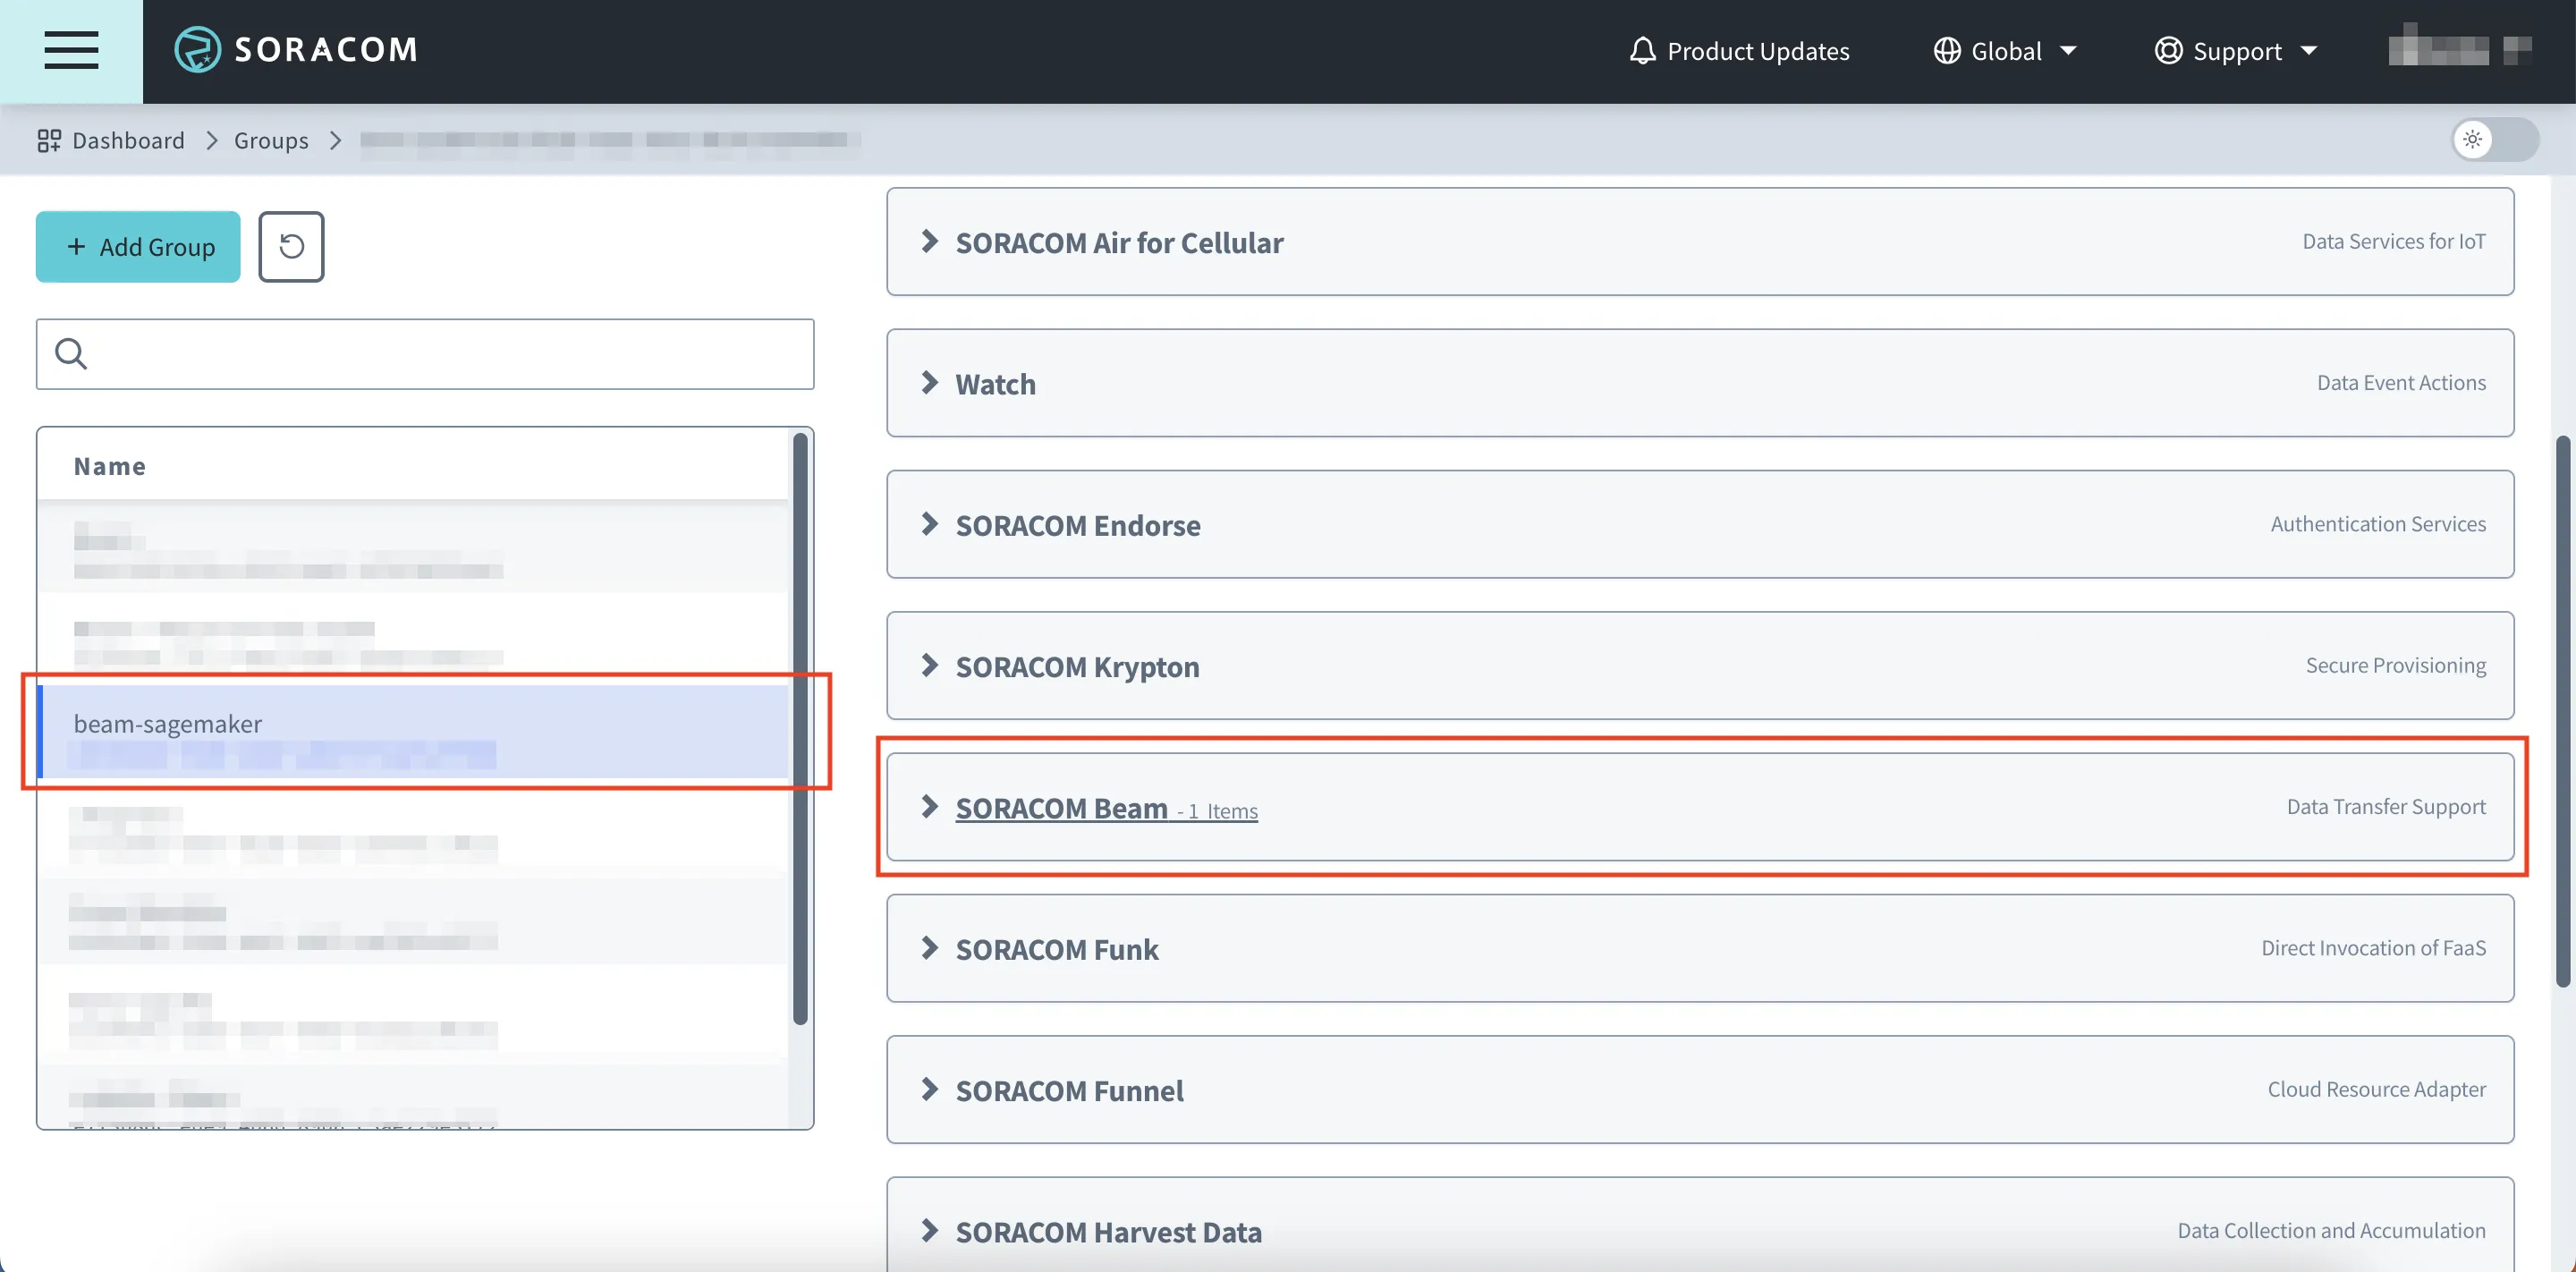
Add all desired SIM plans to a group and click SORACOM Beam.
Setting up Soracom Beam is done at the group level. For more information on Groups and how to add your SIM plans to a group, check the Groups section in the User-Console Guide.
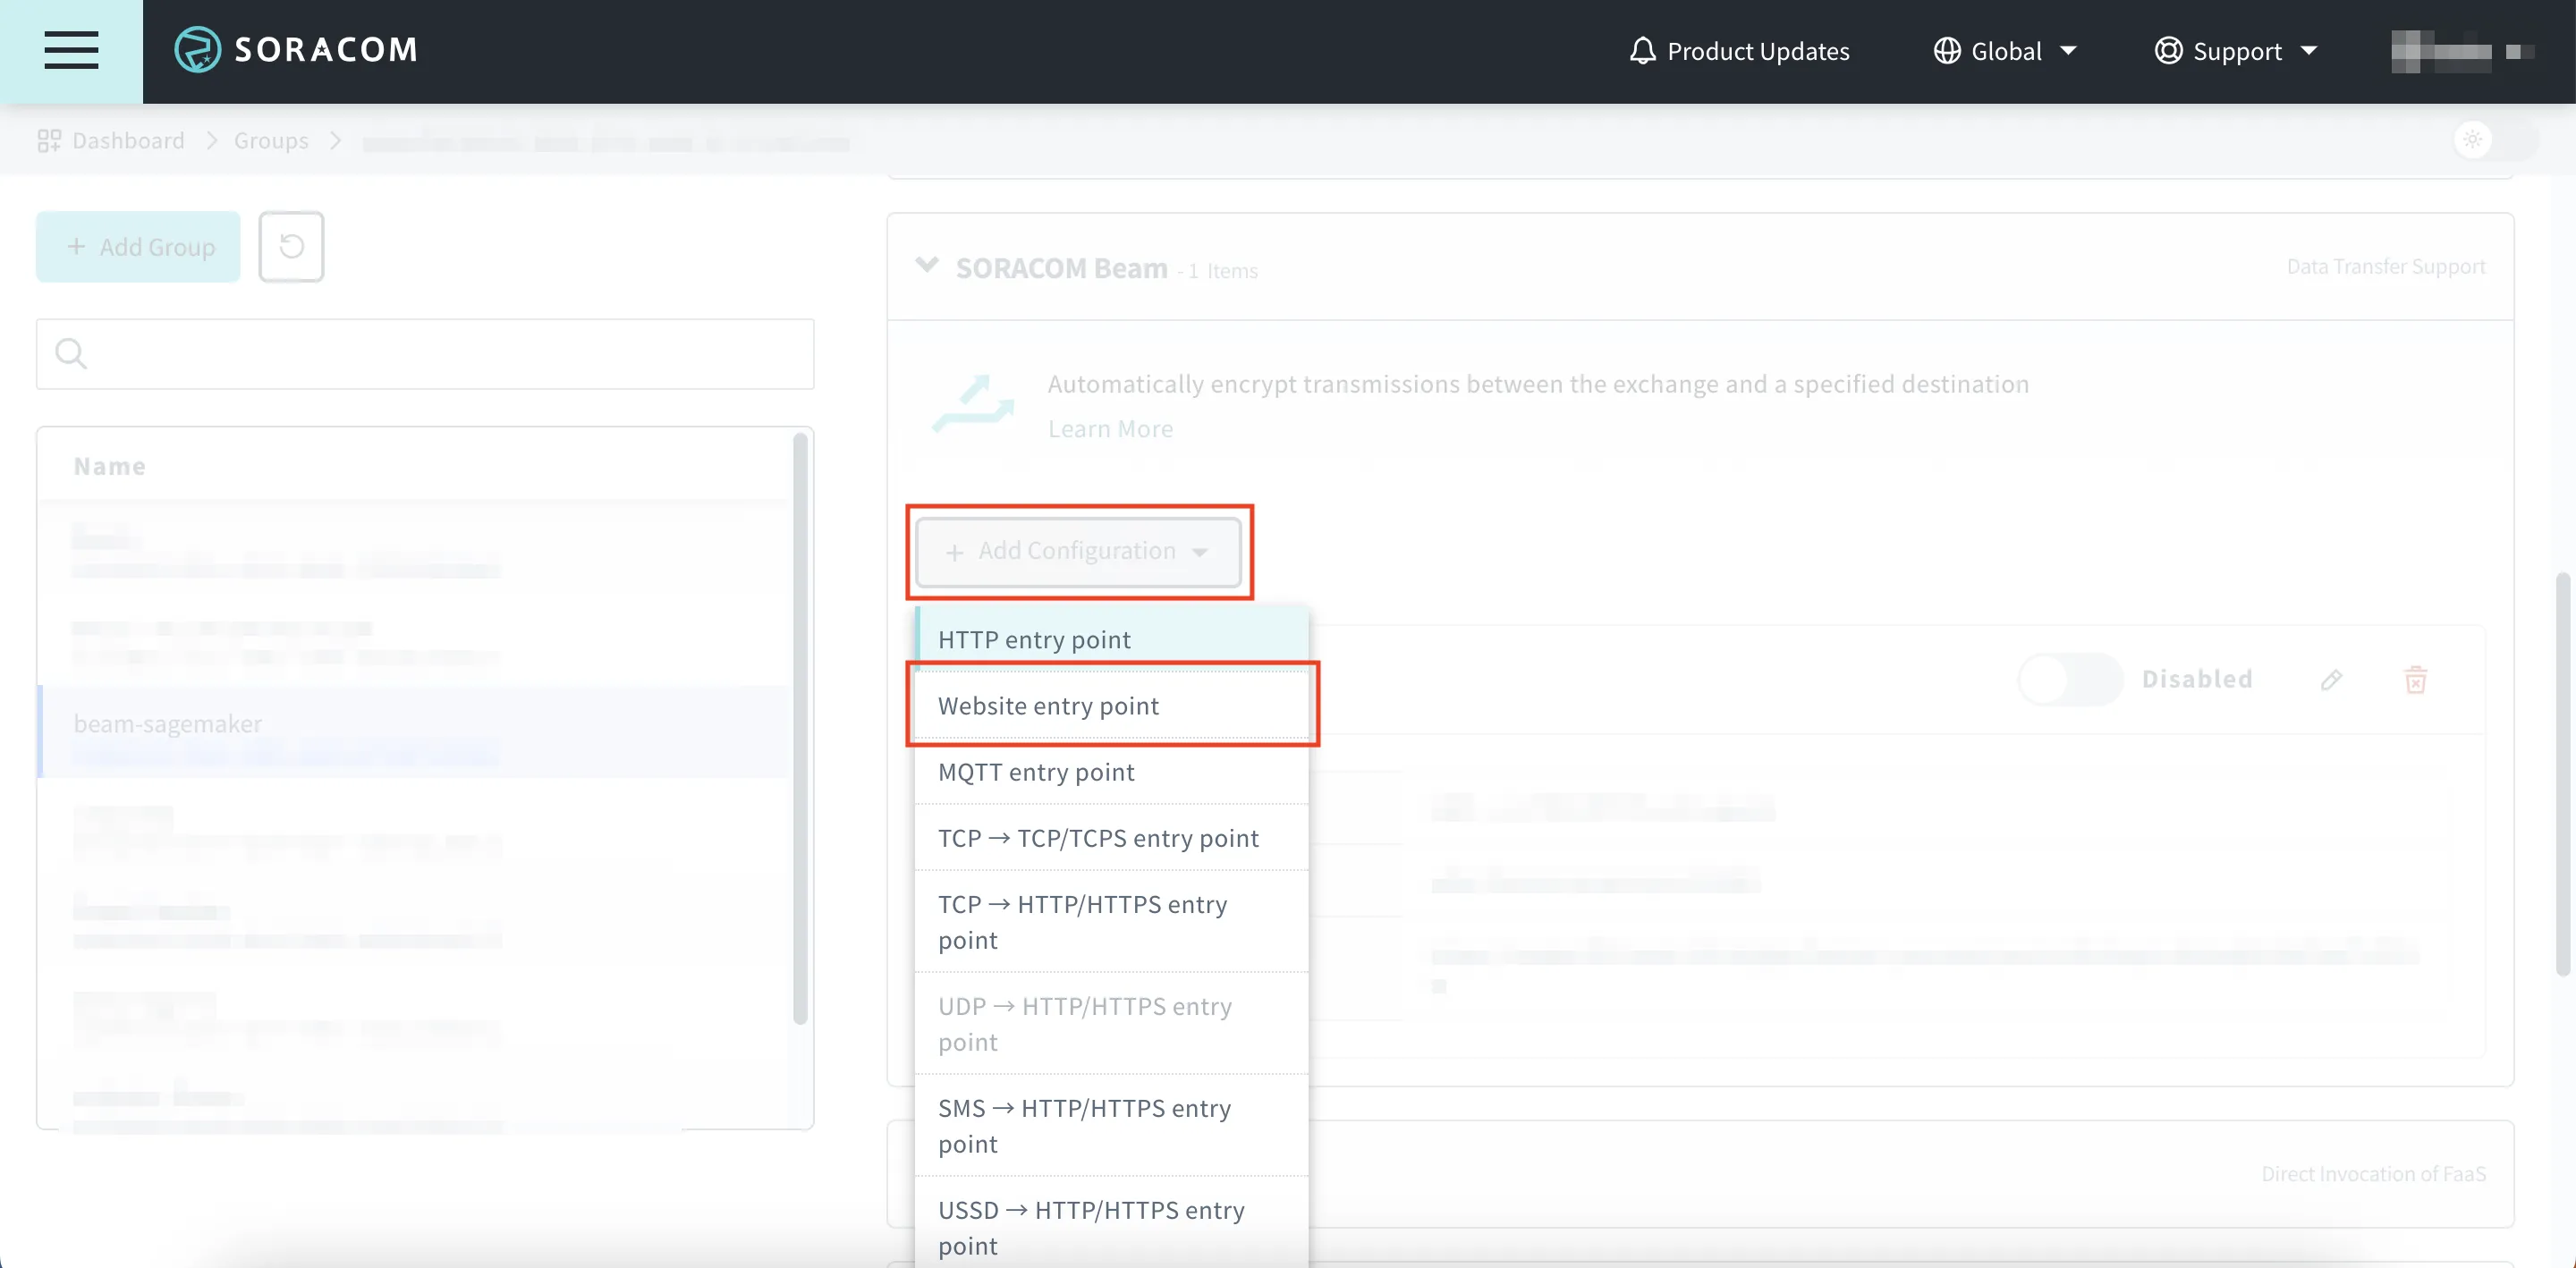
Click Add Configuration, then click Website entry point.
Configure the entry point with the following specifications, then click Save.
Item
Content
Configuration Name
Any Configuration Name (e.g. Amazon SageMaker)
Protocol
Select "HTTPS"
Host Name
Enter "runtime.sagemaker.us-west-2.amazonaws.com"
Port Number
Leave Blank
Authorization Header
Turn on configure as follows:
Type: AWS Signature V4
Service: Amazon Sagemaker
Region: us-west-2
Credential set ID: Credential set just created in Step 4
For more information, advanced configuration, and troubleshooting, go to developer documentation on Website Entry Point.
Step 5: Send Data from Your Device
Now that everything is set up, you will use Soracom Beam's website entry point to get a prediction from the AI model in SageMaker. There are two main ways to accomplish this: one using Boto3 and the other using a curl command.
For both of these methods, your device must already be fully set up and have an established cellular connection using a Soracom IoT SIM. For more information, check the Connection Guides section on Soracom Developer Guides.
Use Boto3 (AWS SDK for Python) to Get a Prediction
Install Boto3 on your device.
pip install boto3
Download sagemaker_invoke_endpoint.py on your device.